


I’ve been using Topaz products as part of my post processing workflow for quite some time now and over this time the order and which programs I use have changed quite a bit. In this post I’ll go through the post editing programs I use and in which order I use them. I’ve made a video for my workflow and posted it below if that suits you better.
Now check out Topaz Photo AI which includes my three favourite Topaz products: DeNoise, Sharpen and GigaPixel in one easy to use package! Get a 15% discount: GETPHOTOAI
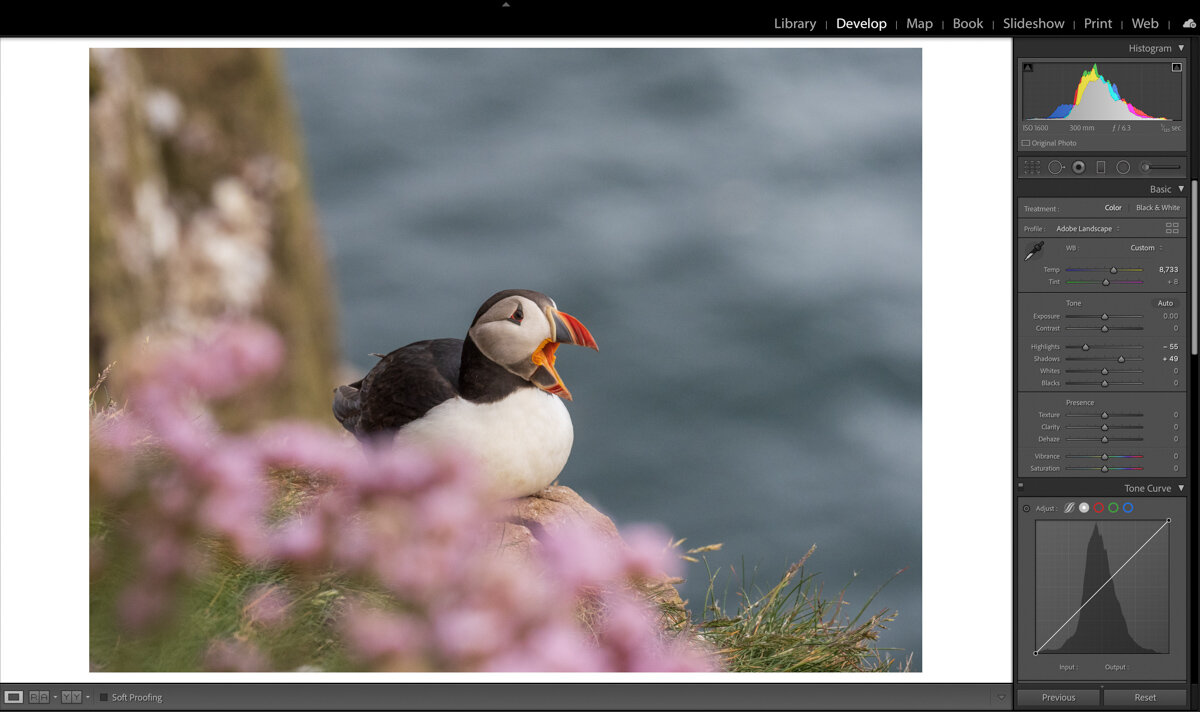
My first step is opening the image in Lightroom (Lr) and do some very light editing. I choose a Camera profile and set white balance and I raise the shadows if needed and lower the highlights if needed. That’s it, I then use the plugin for Topaz DeNoise in Lr (right click, edit in, Topaz DeNoise AI)
After you’ve gone through DeNoise you won’t have the option to choose a camera profile anymore, and I think it’s best to set the white balance with the RAW file. I’ve tried both raising shadows and brightening the exposure before DeNoise, but found that increasing the exposure wasn’t good for the overall image quality, but raising the shadows a bit didn’t seem to affect the quality.
Step 1 – Lightroom
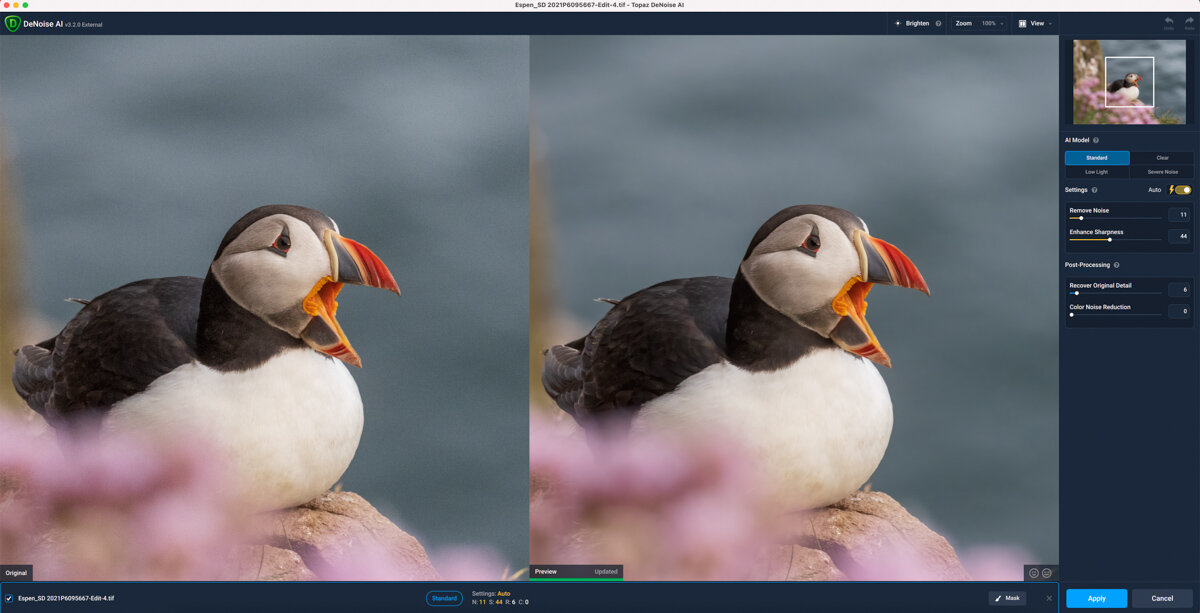
There have been several updates to DeNoise, and this is a program I usually trust with the auto settings. If the image was taken in very low light I set it to Low Light conditions, and sometimes I increase the noise reduction slider. Only if the image is of very poor quality will I start to tinker with the other sliders and options.
Step 2 – Topaz DeNoise AI
Once the image has been through Topaz DeNoise AI I give it a green colour code (shortcut – 8), this is the same colour as the DeNoise logo and it helps me know how far along my process this image is. I now start editing the image in Lr where I mostly use the editing tools in the Basic panel.
Step 3 – Lightroom Editing
Step 3 – Lr Edit Graduated Filter
I often use tools such as the graduated filter (photo), brush and radial filter to dodge and burn certain parts of the image.
If the image needs more detailed edits I will open it in Photoshop and continue editing there.
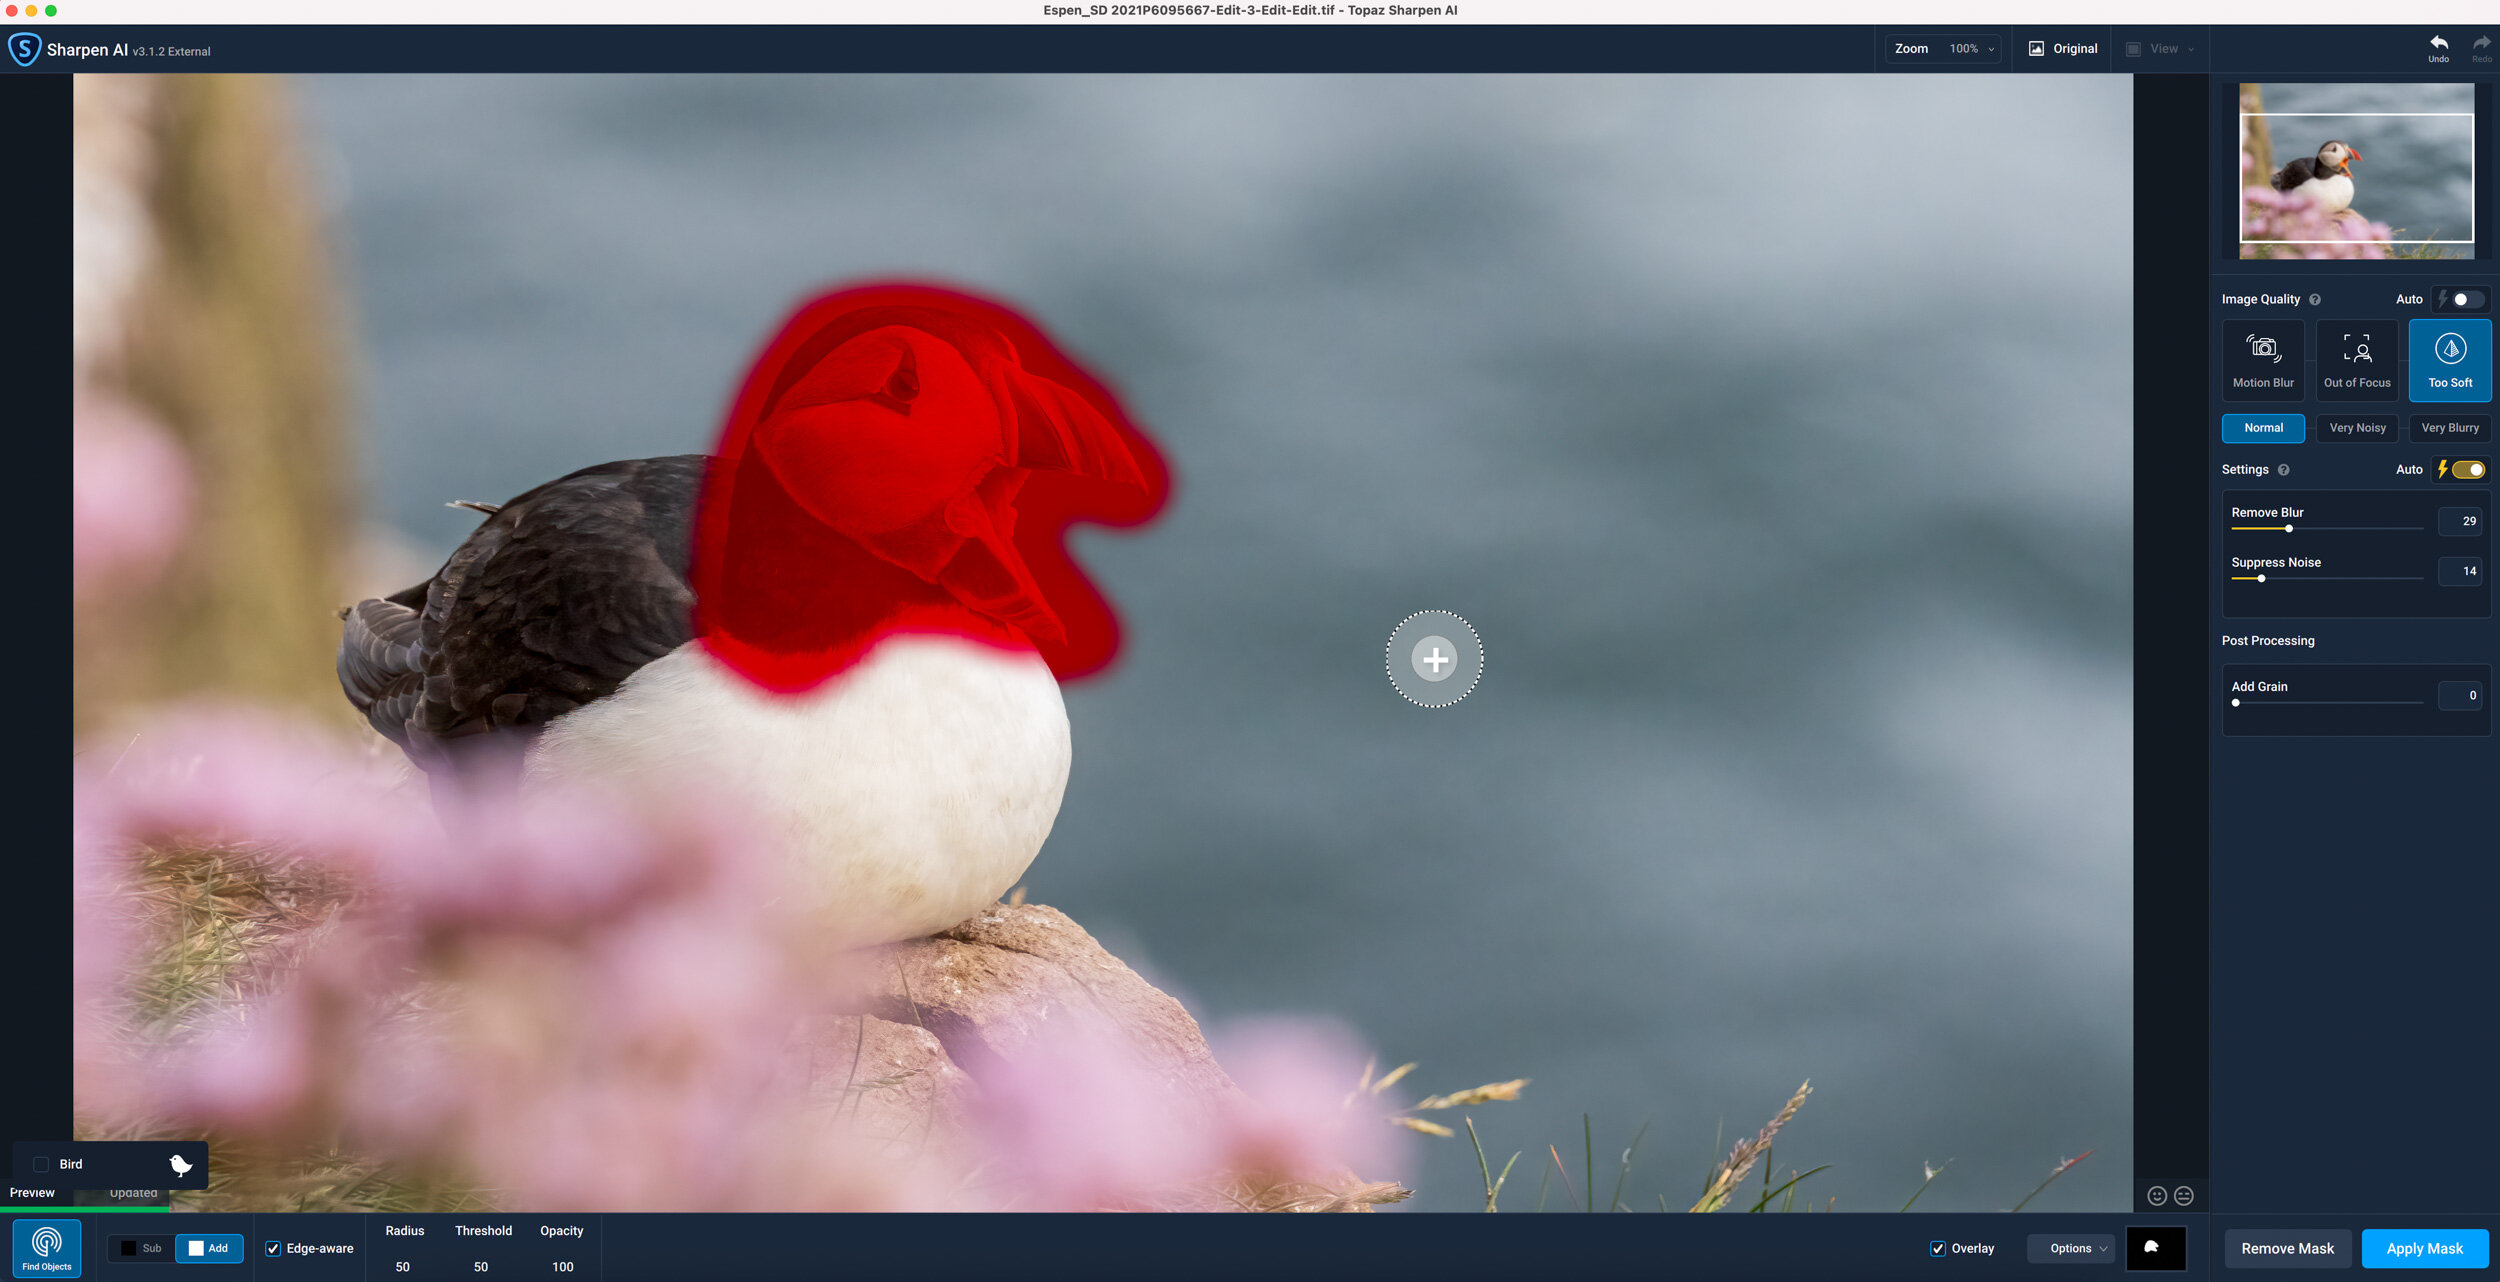
If a certain image needs extra sharpening I use Topaz Sharpen AI. I send the image to Sharpen AI directly from Lightroom or Photoshop depending on which program I last used.
If a particular image is blurry and in need of a miracle I will try Topaz Sharpen AI at the very beginning of the workflow just to see if it’s possible to save it
Sometimes when using Sharpen AI I notice that the program may have sharpened areas that shouldn’t be sharpened and it may look kind of weird. Also, I find that it sometimes over sharpens and the results can look a bit fake. To get around these issues I will often reduce the sharpen slider a bit, and I’ll often create a mask so as to only sharpen what I want sharp.
Step 4 – Topaz Sharpen AI
As in the puffin image (photo) I created a mask around the head of the puffin as it’s the only part of the image that was sharp when I took it. I’ll often try out the different modes such as Motion blur, Out of Focus, and Too Soft to see which one performs best for the particular image.
Topaz Sharpen AI Masking Tool
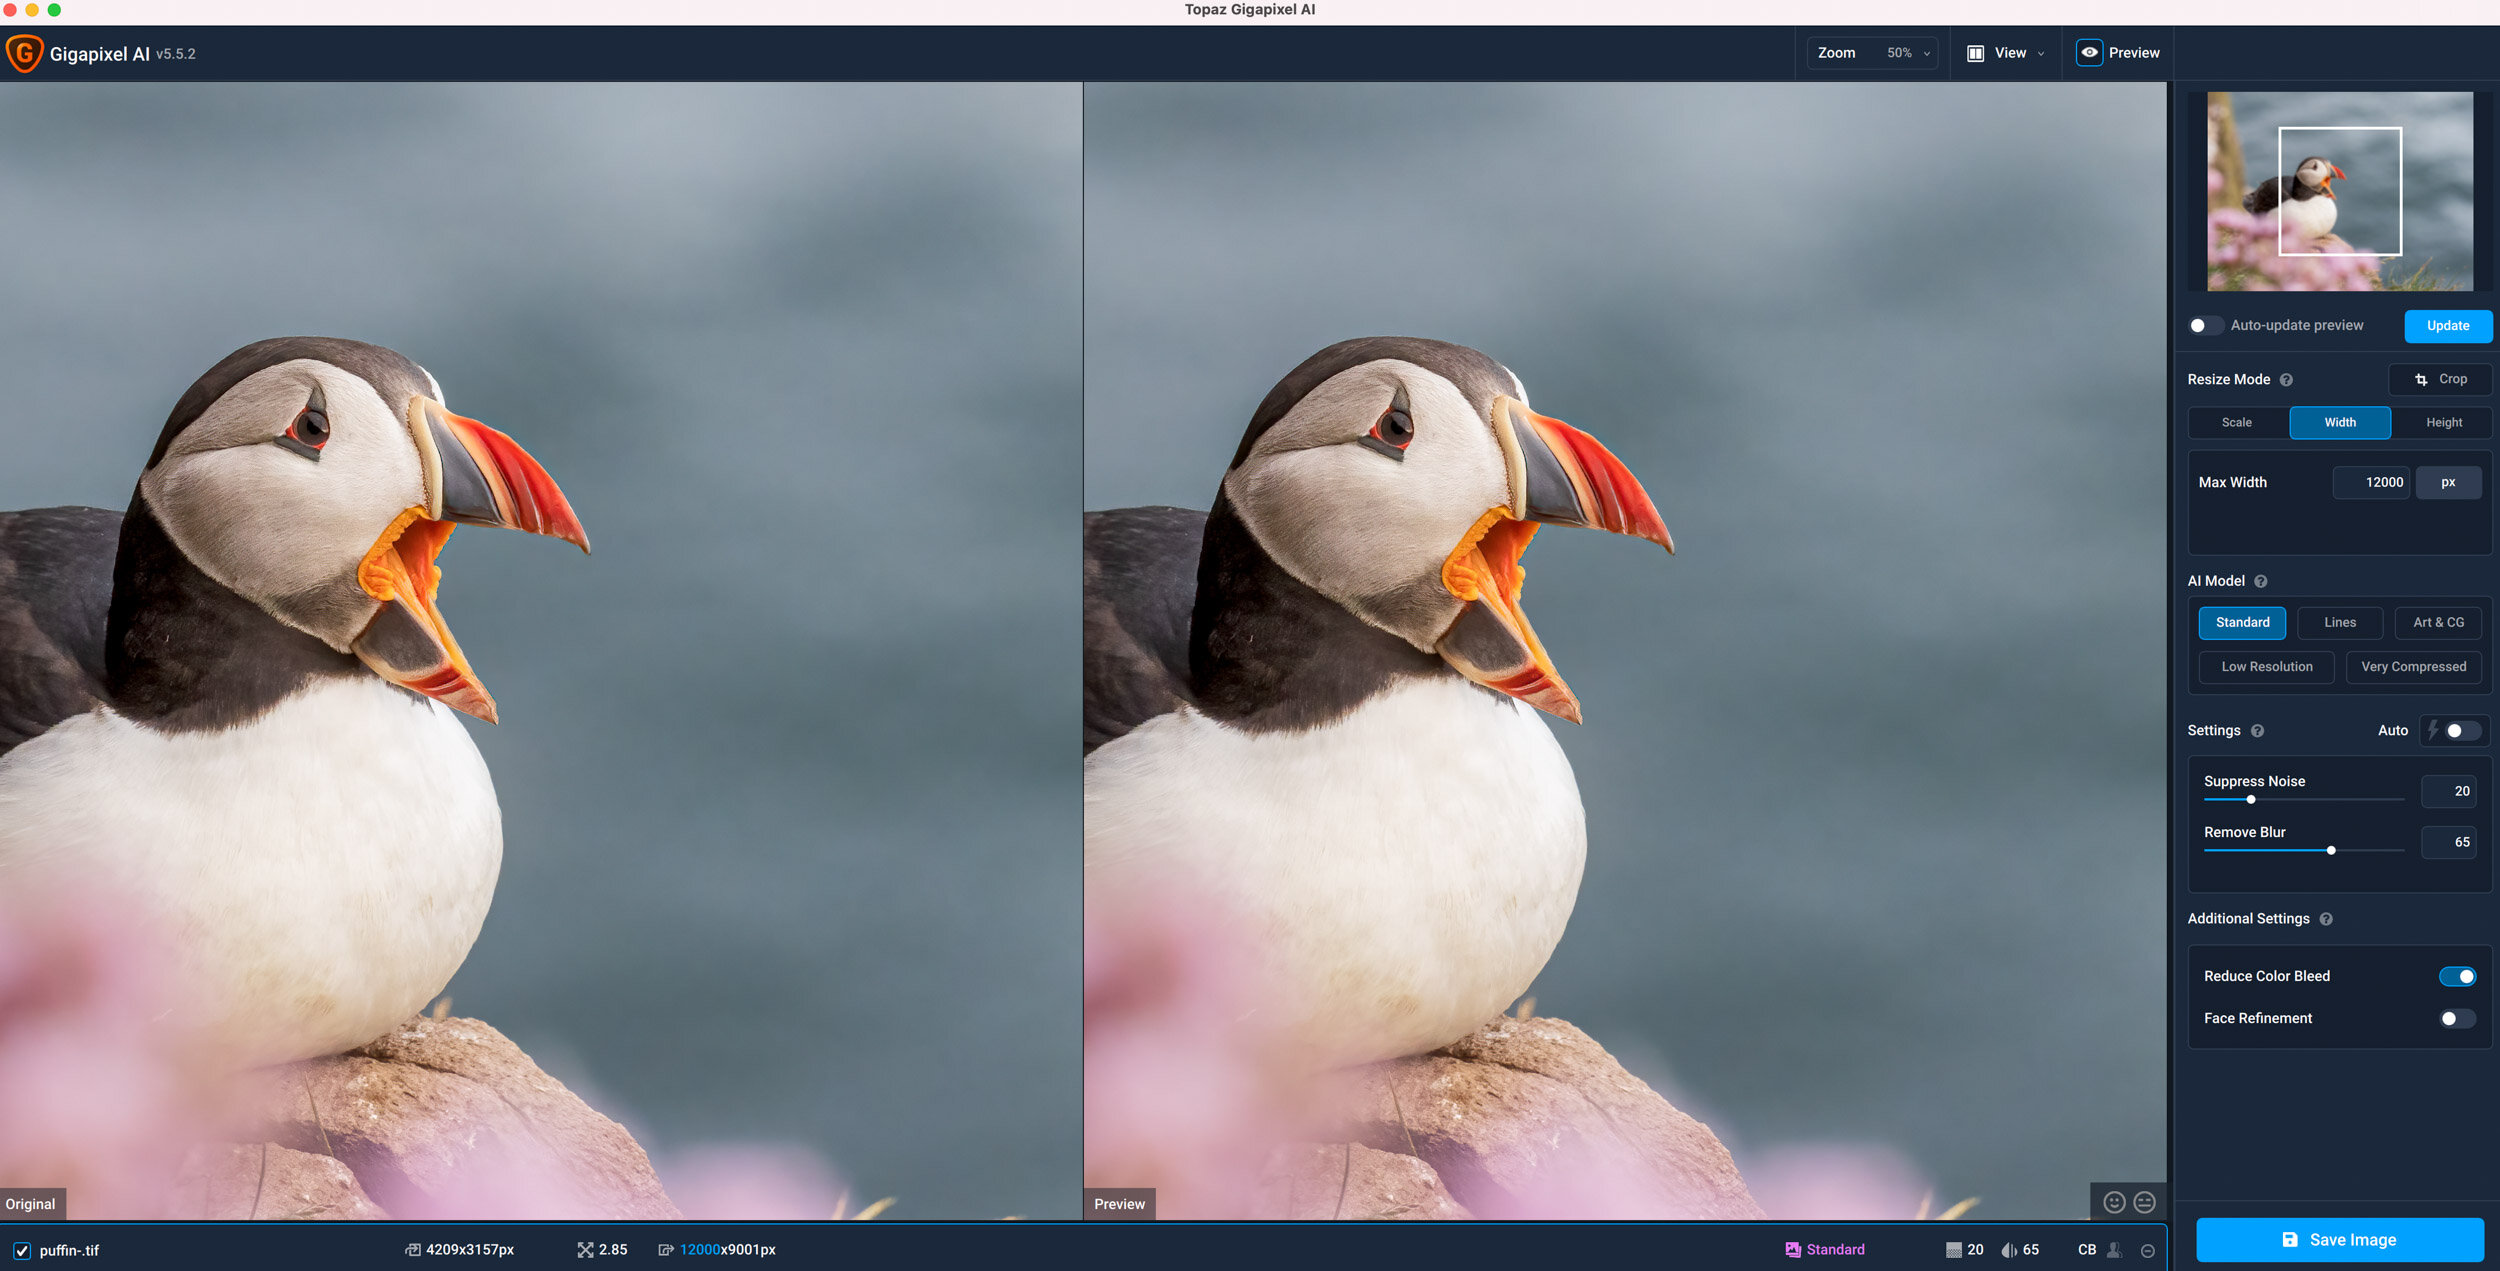
I have several different presets for exporting images in Lr and a specific one for when I want to print images with settings that my printing company recommends. My print settings: TIFF, Adobe RGB (1998), 16 bits, 300ppi – But you’re best to check with your specific printer or company to see what your’s should be set to. I export my image to a folder and drag them into Topaz Gigapixel AI from there.
After I open the image in Gigapixel AI I increase the pixel size to the largest print size I have available in my website print shop, with is a 40×30 inch print. At 300ppi I resize the long edge of my image to 12,000px (40×300) which enhances my image of a puffin by 2.85x. I update the preview to double-check the quality, but so far I’ve only had good results and the enhanced image often looks sharper than the original.
As enhancing an image with Gigapixel AI can be a bit time consuming I like to batch this process by dragging all my available print images into Gigapixel AI and repeat the above process, then export all of them to a new folder
Out of the three Topaz programs in my workflow I highly recommend DeNoise AI and Gigapixel AI. Sharpen AI I find useful, but it does have some flaws with it. However, as Topaz are continuously updating these programs I’m sure Sharpen AI will only become better and better over time.
Recently I started to experiment with Topaz Adjust AI as part of my editing process and Topaz Video Enhance AI for my videos. However, I haven’t used them enough to recommend them just yet, but I’ll continue to experiment with them and come with an update if I start using either of them regularly. If you’re curious you can always get a 30 free trial and try them out for yourself.


Hello!
Hello! I’ve been using Topaz AI as a Lightroom plugin for ssomee Time, but on a recent photo shoot I collected many images that were shot at high ISO and I would like to run all of them through Topaz in a batch. However, once I have run the raw photos through Topaz and exported the results, I no longer have access to applying camera and lens profiles in Lightroom or any other tool. Do you know of any effective way to do batch noise removal in a white room workflow without losing the ability to apply corrections??
Hi Bill, apologies for a late reply. I do very light editing first such as setting white balance applying profile and lift shadows, then I batch upload to Topaz. I’m not sure of other ways of doing it as Topaz saves the file as a tif file after it’s done its thing.
I enjoyed reading your post
Thanks for sharing your detailed Topaz workflow, Espen! I love how you combine Lightroom edits with DeNoise, Sharpen, and Gigapixel AI for wildlife photography. The tip about color-coding images after DeNoise is really clever — it’s such a simple way to track progress. I’ve been experimenting with batch processing and your approach gives me a lot of ideas for making it more efficient. Excited to try it on my own high-ISO shots!