
Printing a Photo Calendar using Saal Digital
Second to actually pressing the shutter and making the image, printing my best photos is one of my favourite things to do. At the beginning of a new year what better way to print photos than by making a wildlife photography calendar of your best images.
In this post I’ll walk you through how I printed a photo calendar of my favourite wildlife images of 2023 using Saal Digital.
This post is sponsored by Saal Digital, but having used their printing service on numerous occasions now, I can confidently recommend their services
50% Discount Before end of March 2024

Saal Digital Calendars
Step 1: Selecting Your Best Shots
To begin, I dove into my Lightroom Catalogue and started to explore my best moments from 2023, and carefully select the most captivating shots of the year.
I find it best to select all images in the same format so that they are equally taking up similar space on the calendar page. I chose all my images in landscape 4:3 format.
If you want additional guidance on image processing Saal Digital have several guides on their website.
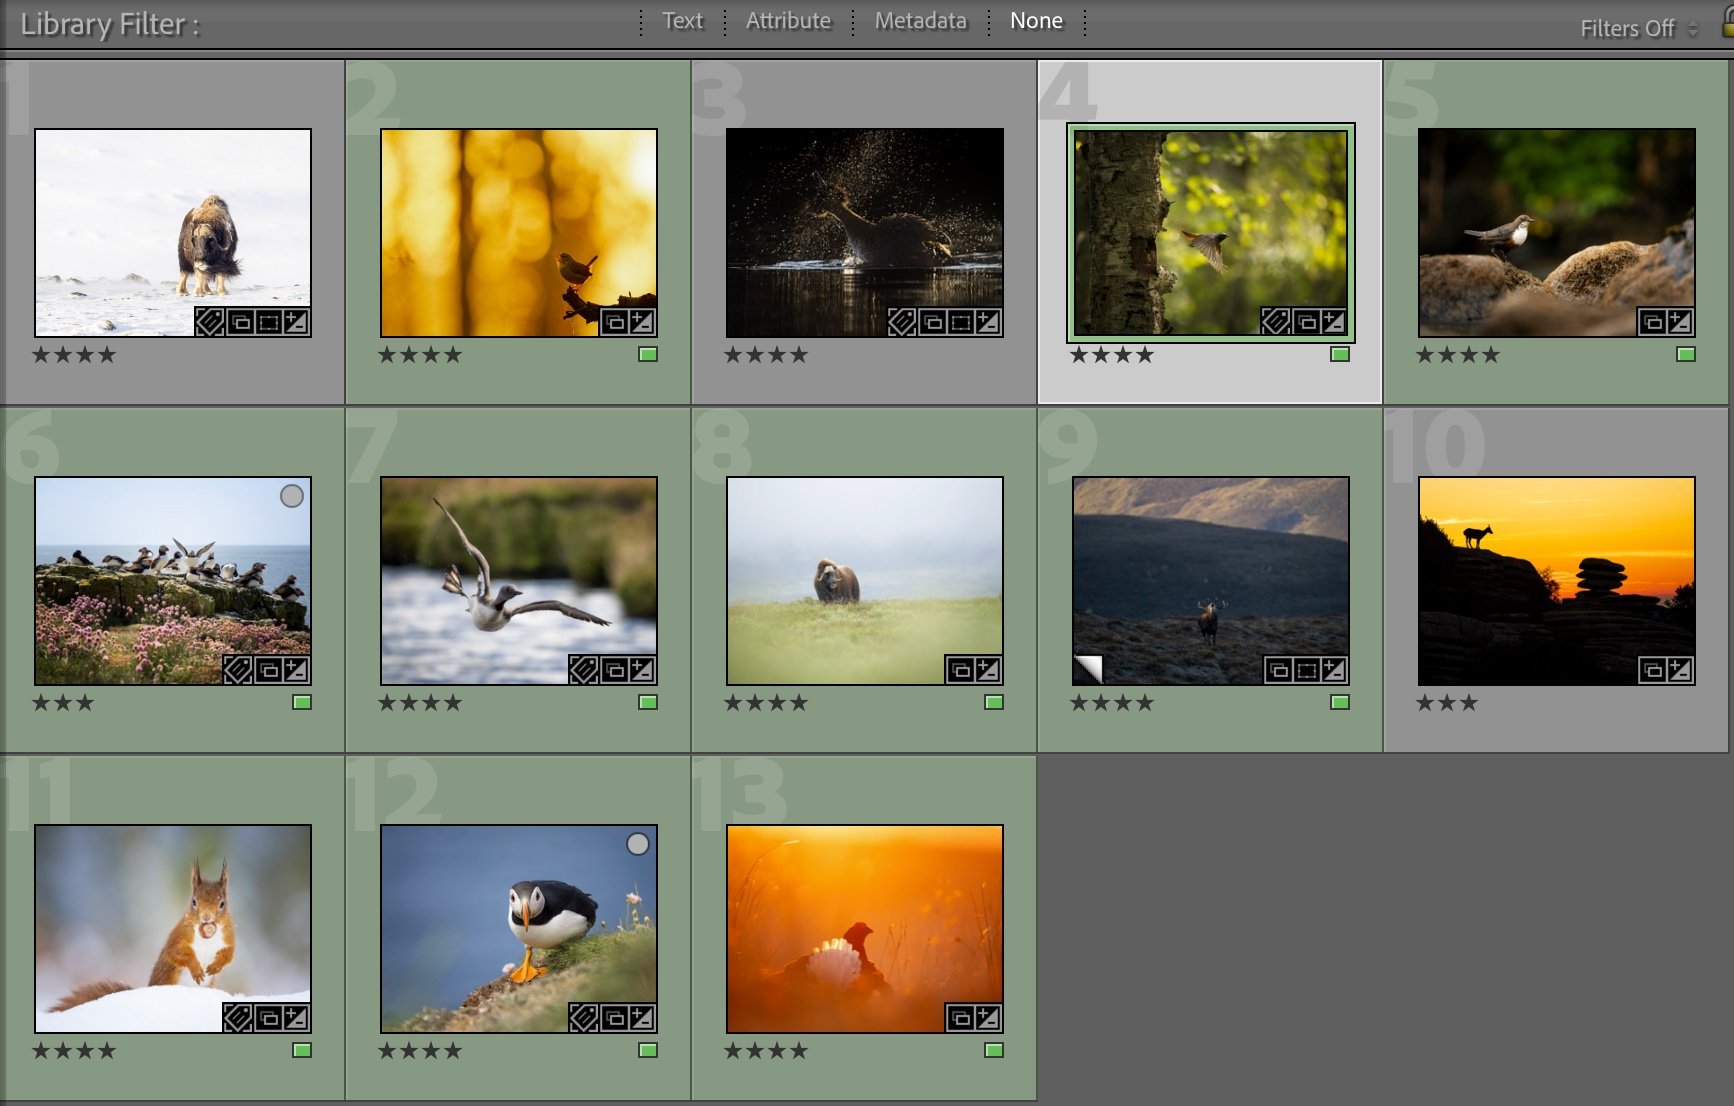
Lightroom Collection, Favourites of 2023
Watch the video of how I got some of my favourite images of 2023!
Step 2: Organising Your Calendar Storyline
Once you've curated a selection of images, it's time to arrange them into a captivating storyline. I like to consider the changing seasons, and staying true to the natural cycle of the animals through the year. I prefer to pick the best photos of each month, but as some months are much busier than usual it does happen that three images made in April are spread out through March, April and May. As long as the animals, behaviours and plumage/pelt would still be present in those months I’m ok making those slight tweaks to show my best work.
Craft a visual narrative that unfolds throughout the year, creating a calendar that not only tells time but also tells a compelling wildlife story.
Remember that you’ll want 13 images with one photo as your cover page for the calendar.
Step 3: Choose your Preferred way to Design
You can use Saal Digital’s downloadable software, online designer or mobile app to start designing your calendar.
I chose to use the downloadable software.
Navigate to Saal Digital's website and download their user-friendly software. Follow the installation instructions to set up the program on your computer, there are separate downloads for PC and Mac. Saal Digital provides a seamless platform that allows for creative freedom in designing your photo calendar.

Saal Digital Design Options
Step 4: Choose Calendar Type and Size
Launch the Saal Digital Software and select the calendar option. Choose the type of calendar you'd like to create—perhaps a wall calendar for a stunning display or a desk calendar for a more intimate setting. Pick the appropriate size, keeping in mind the resolution and quality of your wildlife photographs.
If you’re unsure on what to select, pick the options you like the look of and know you can always change it later.
I really like the option of bulk ordering here, if you’re ordering many calendars for friends and family or if you want to sell a few calendars. There are significant discounts to be had by ordering several identical calendars.

Calendar Options
After having tried a few of the different paper types I can highly recommend the recycled paper. Not only is it environmentally friendly, it looks great, feels solid and has a nice texture to it.
Step 5: Choose a Design Option
There are three different design options to chose from depending on how much help you want designing your calendar. From ‘Empty Template’ where you chose every option yourself, ‘Comfort Designer’ which is what Saal Digital recommends to ‘One Minute Calendar’.
I went for the One Minute Calendar myself and made small tweaks to finalise the look I wanted. This saved me time and I was very happy with the results.

Design Options
Step 6: Appearance and Holidays
Saal Digital Software provides a range of customisation options, experiment with monthly layouts, background colours, text colours and fonts. Here you can also pick what holidays to display in the calendar, highlighting Sundays, adding week numbers and much more.

Calendar Appearance and Holidays
Step 7: Adding Photos
Now it’s time to add photos to your calendar. On the left you can navigate to the folder where you have saved you selected photos, drag individual images to the respective month or bulk upload all of them.
Maintain a clean and minimalist design that allows your wildlife images to take centre stage. Consider adding brief captions or quotes that enhance the storytelling aspect of each photo.
When you add a photo you may need to drag and stretch the image to make it fit the format that you selected.

Adding Photos
Step 7: Preview and Proofread
Before finalising your creation, take advantage of the preview feature to see how each page will look. Proofread any text and double-check image placement. Make any necessary adjustments to ensure your wildlife photo calendar is flawless and ready for printing.
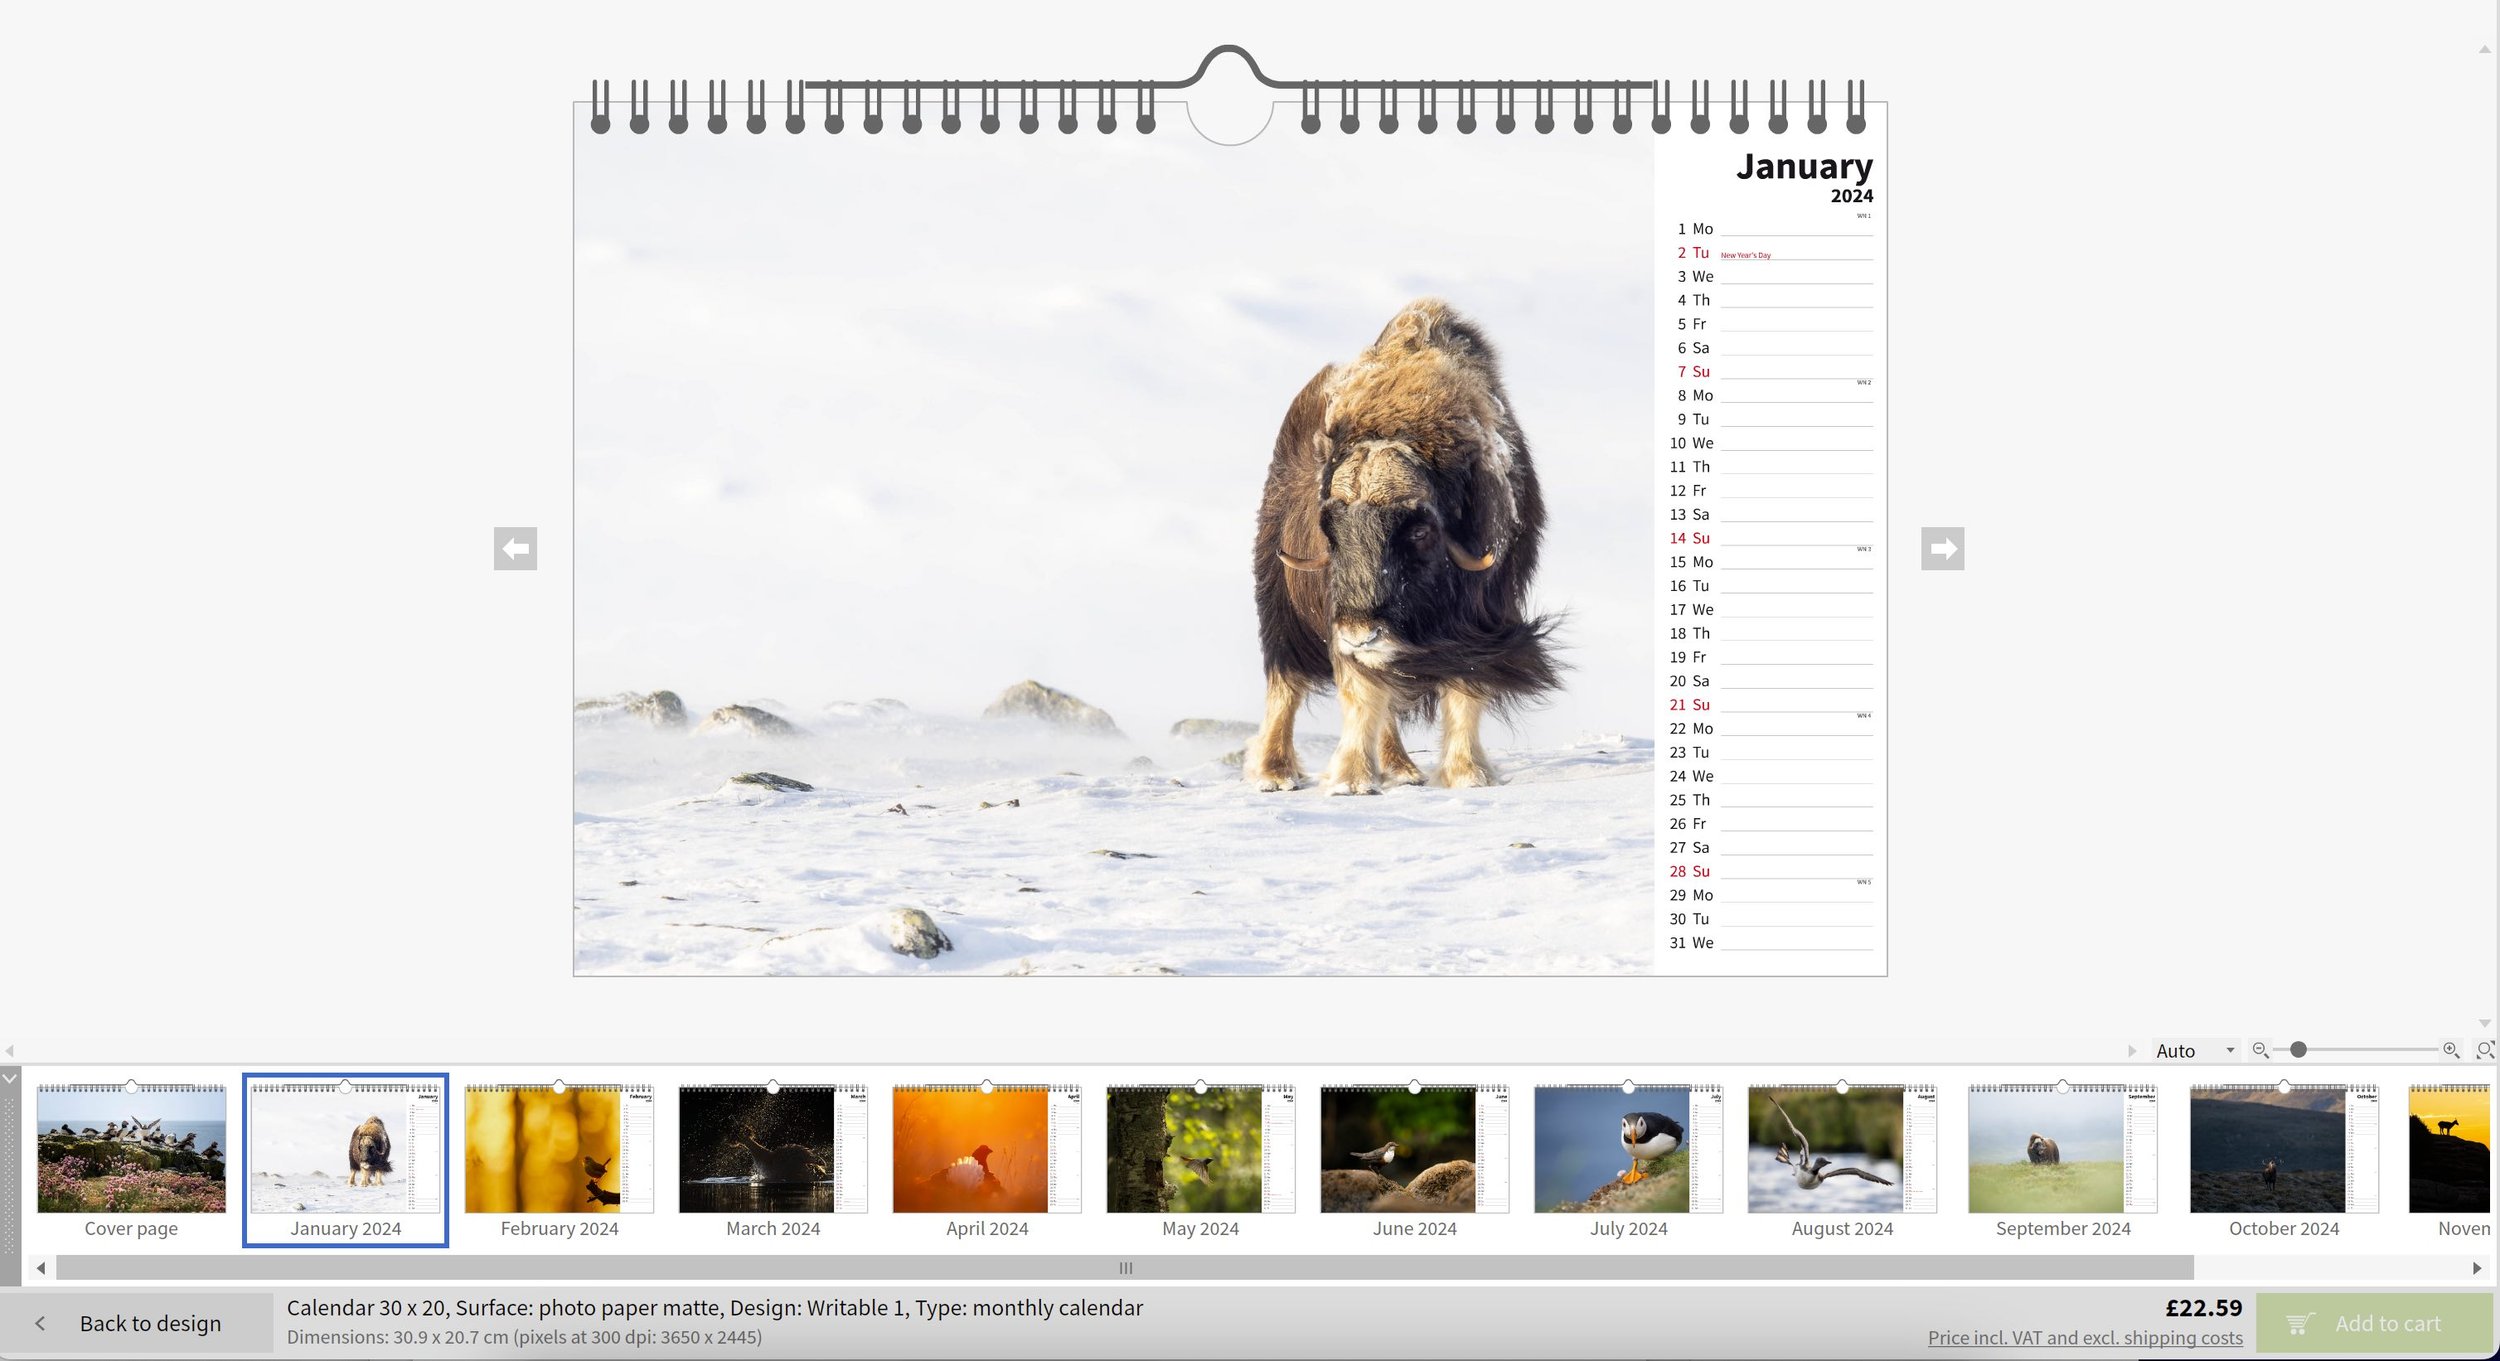
Calendar Preview
Step 8: Place Your Order
Once you're satisfied with your design, follow the prompts to place your order. Saal Digital's commitment to quality ensures that your wildlife photo calendar will be a true work of art.
Your wildlife photo calendar, is now ready to be enjoyed throughout the year. Share your creation with fellow nature enthusiasts, and let the captivating images of the wild remind everyone of the beauty that surrounds us.