
Best EM1X Settings for Wildlife Photography | Top 5 Tips
Wildlife Settings for OM-D Olympus Cameras (OM SYSTEM )
My EM1X has been an absolute workhorse for my wildlife photography since I bought it nearly 2 years ago. I still have my EM1 Mark II and I used most of these settings for that camera as well. In fact, most of these settings will work on most of the OM-D cameras from OM System Olympus.
If you’re interested in my complete setup guide for OM-D cameras for wildlife photography, check out my course:
OM System for Wildlife Photography Course

Custom Button for Changing Shooting Mode
Both my EM1X and my EM1ii have a button on the top left that will allow me to change shooting mode. However, as anyone who takes photos of wildlife with a telephoto lens knows, these buttons on the top left are all but useless when it comes to changing settings quickly in the field.
Imagine you’re aiming your camera and lens at the most spectacular looking bird, your eye is looking trough the viewfinder, your right hand is on your camera body with your index finger ready at the shutter and your thumb is holding down the back button focus (AEL/AFL) button. Your left hand is underneath your lens, supporting it and holding it as steady as you can.
If you were to try to move your left hand to change shooting mode you’ll likely lose your composition and likely the bird altogether from your frame.
One of the reasons why I love the OM System cameras is the way I can tweak the configurations and settings to truly make the camera my own and fit my needs.
Here’s how I do it:
Menu - Cog icon - B1 - Button Function (Image 1.1)
Go down to the directional pad - press right - set to Direct Function - ok (Image 1.2 & 1.3)
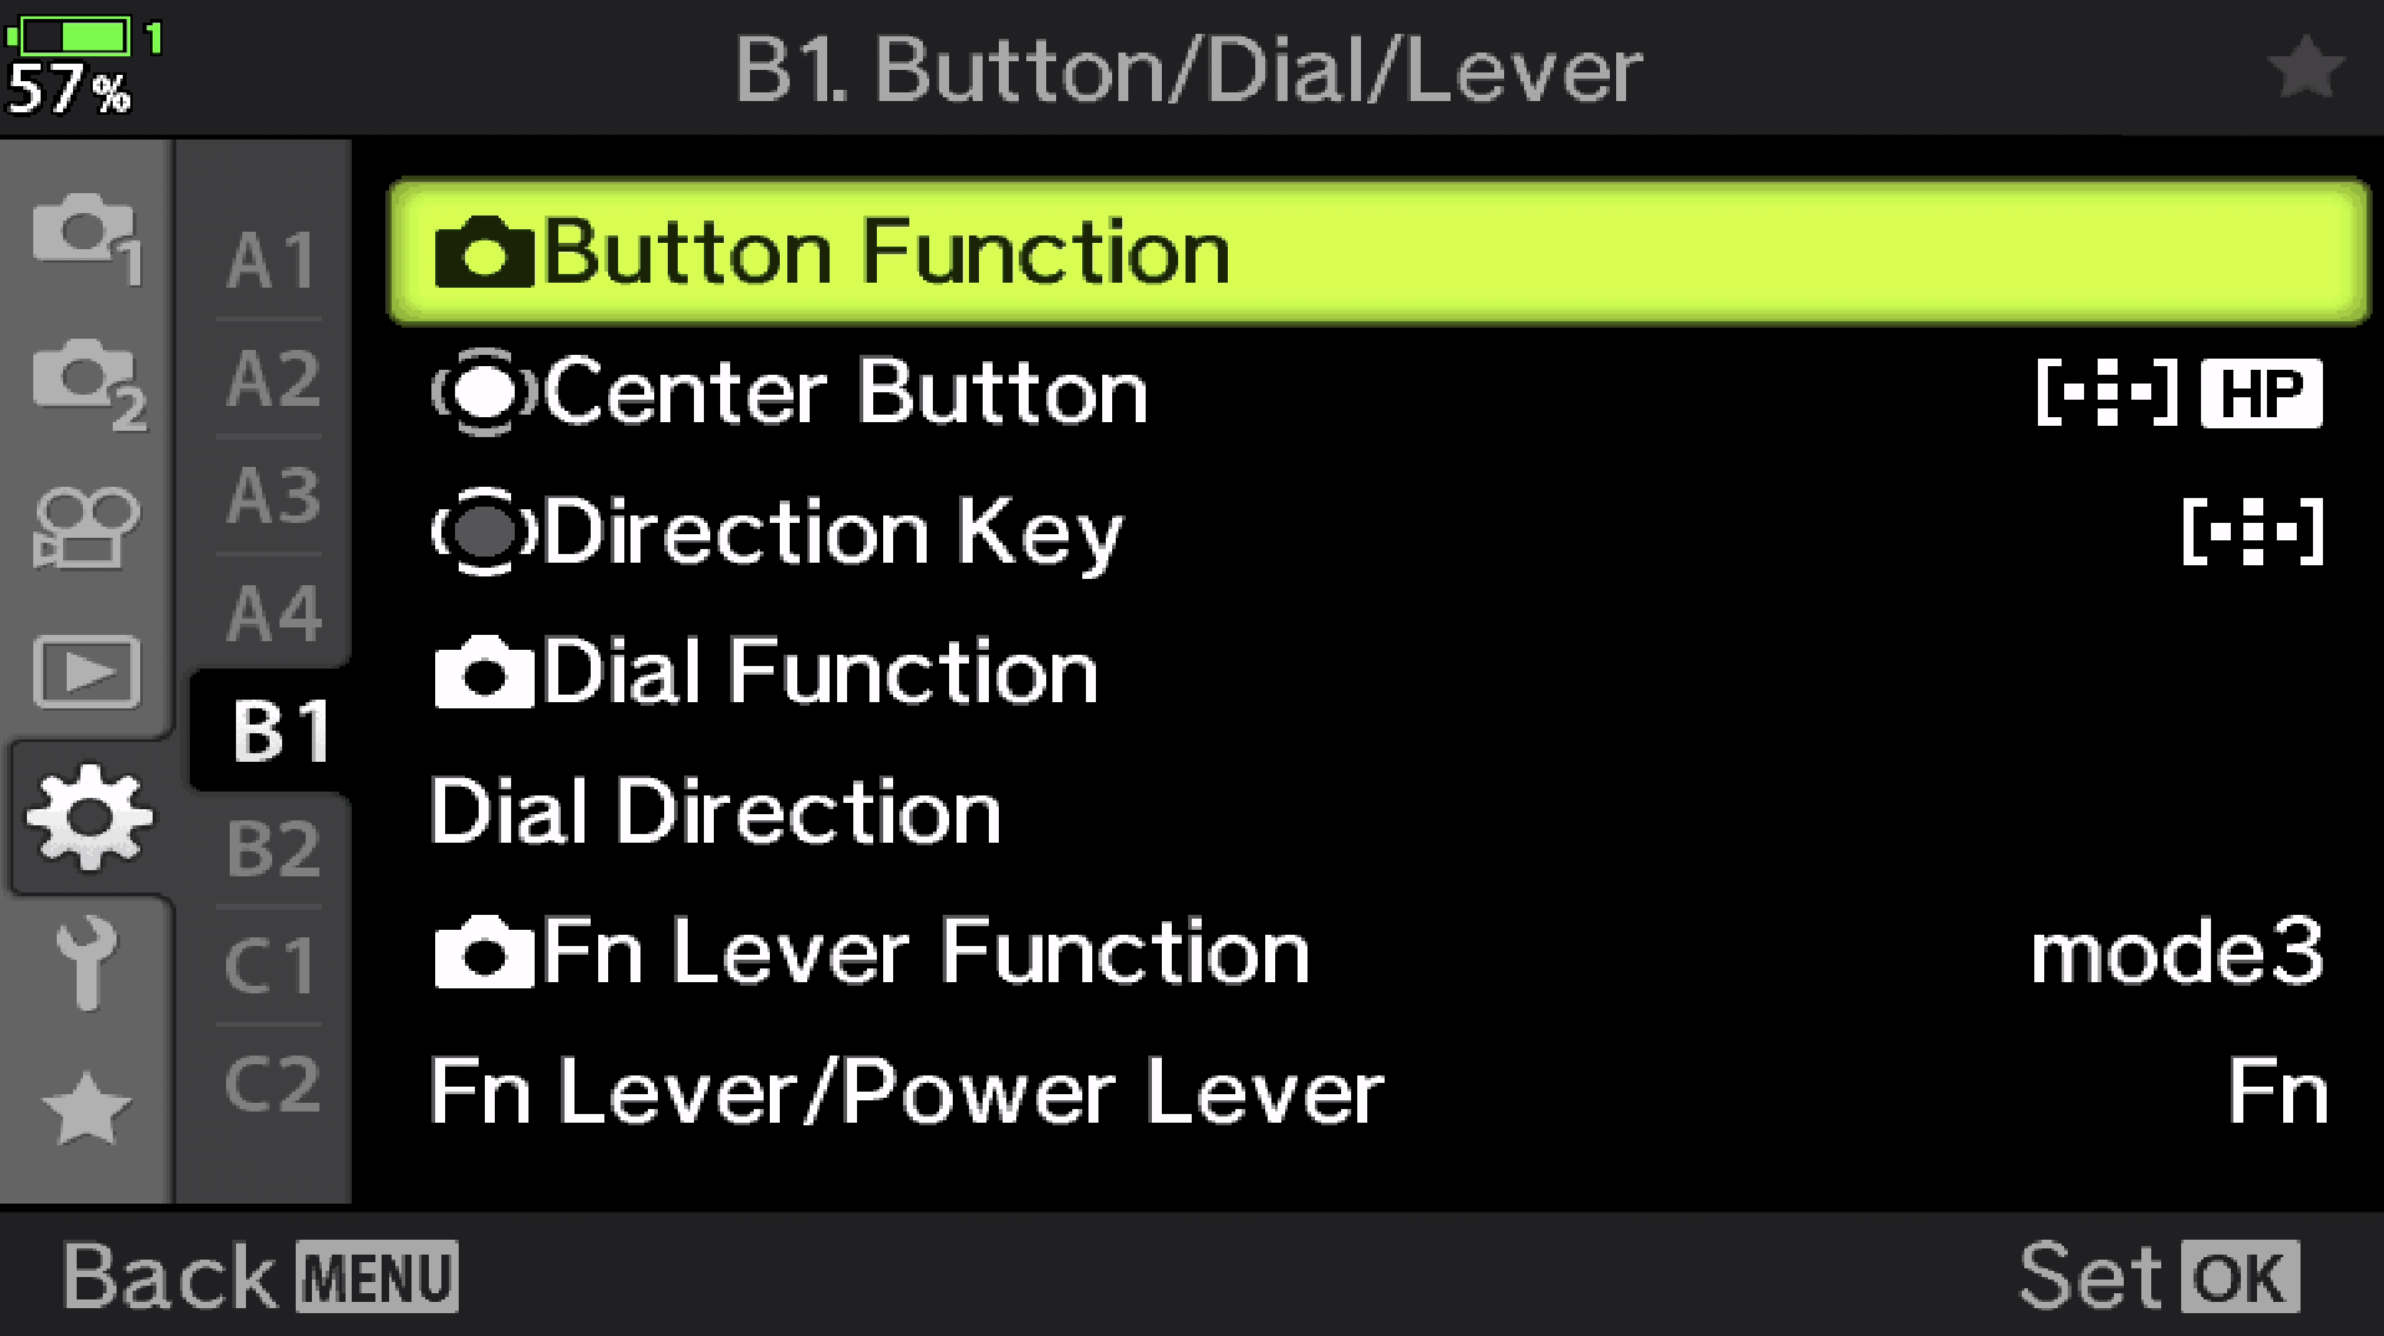
Image 1.1

Image 1.3
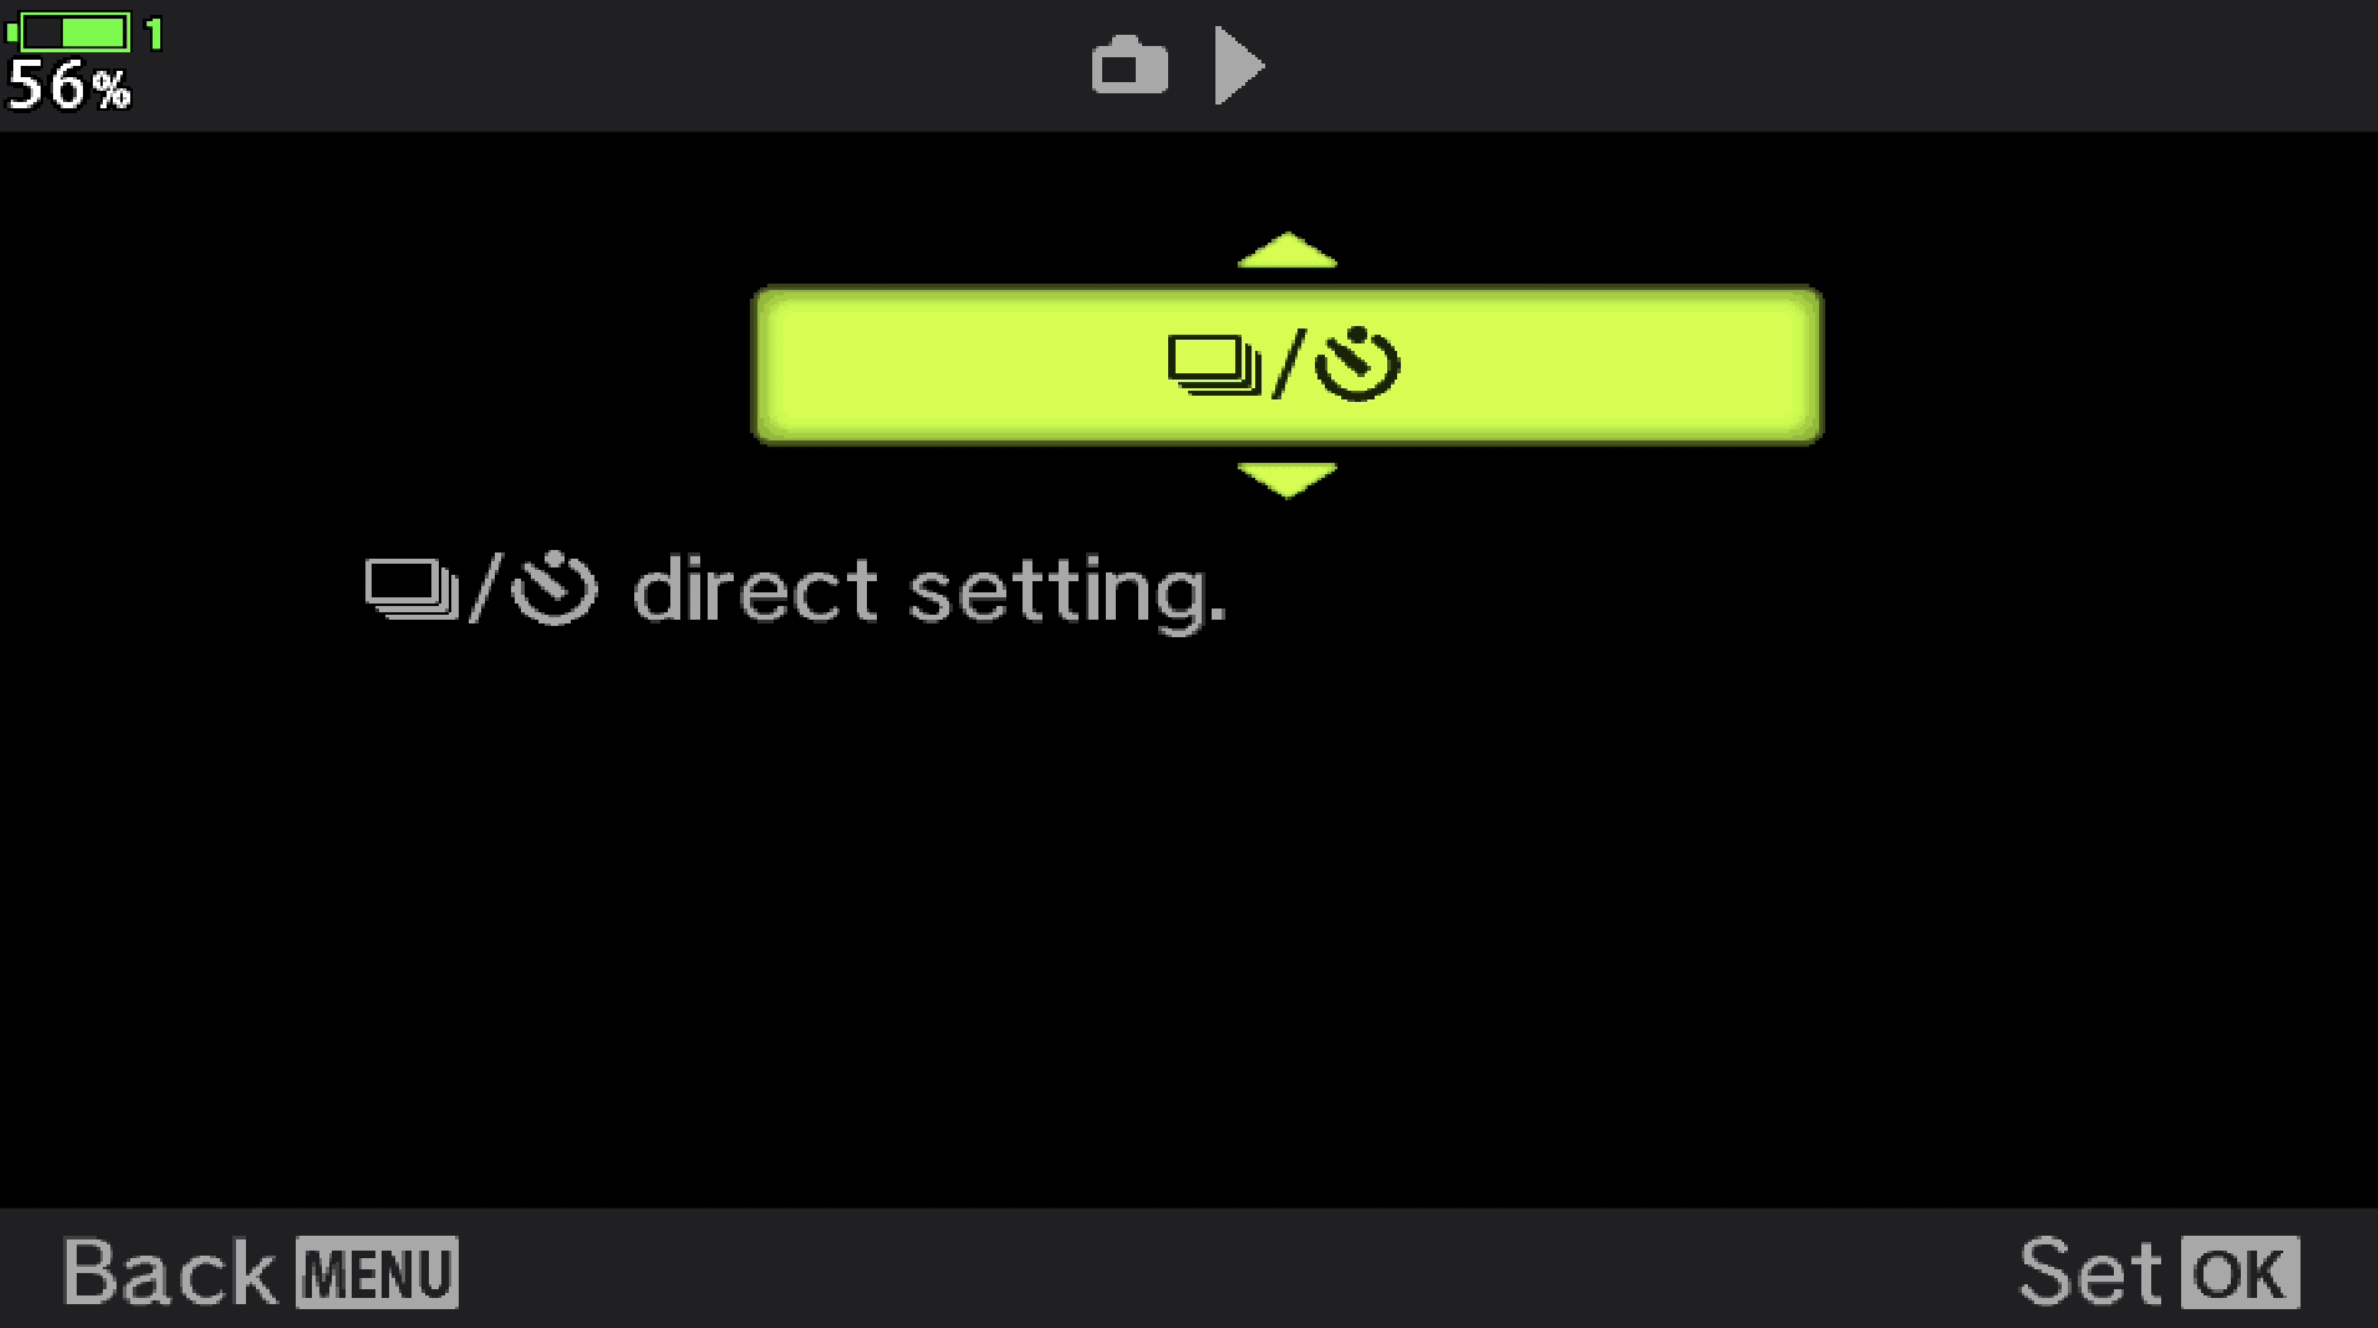
Image 1.5

Image 1.2
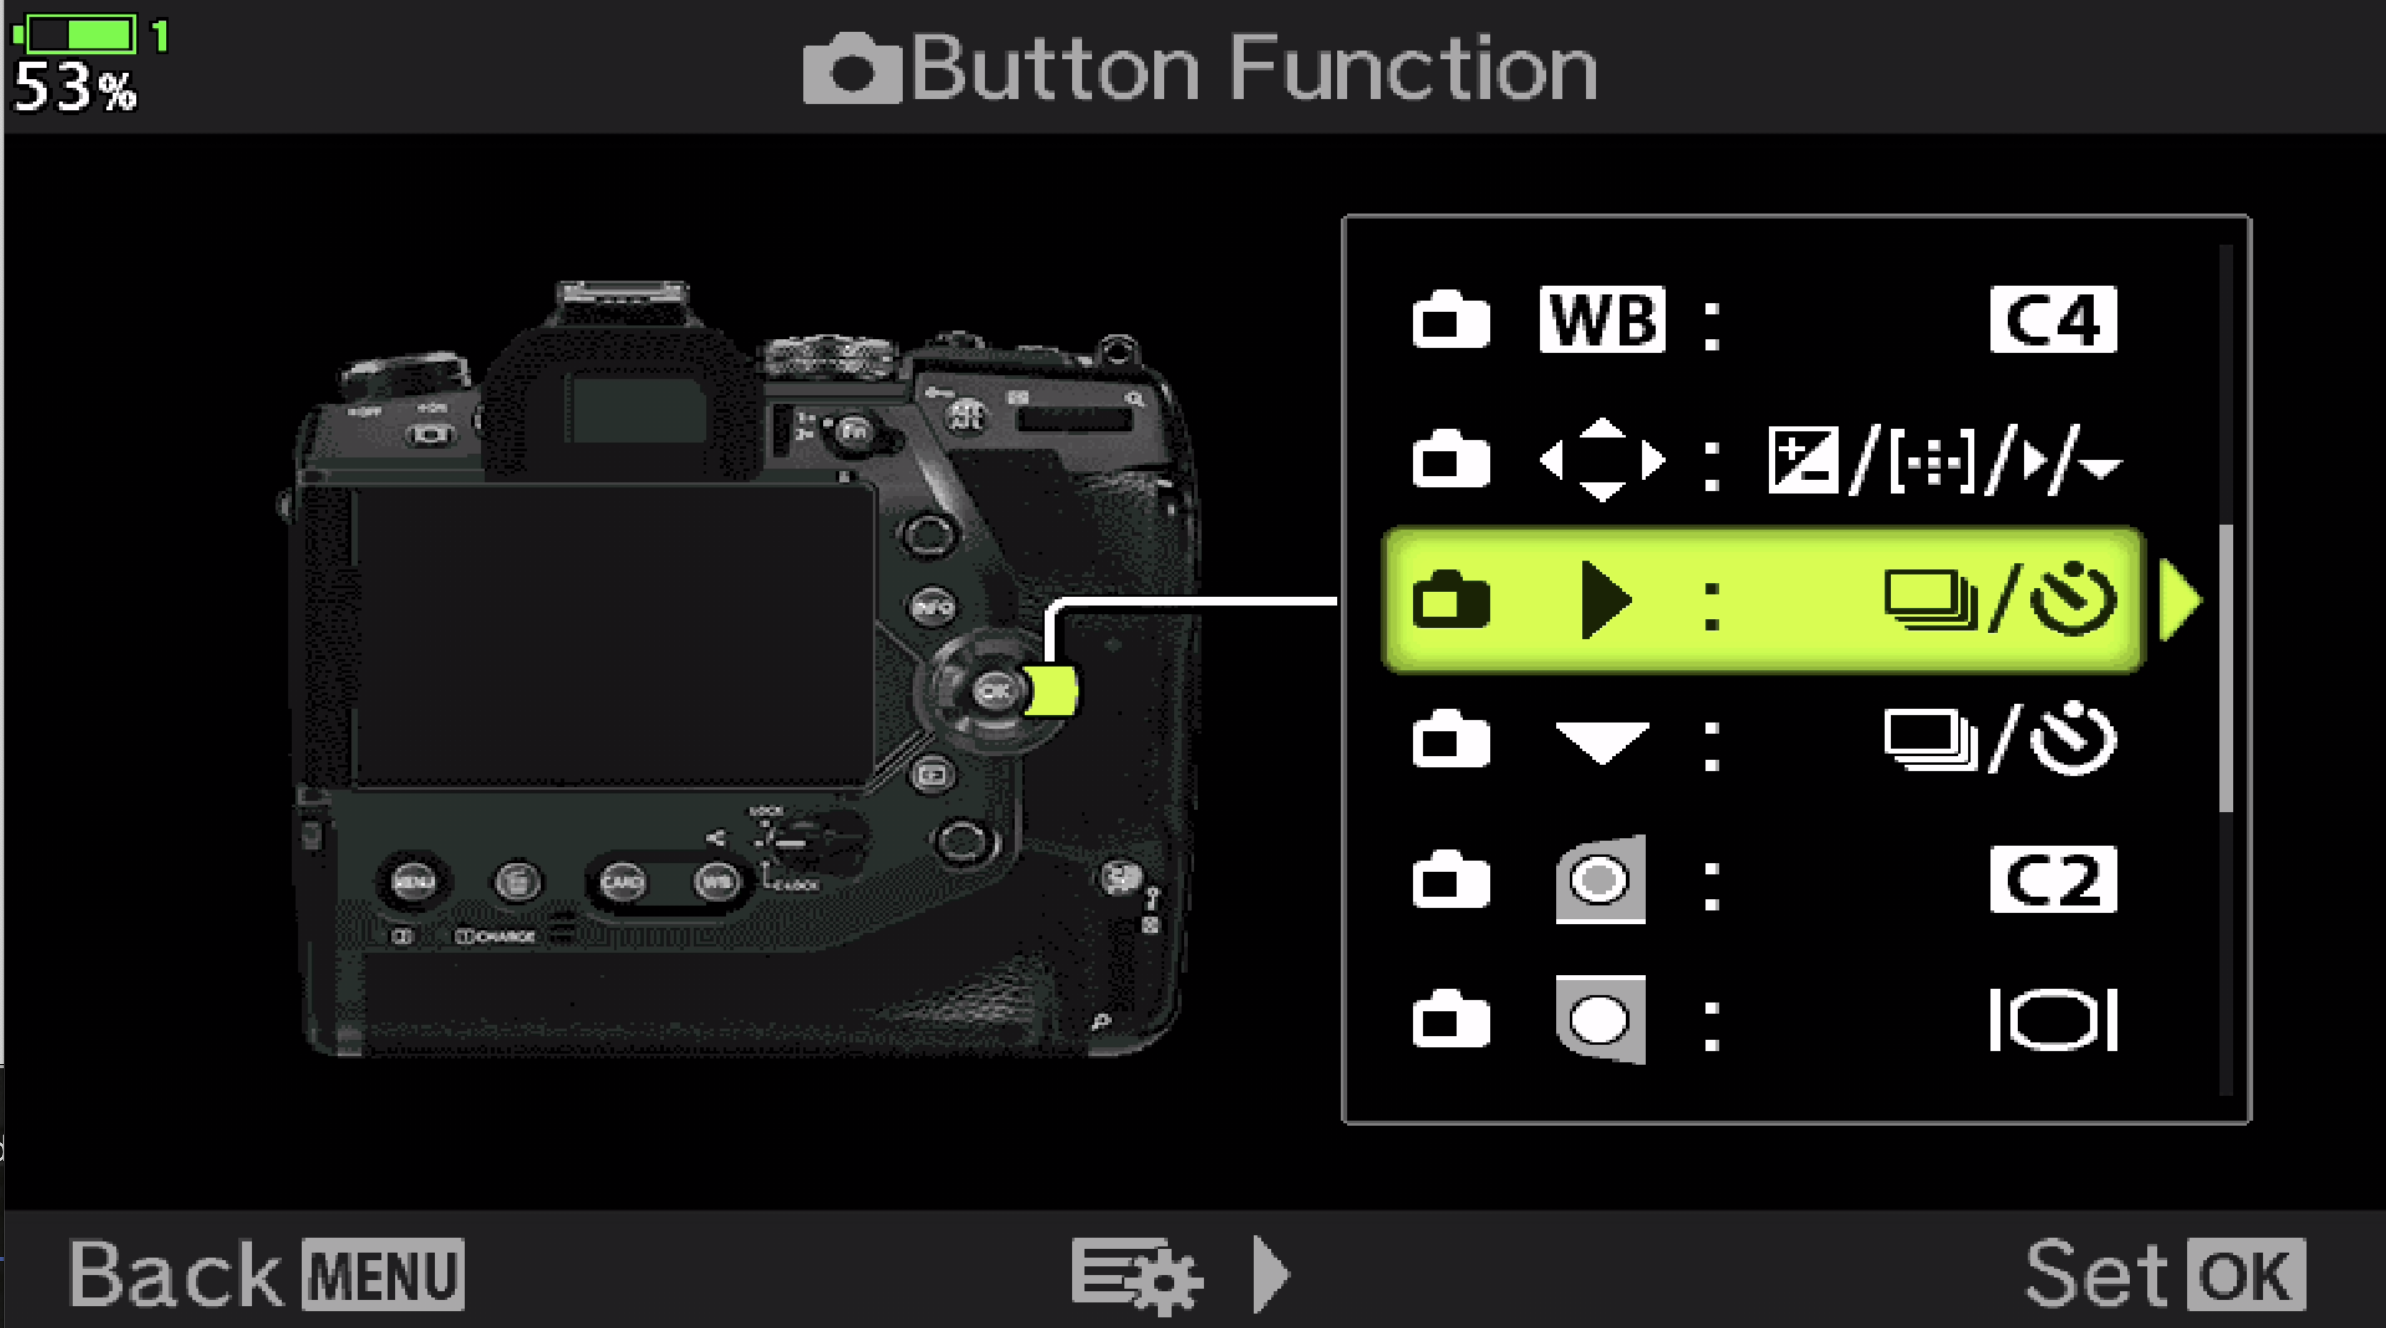
Image 1.4
Directional Pad Right - press right - choose the shooting mode option (frames/clock) - ok (Image 1.4 & 1.5)
Now, when you are in the field and need to quickly change shooting modes, press right on the directional pad, select shooting mode and press ok (Image 1.6)

Image 1.6
2. Back Button Focus (BBF)
Setup back button focus on your camera. The benefits of back button focus far outweigh the initial period that it takes getting used to it, you may miss a few shots during this period so don’t change when you have an important shoot coming up.
Main benefits for using BBF
You never have to change between Single Auto Focus (AF) and Continuous AF again. With BBF you can use C-AF to track a subject, but you can also focus on your subject, move your frame to compose your shot and press the shutter without your camera focusing again. So you have the best of both worlds!
You can manually focus on tricky subjects that may be far away or in between vegetation and press the shutter without your camera starting to focus again and ruin the focus that you just achieved manually.
It doesn’t really matter if its back button focus, you just need a way of separating the focus from the shutter button.
To setup Back Button Focus the way I have:
Press Menu - Cog - A1 - AEL/AFL = Mode 3 (Image 2.1 & 2.2)
B1 - AEL - AEL (Image 2.3) (Or assign a different button to AEL if that works better for you)
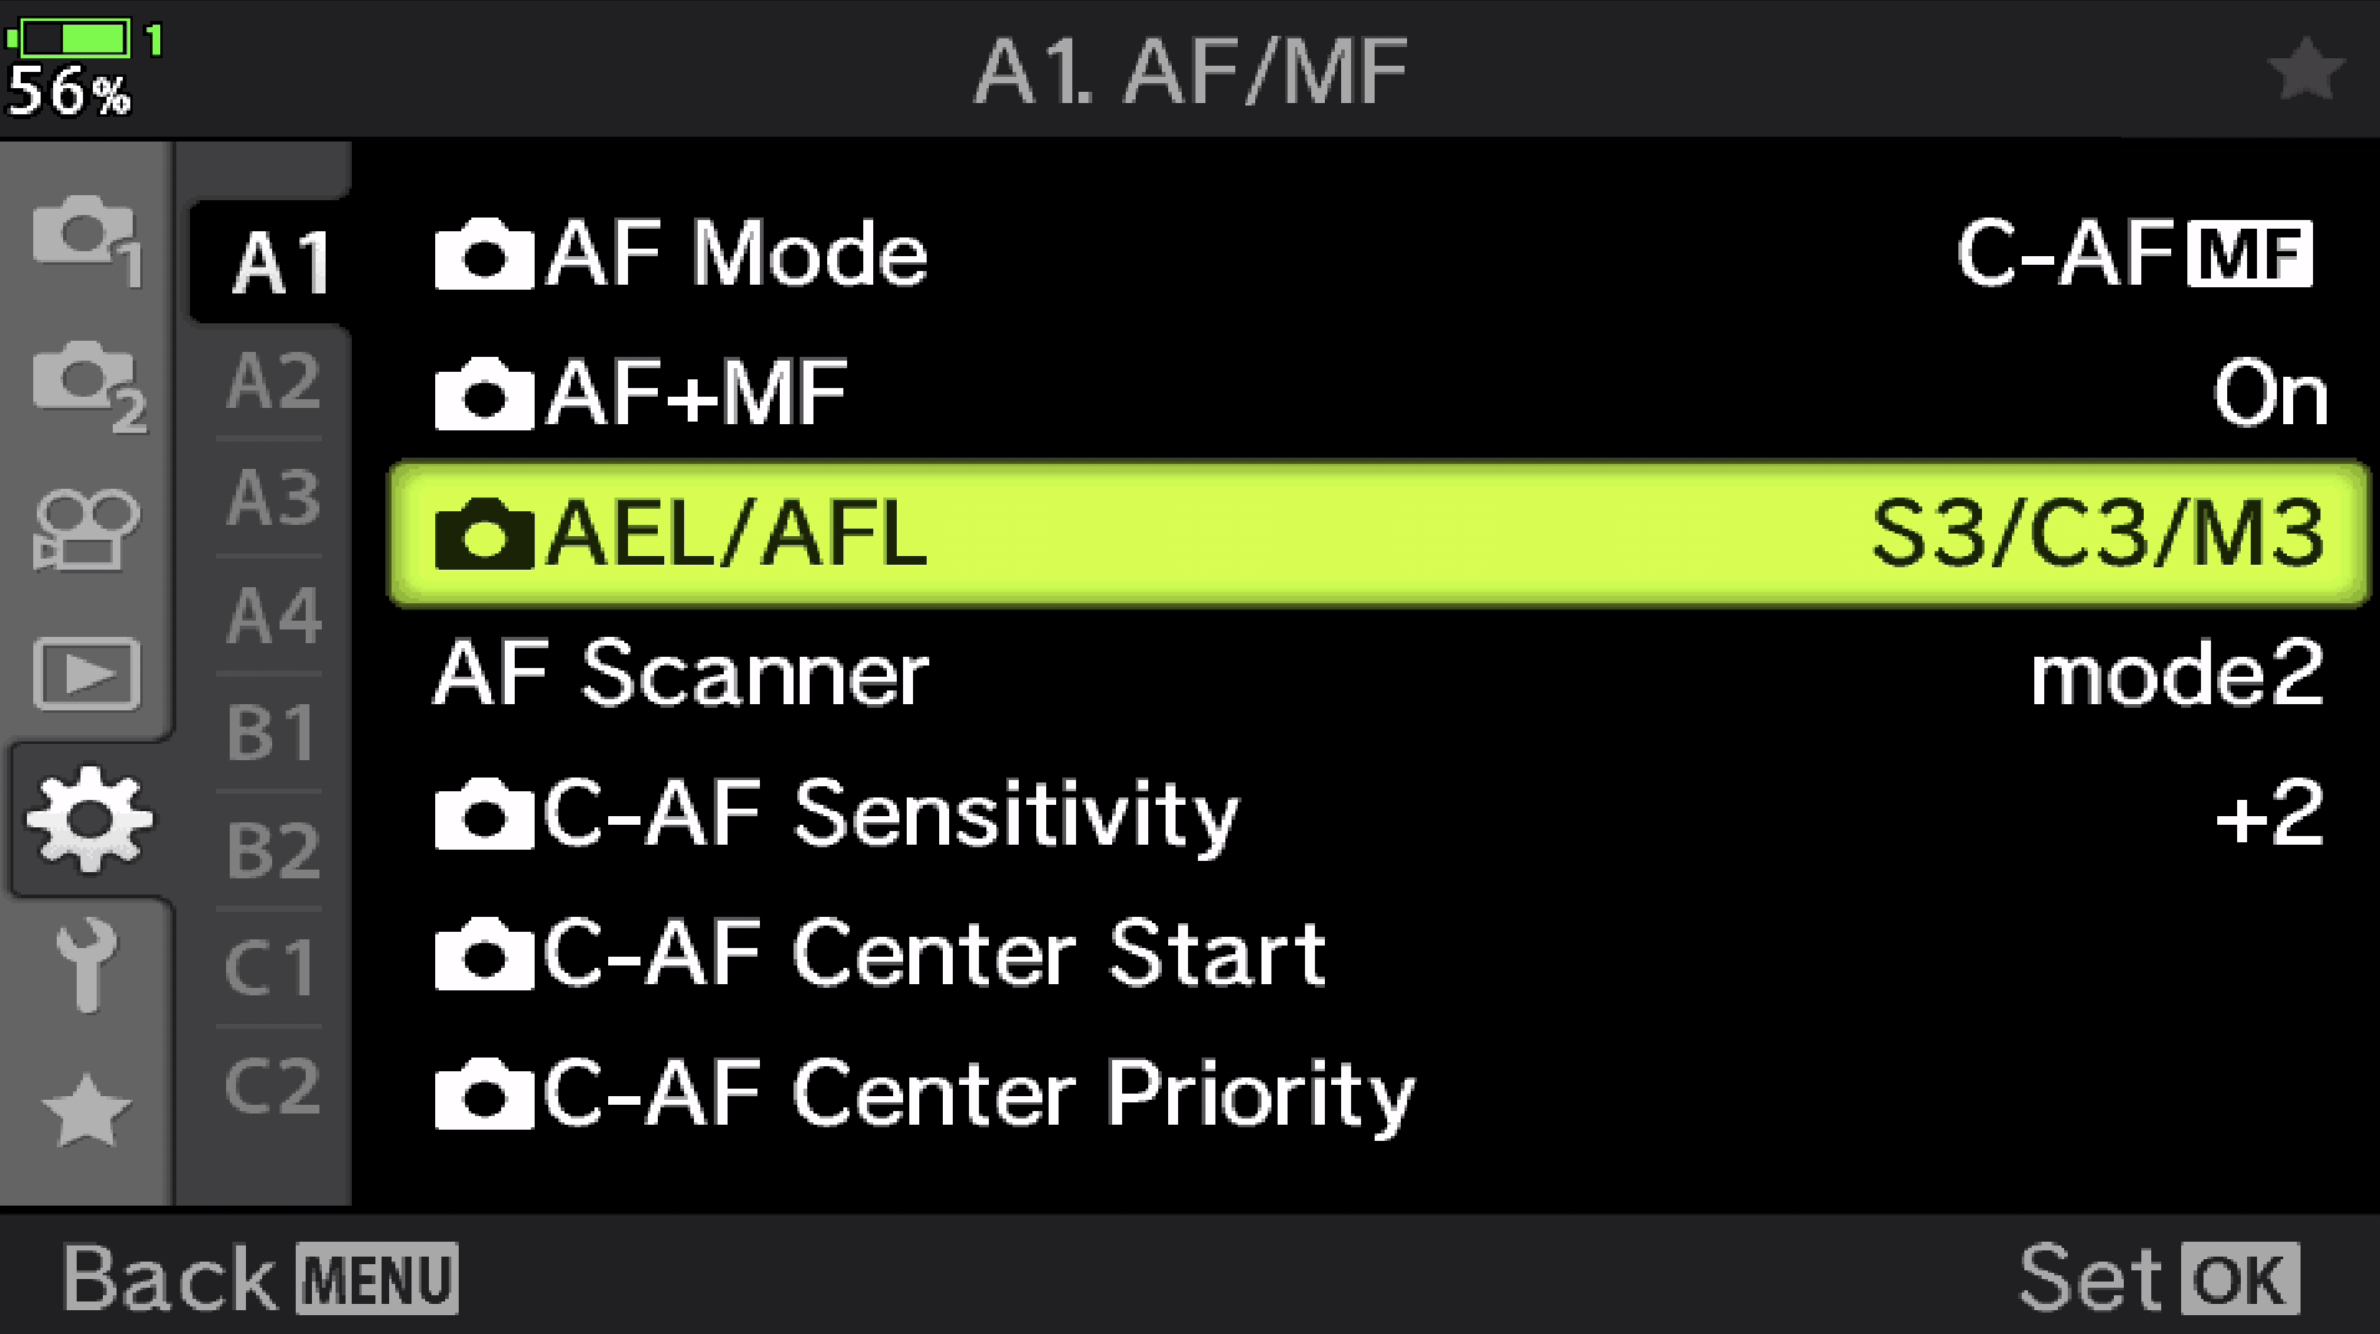
Image 2.1

Image 2.3

Image 2.2
3. AF Limiter - A Must Have for Bird Photography
This is one of those simple feature that is incredibly handy and I use it almost every time I'm out photographing birds!
Many lenses have a focus limiter on it, my 300mm f/4 has 1.4-4m, 1.4 - infinity (off) and 4m - infinity. I've never used this much, because I find it too limiting and not that useful. Often when a bird is close it's around the 4m distance and I don't want to miss getting focus because of this limit. It’s also awkward to reach to switch on/off when you’re tracking your subject and just need to get focus quickly.
The way I use the AF - Limiter is to set a limit to the background which I find much more useful, and I assign it to a button that I can easier reach than the switch on the lens.
There are three different settings for AF Limiter. I set them to a default of short - medium - far away focus limit. On my em1x I add the AF-limiter to my menu as I often change the parameters for the situation.
Menu - Cog - A3 - AF Limiter (Image 3.1 & 3.2)
1 - 15m
2 - 500m (further away is not very accurate)
3 - 75m

Image 3.1

3.2
You can switch to feet if that's easier by changing m to ft in A3 - AF Limiter
Short and medium I mostly use for birds in trees and branches
Further away I usually use for birds in flight, beware that it's not very accurate for far away distances.
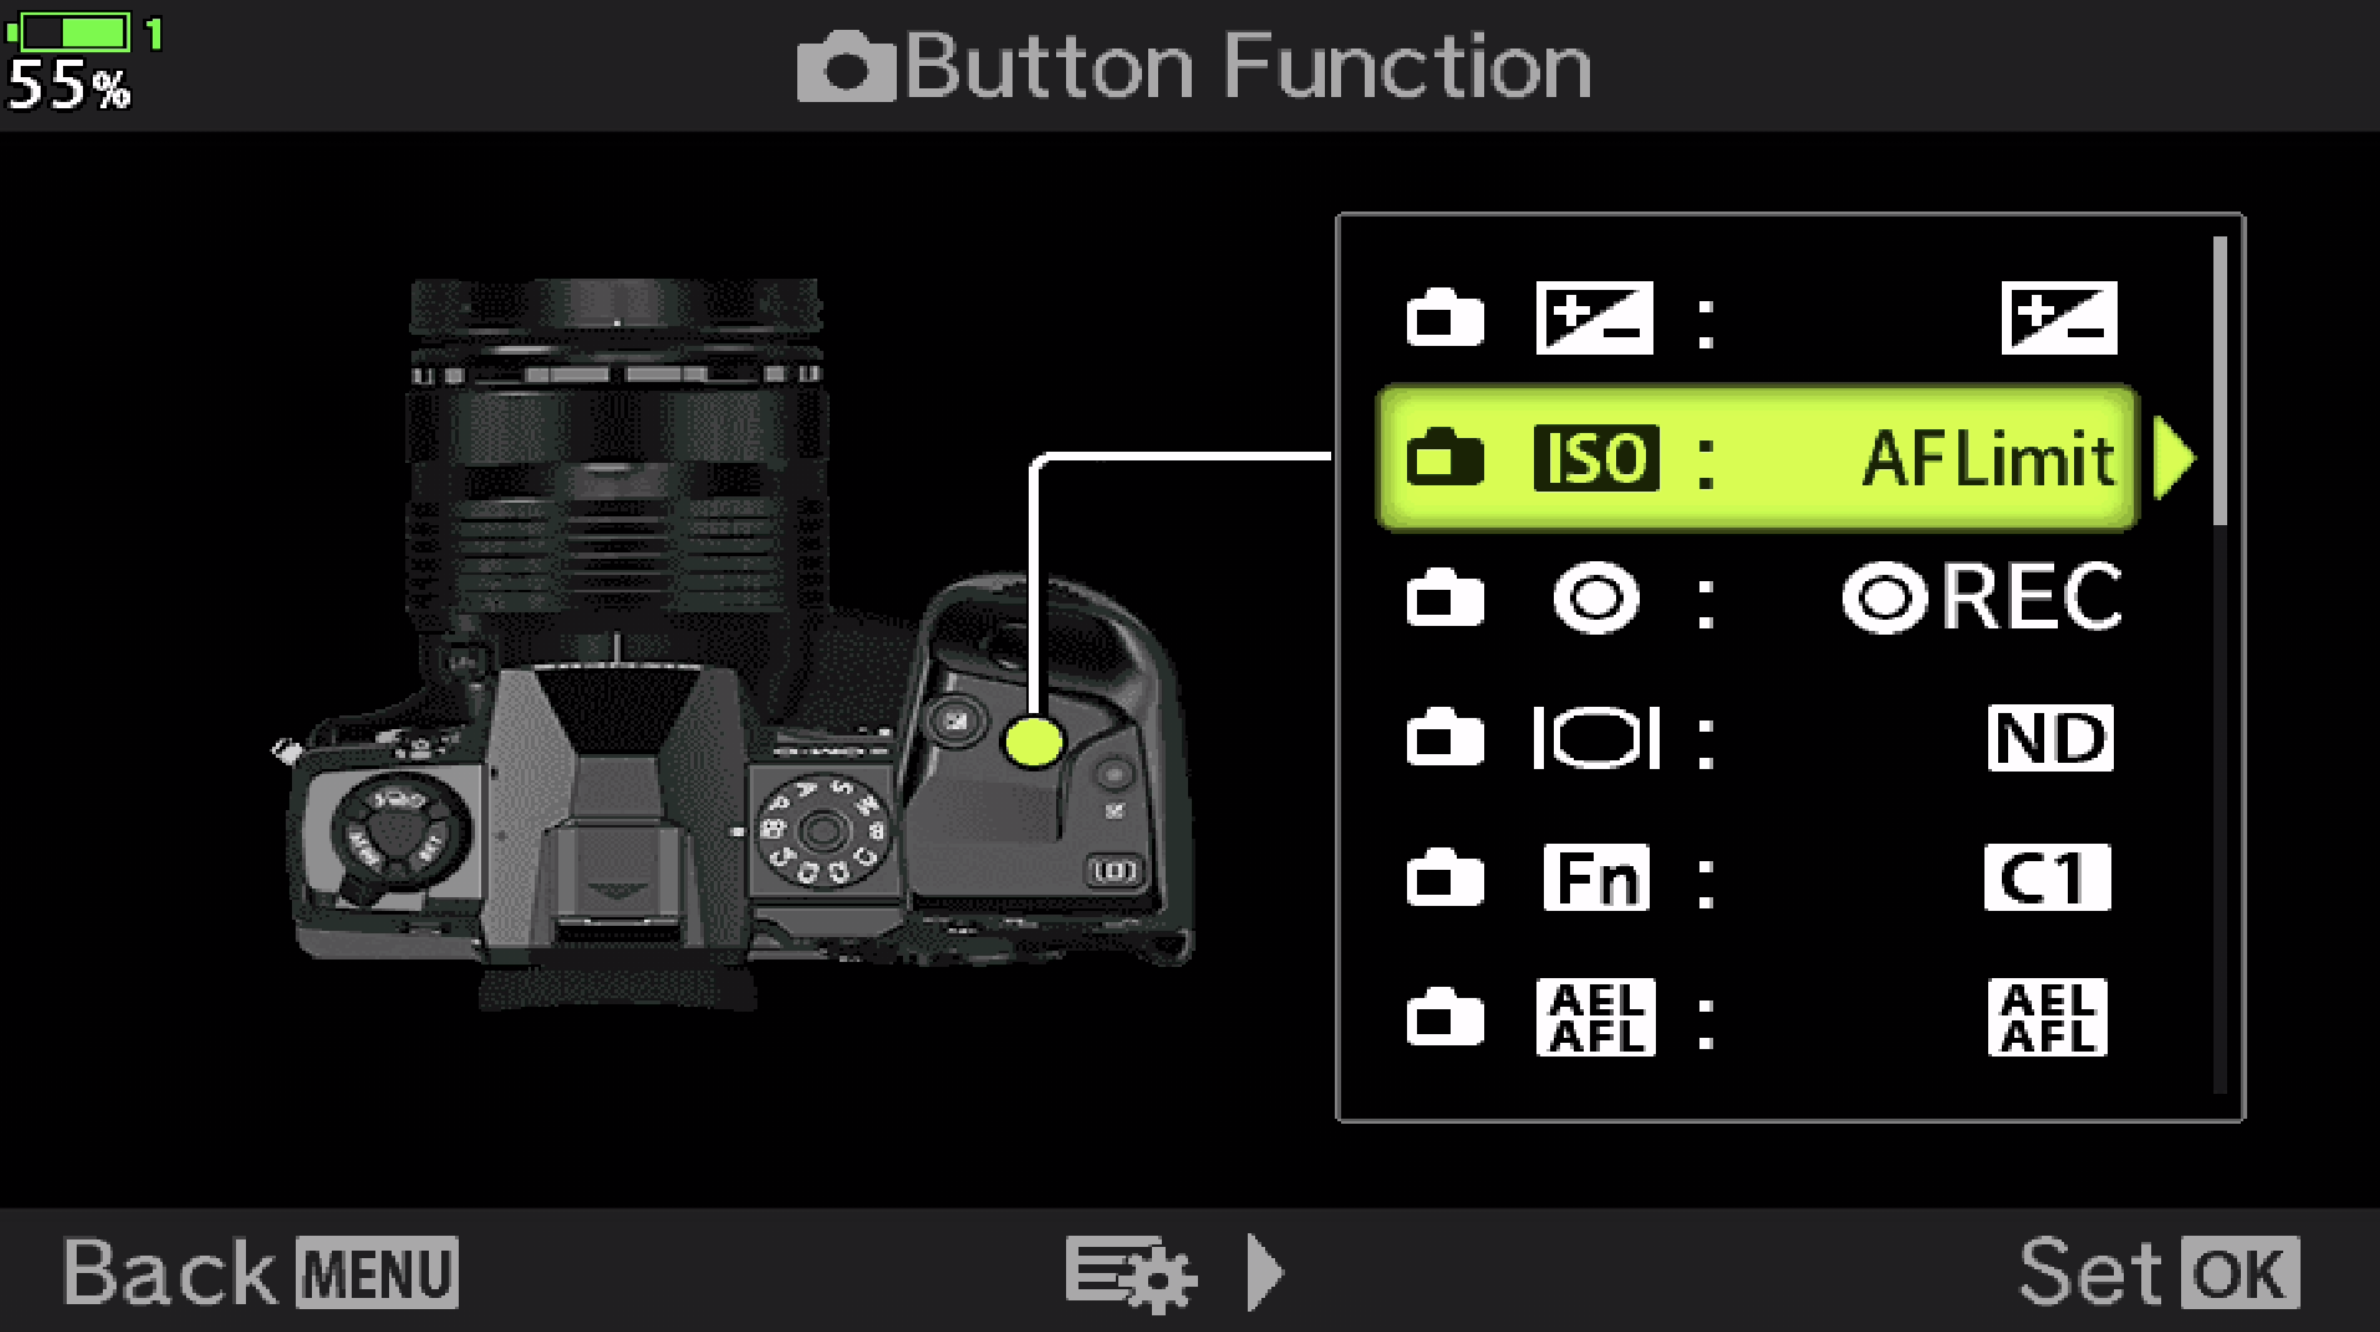
On my em1x I have assigned the ISO button to turn AF-Limiter on/off (to switch between the distances hold the ISO button and turn rear dial)
Menu - Cog - B1 - Button Function - ISO - AF Limit (Image 3.3)
4. Manual Focus & Peaking
I like to turn off the manual focus on/off clutch on the lens as it can too often change accidentally, I like to have it always available to me with the focus ring, but you need to be using BBF to take advantage of this.
Menu - Cog - A1 - AF+MF - On (Image 4.1)

Image 4.1
Peaking is an awesome feature that really helps using manual focus
if I have plenty of time I may also digitally zoom in to make sure I get focus.
I mostly use manual focus for video, but sometimes when it’s a tricky auto focus, like shooting through vegetation or if the subject is very far away I'll also use it for taking photos.
Menu - Cog - A4 - MF Assist - Peaking - On (Image 4.2)
Now I can set my auto focus to C-AF (MF) (Image 4.3)
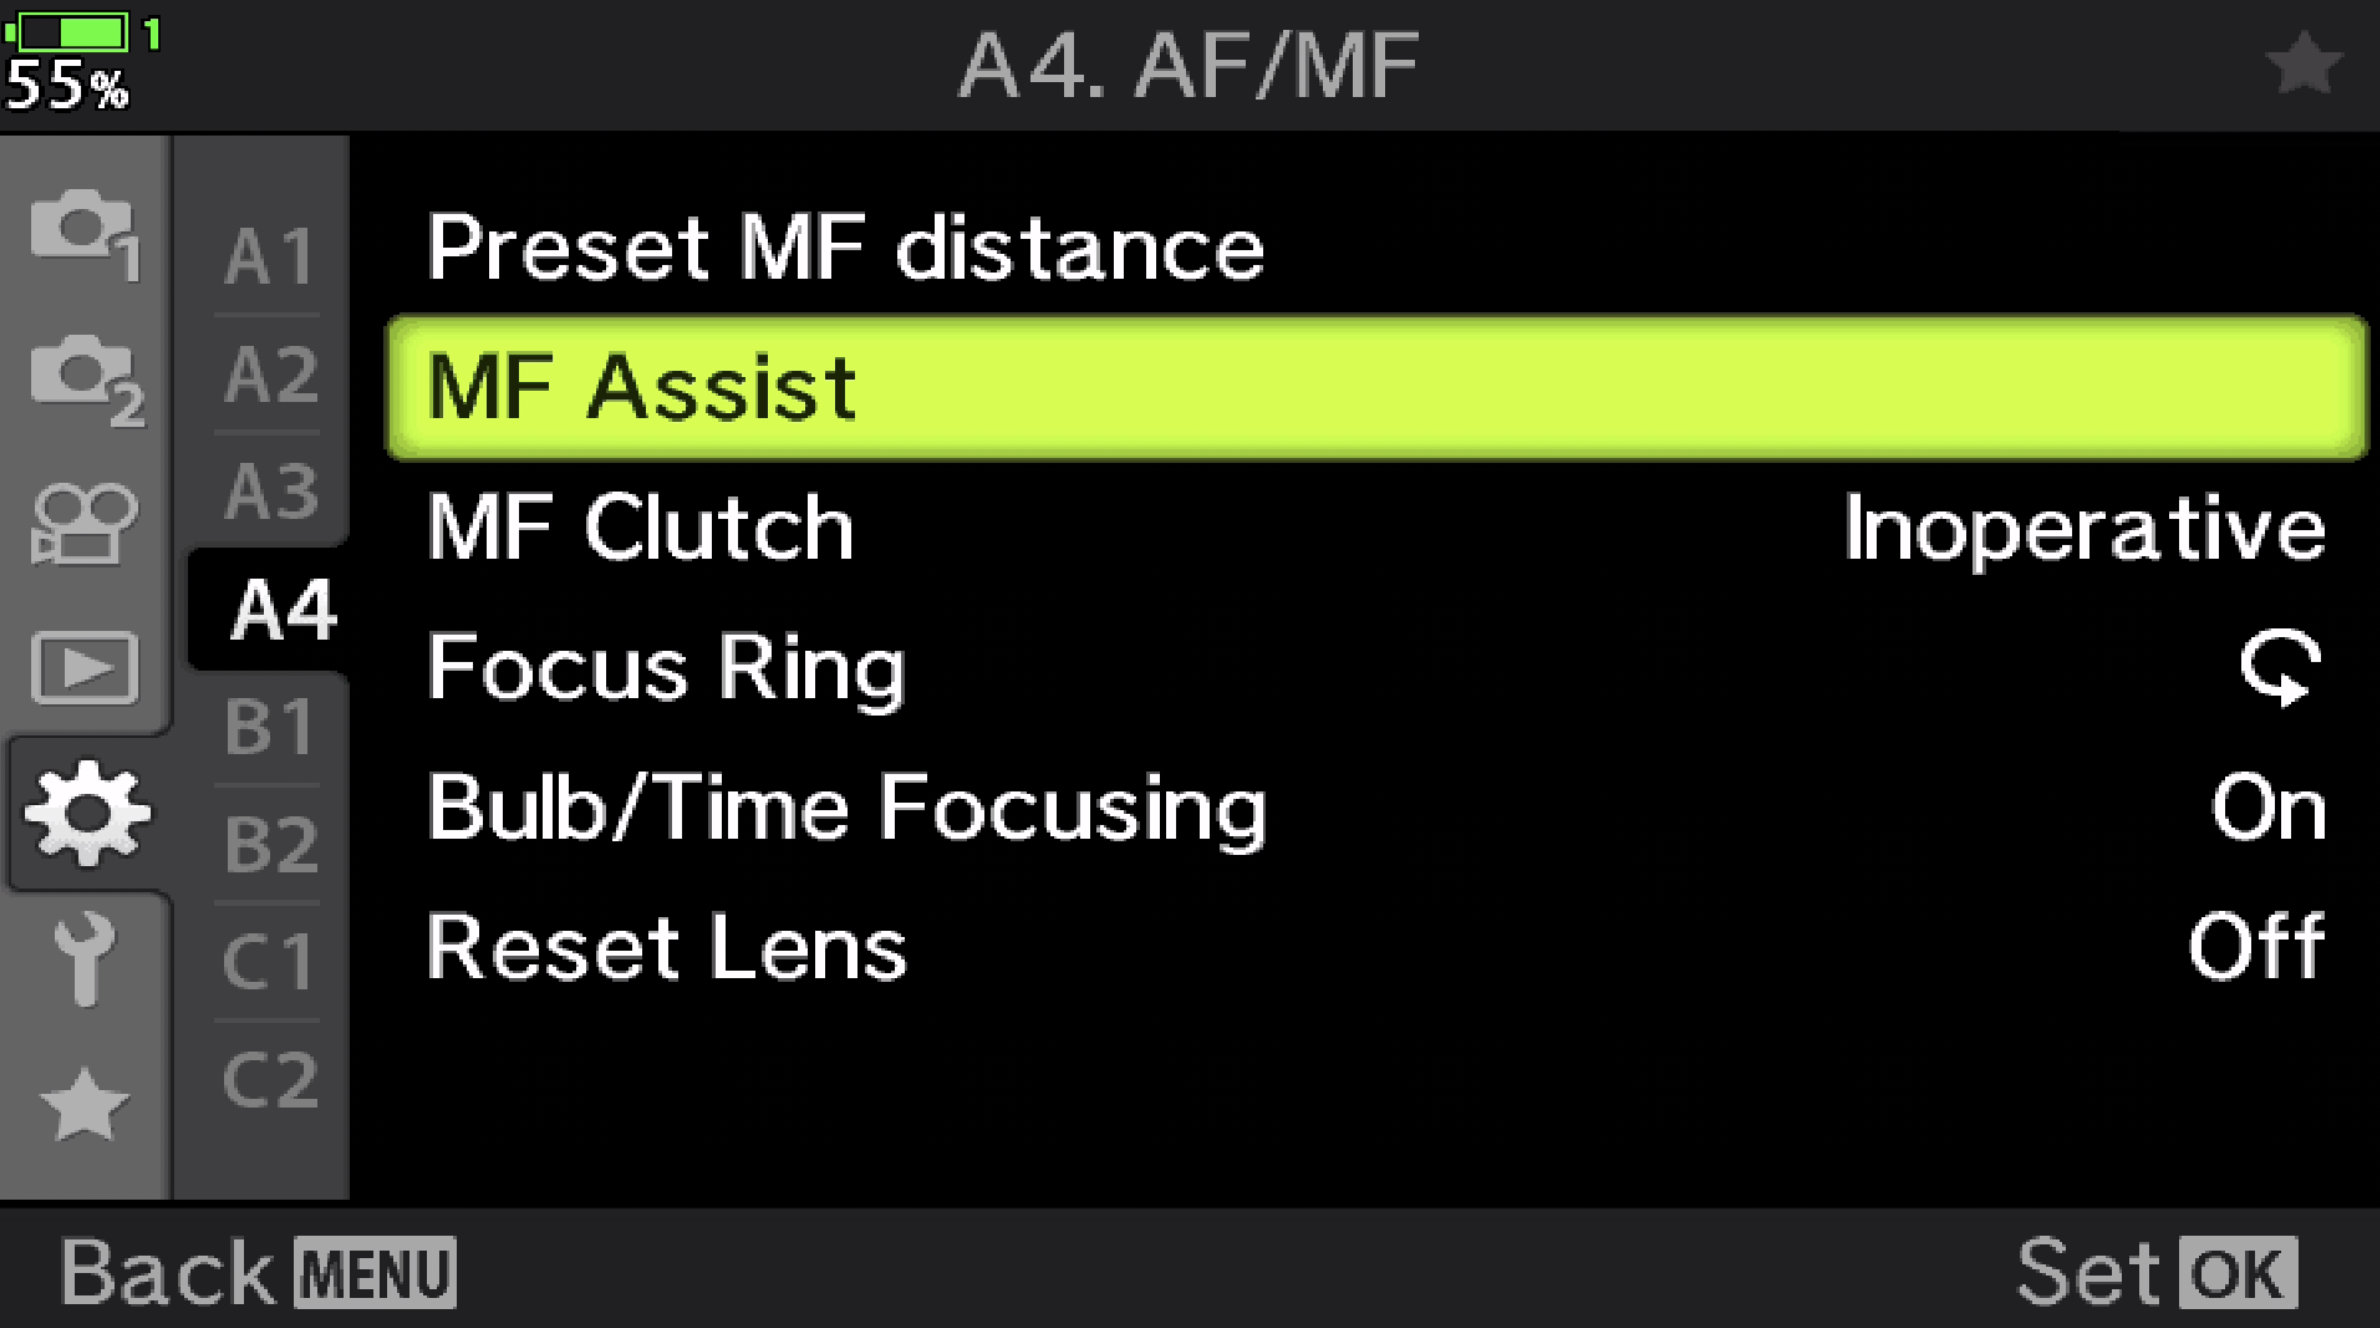
Image 4.2
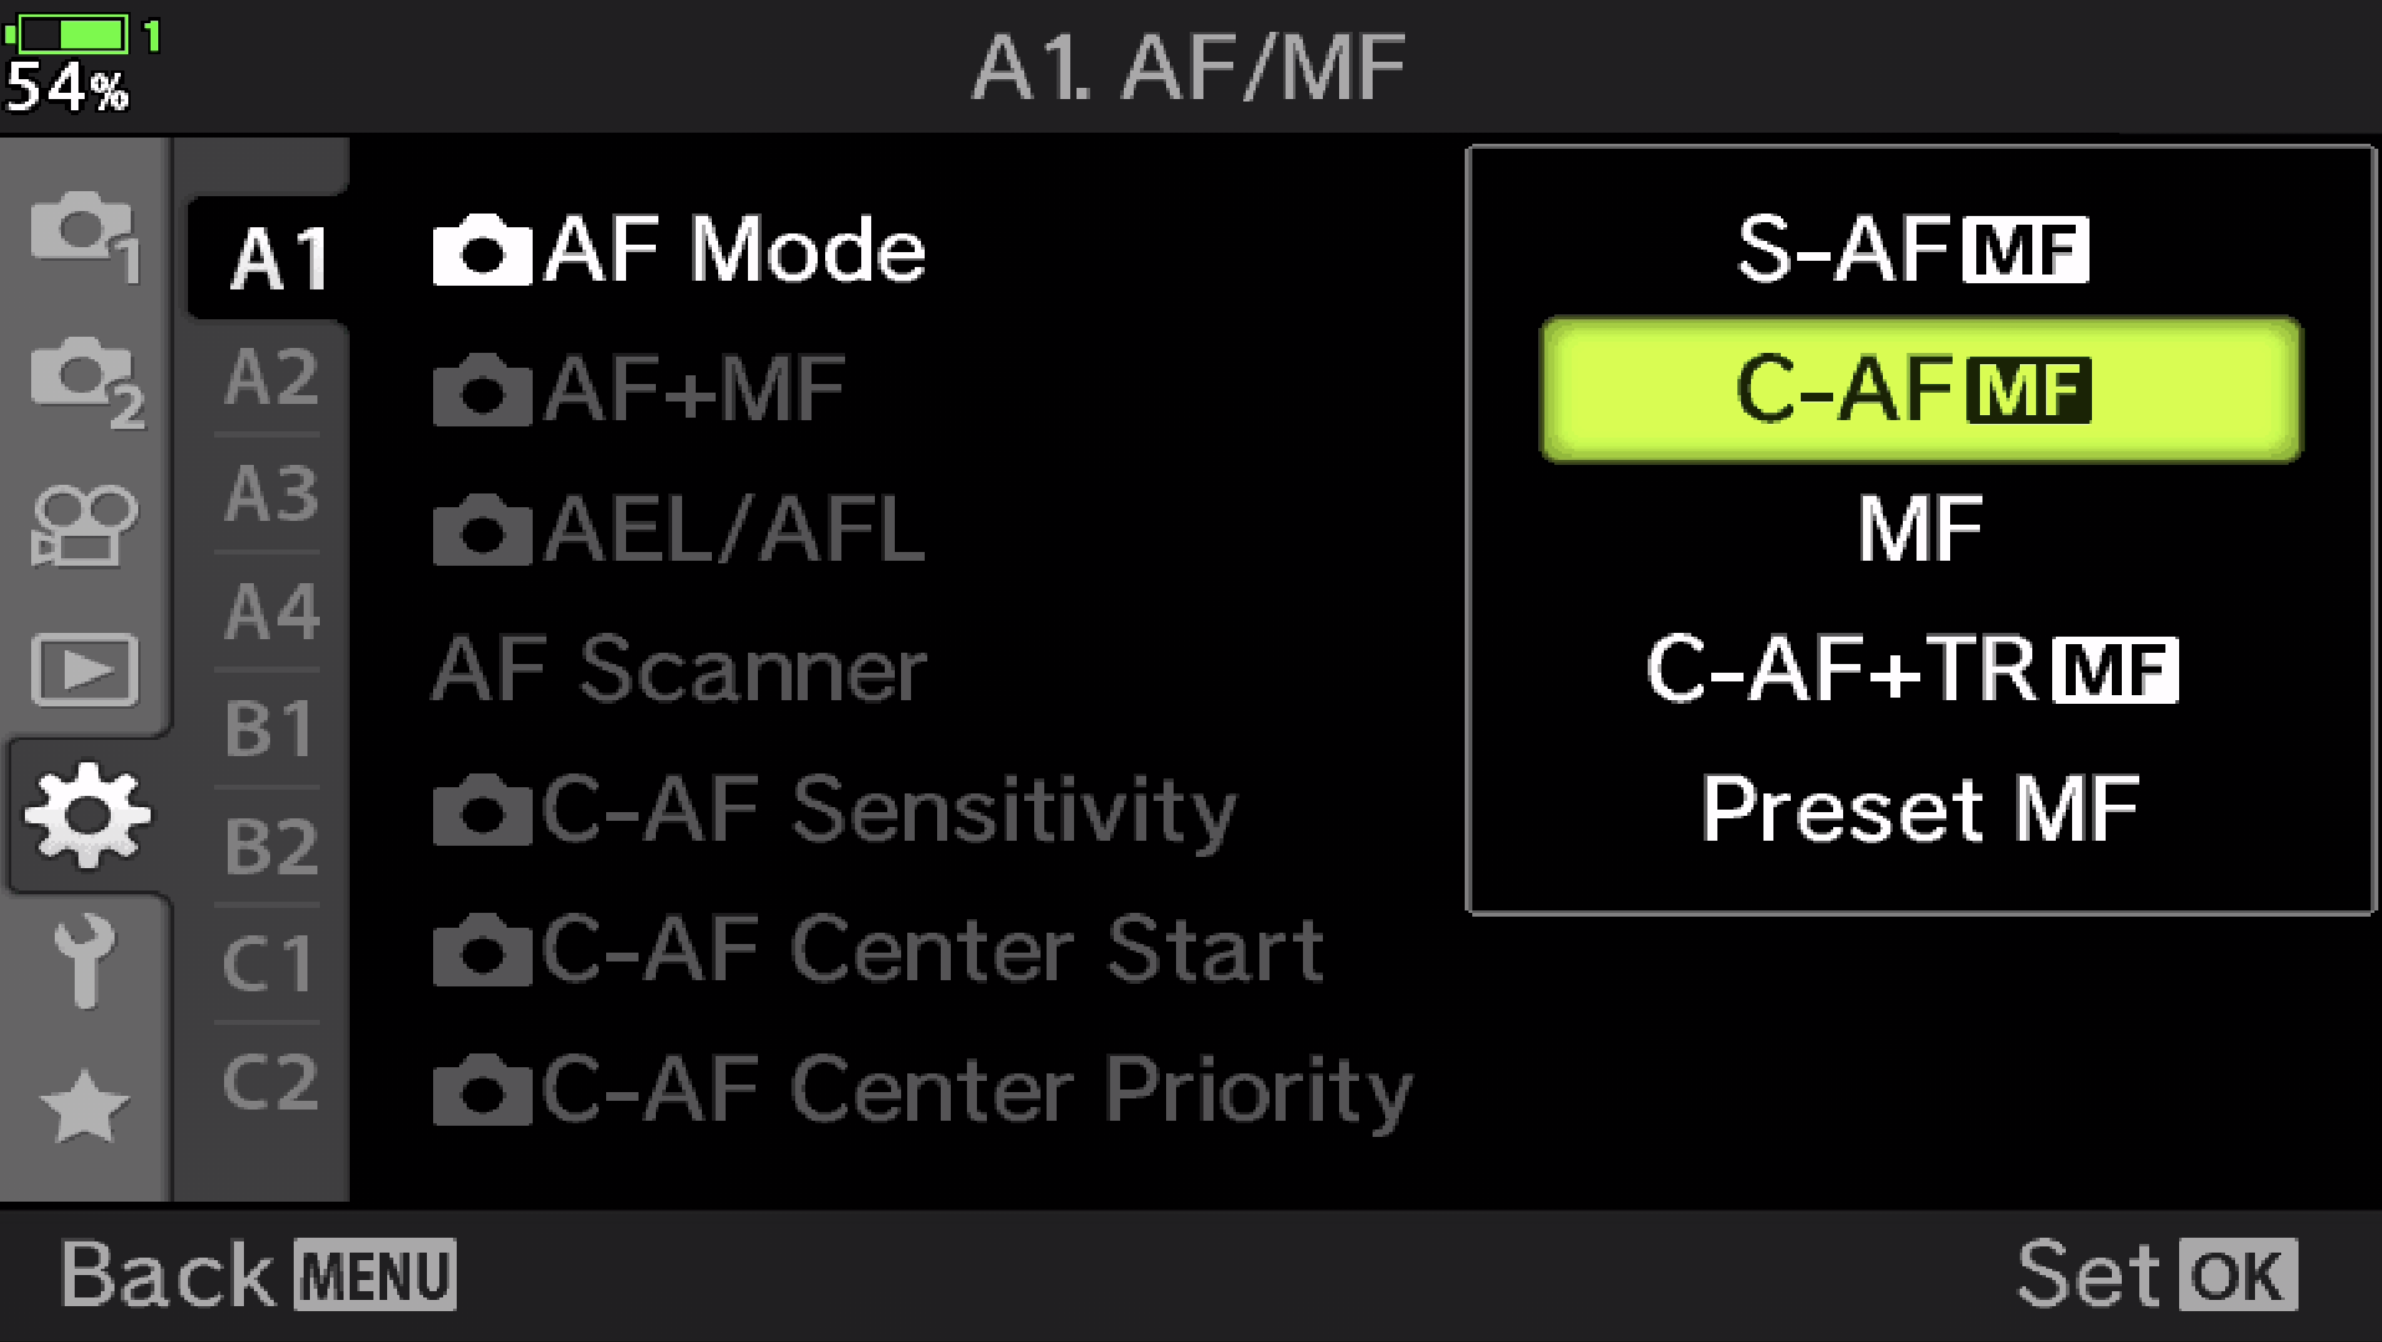
Image 4.3
5. Custom Mode for Birds in Flight (Quick button on EM1X)
I love making use of the various Custom Modes on my cameras for settings I use regularly and I definitely photograph birds in flight regularly. Here are my default settings for birds in flight that I save to C1 and on my EM1X I also assign this to a quick button so that I can change my settings super quickly!
Settings:
f/4, 1/1600s, ISO Auto - (If I have time I take control of ISO and change my Shutter to suit the species)
C-AF(MF), 5x5 Focus Grid
Menu - Cam1 - Reset Custom Modes - Assign to Custom Mode - C1 (Image 5.1)
Menu - Cog - B1 - Fn - C1 (Image 5.2)
Image 5.1

Image 5.2
I hope you found these tips useful and can apply them to your workflow in the field for wildlife photography. If you want to dive deeper into how I setup my OM System cameras for wildlife photography and video check out my course!