
Dovre Muskox - 2023 | Gear, Photos and Settings
My First try of the M.Zuiko 150-400mm f/4.5
A fantastic trip to Dovre in January 2023 where I was joined by Gunnar Dresler, Oddbjørn Austevik and Trond Westby to photograph the muskox in the snow. A cabin trip with good company and 3 days of wildlife photography, I can’t think of a better way to kick off the year!

Espen, Gunnar, Trond and Oddbjørn (photo by Oddbjørn)
In this post you can check out the various images that I took from the trip along with the gear and settings I used. Along with photos of the muskox I’ve also included some landscape images as I explored using the M.Zuiko 150-400mm f/4.5 lens. This was the first time I got to try out the mighty lens from OM System and I can definitely say that it didn’t disappoint.
Day 1 Photographing the muskox at Dovre

OM-1, 150-400mm, 188mm, f/5.6, 1/125s, ISO 800
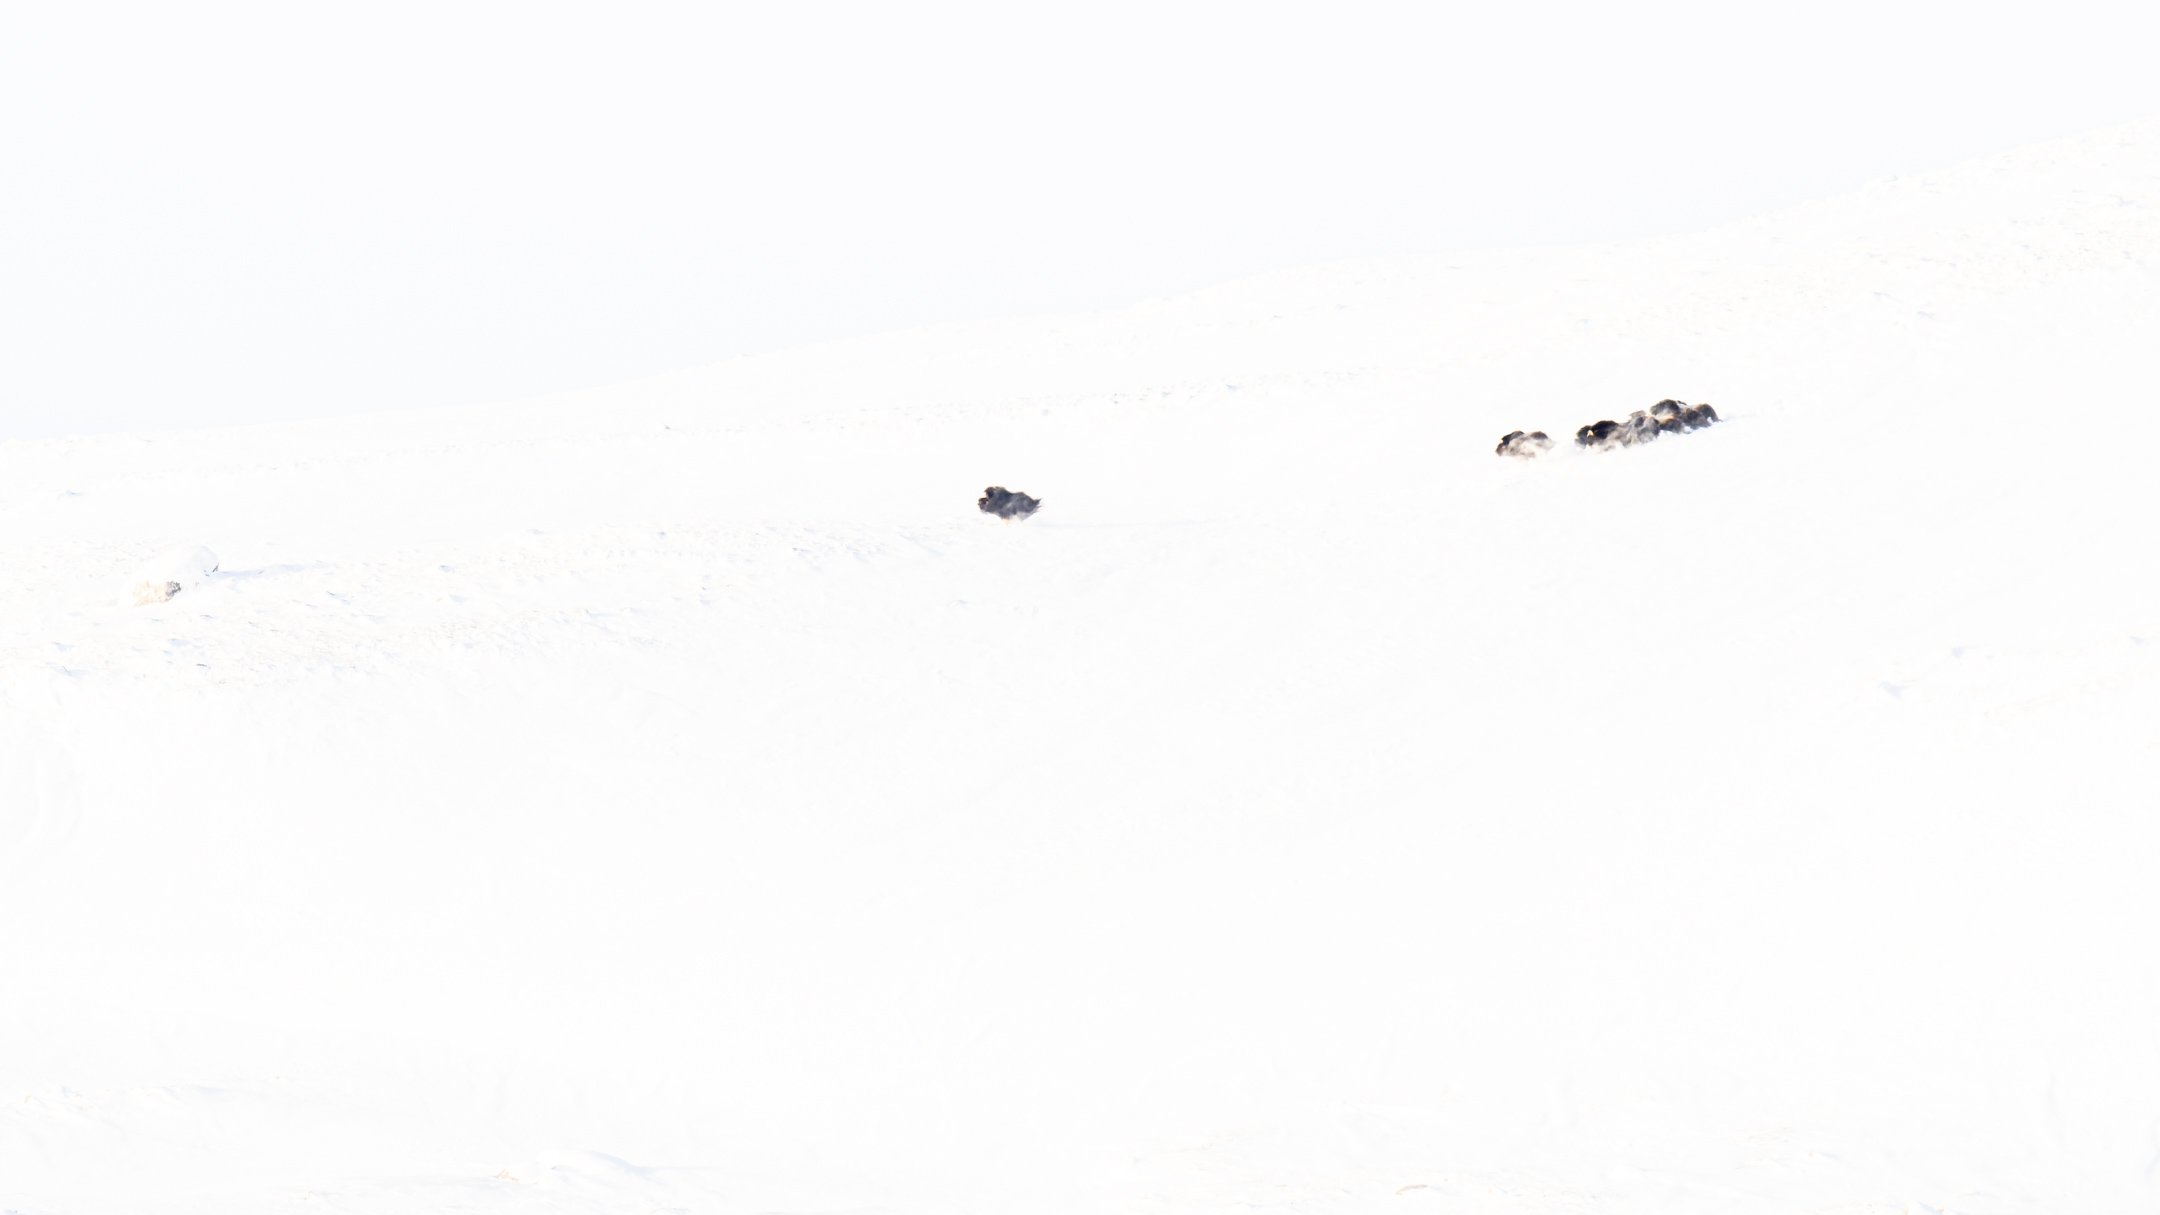
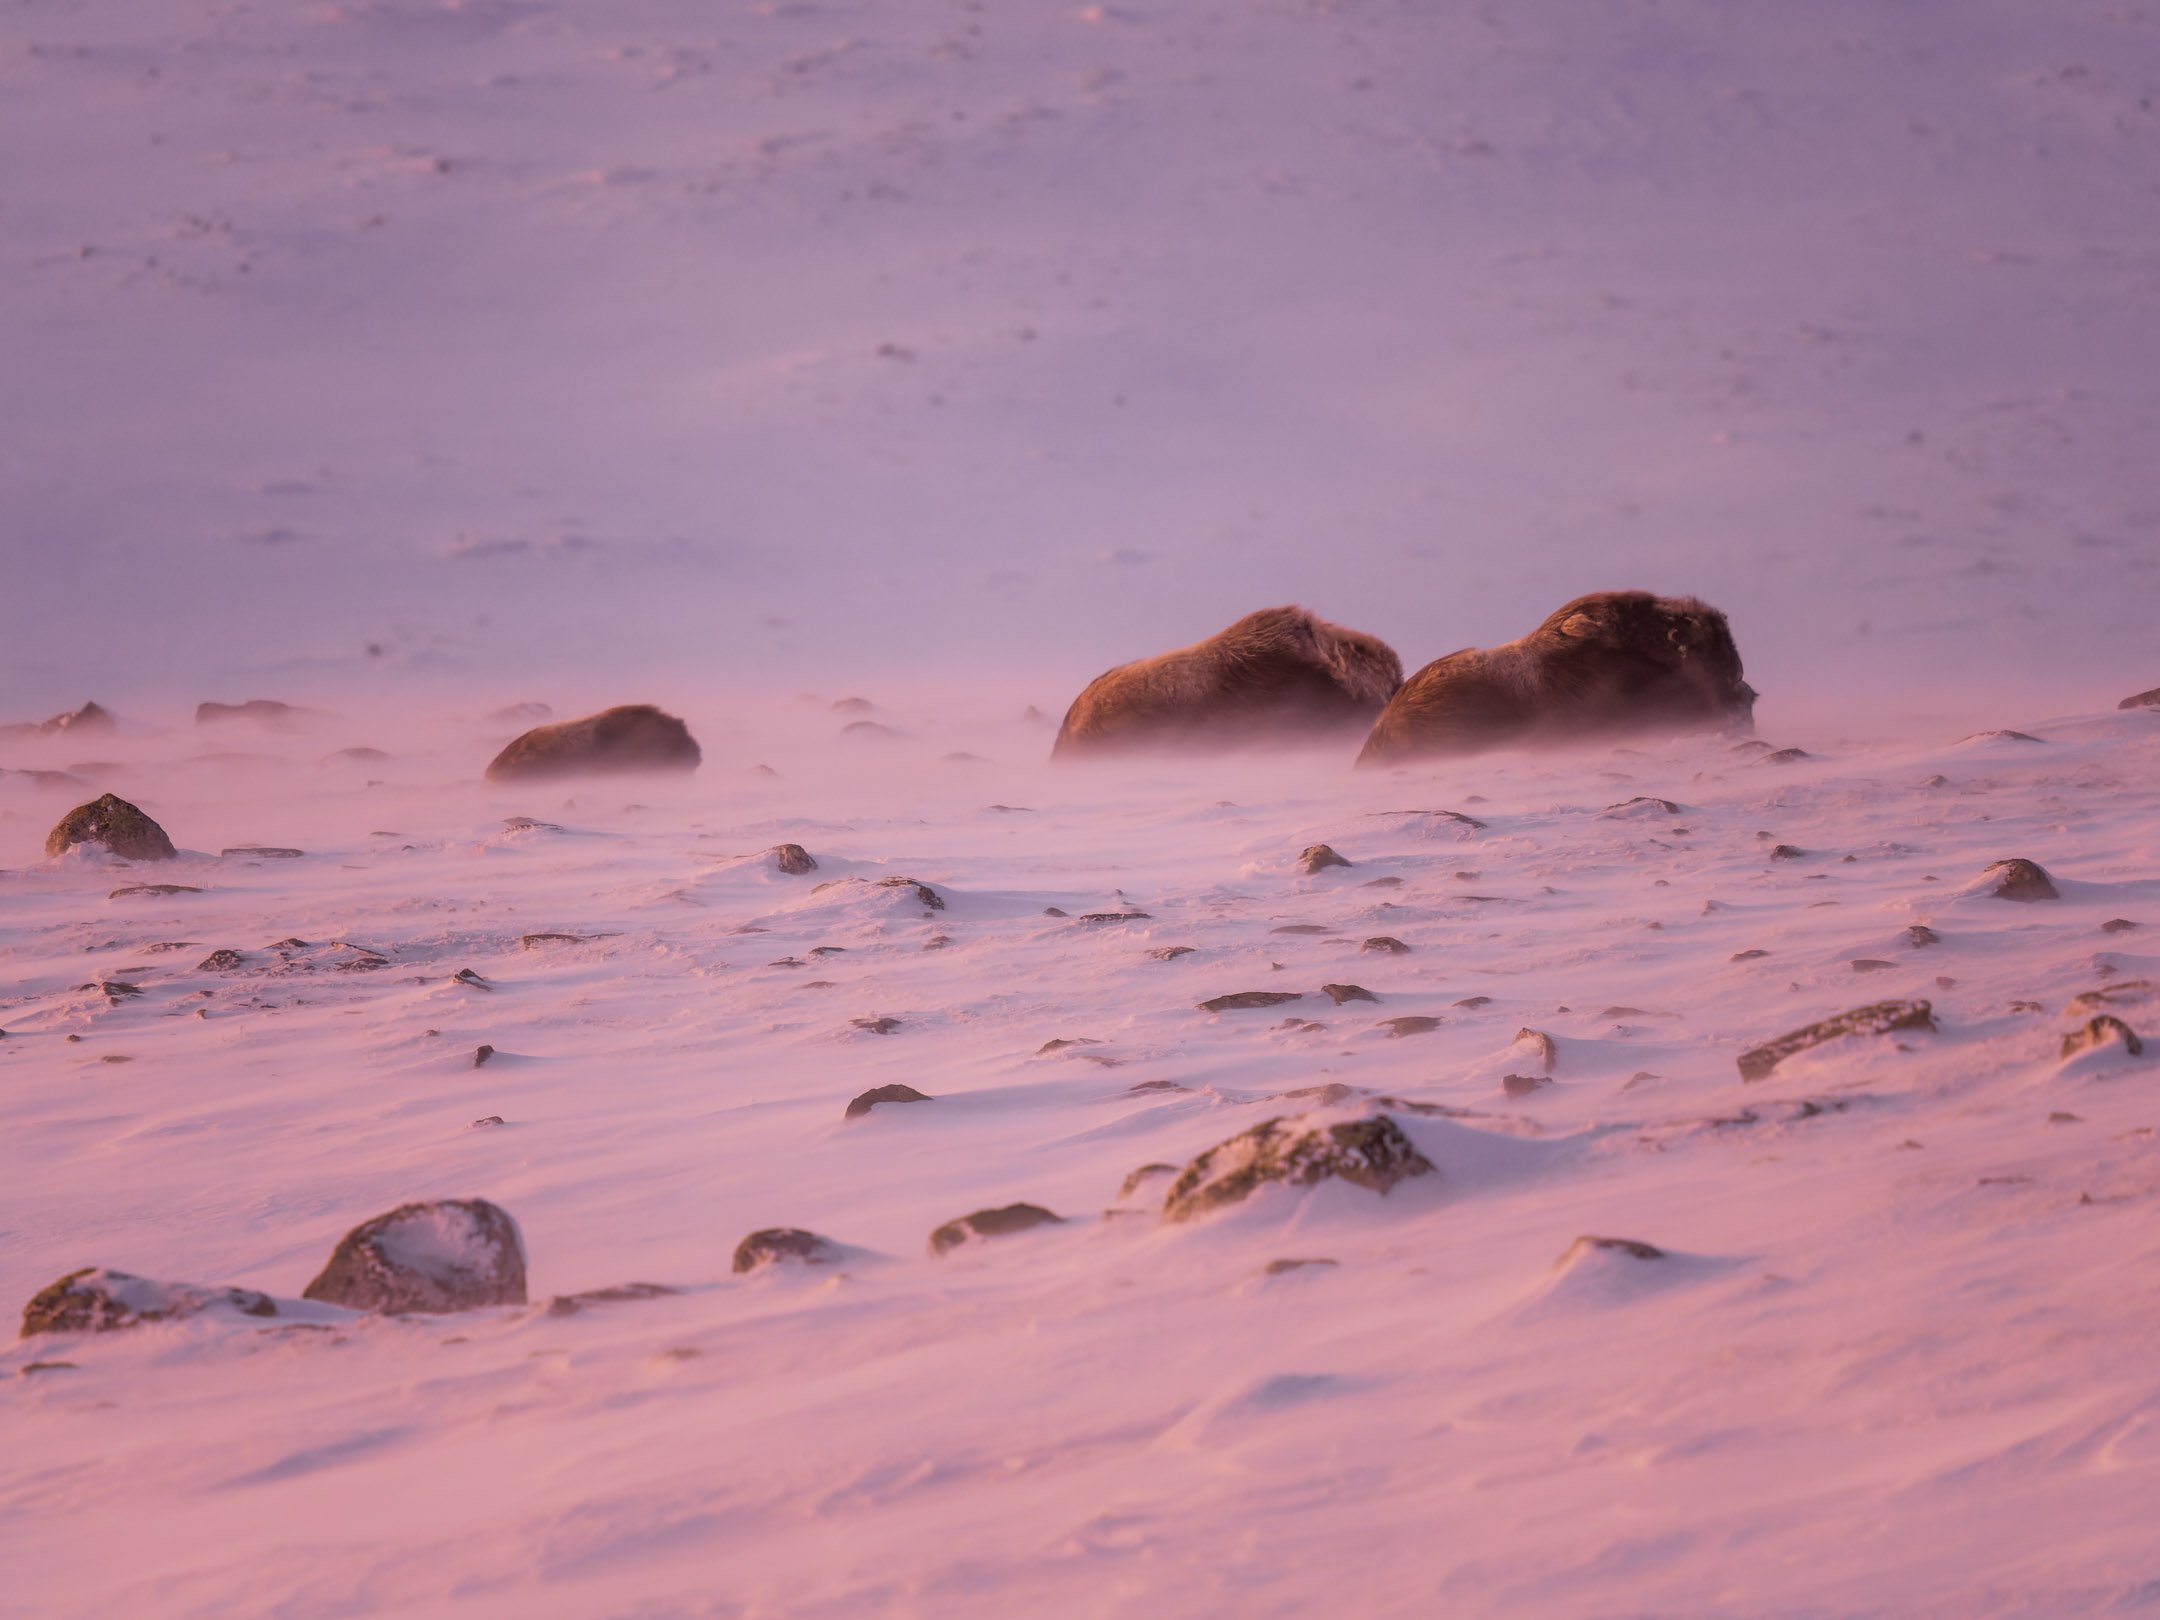
Just as we were about to give up we came across two muskox on the first day. With less than an hour left until sunset we had no time to lose and I immediately got out my OM-1 with the M.Zuiko 150-400mm f/4.5 attached and made an image of the two animals from far away.
Instead of zooming in I decided to go for a wider view and show the tree covered hill in the background.
I really like to show the animals in their environment, so for my second image I used the 40-150mm f/2.8 to go even wider and show more of the mountains and the sky in the background.
On this trip I didn’t use the 40-150mm f/2.8 very much. This was probably a combination of the novelty of having the 150-400mm for the first time and the fact that a lot of the time we were far away from the animals, and 150mm was wide enough to include the environment.

OM-1, 40-150mm f/2.8, 67mm, f/7.1, 1/125s, ISO 400

OM-1, 150-400mm, 500mm, f/5.6, 1/100, ISO 1600

OM-1, 150-400mm, 438mm, f/8, 1/50s, ISO 1600

OM-1, 150-400mm, 459mm, f/5.6, 1/100, ISO 1600
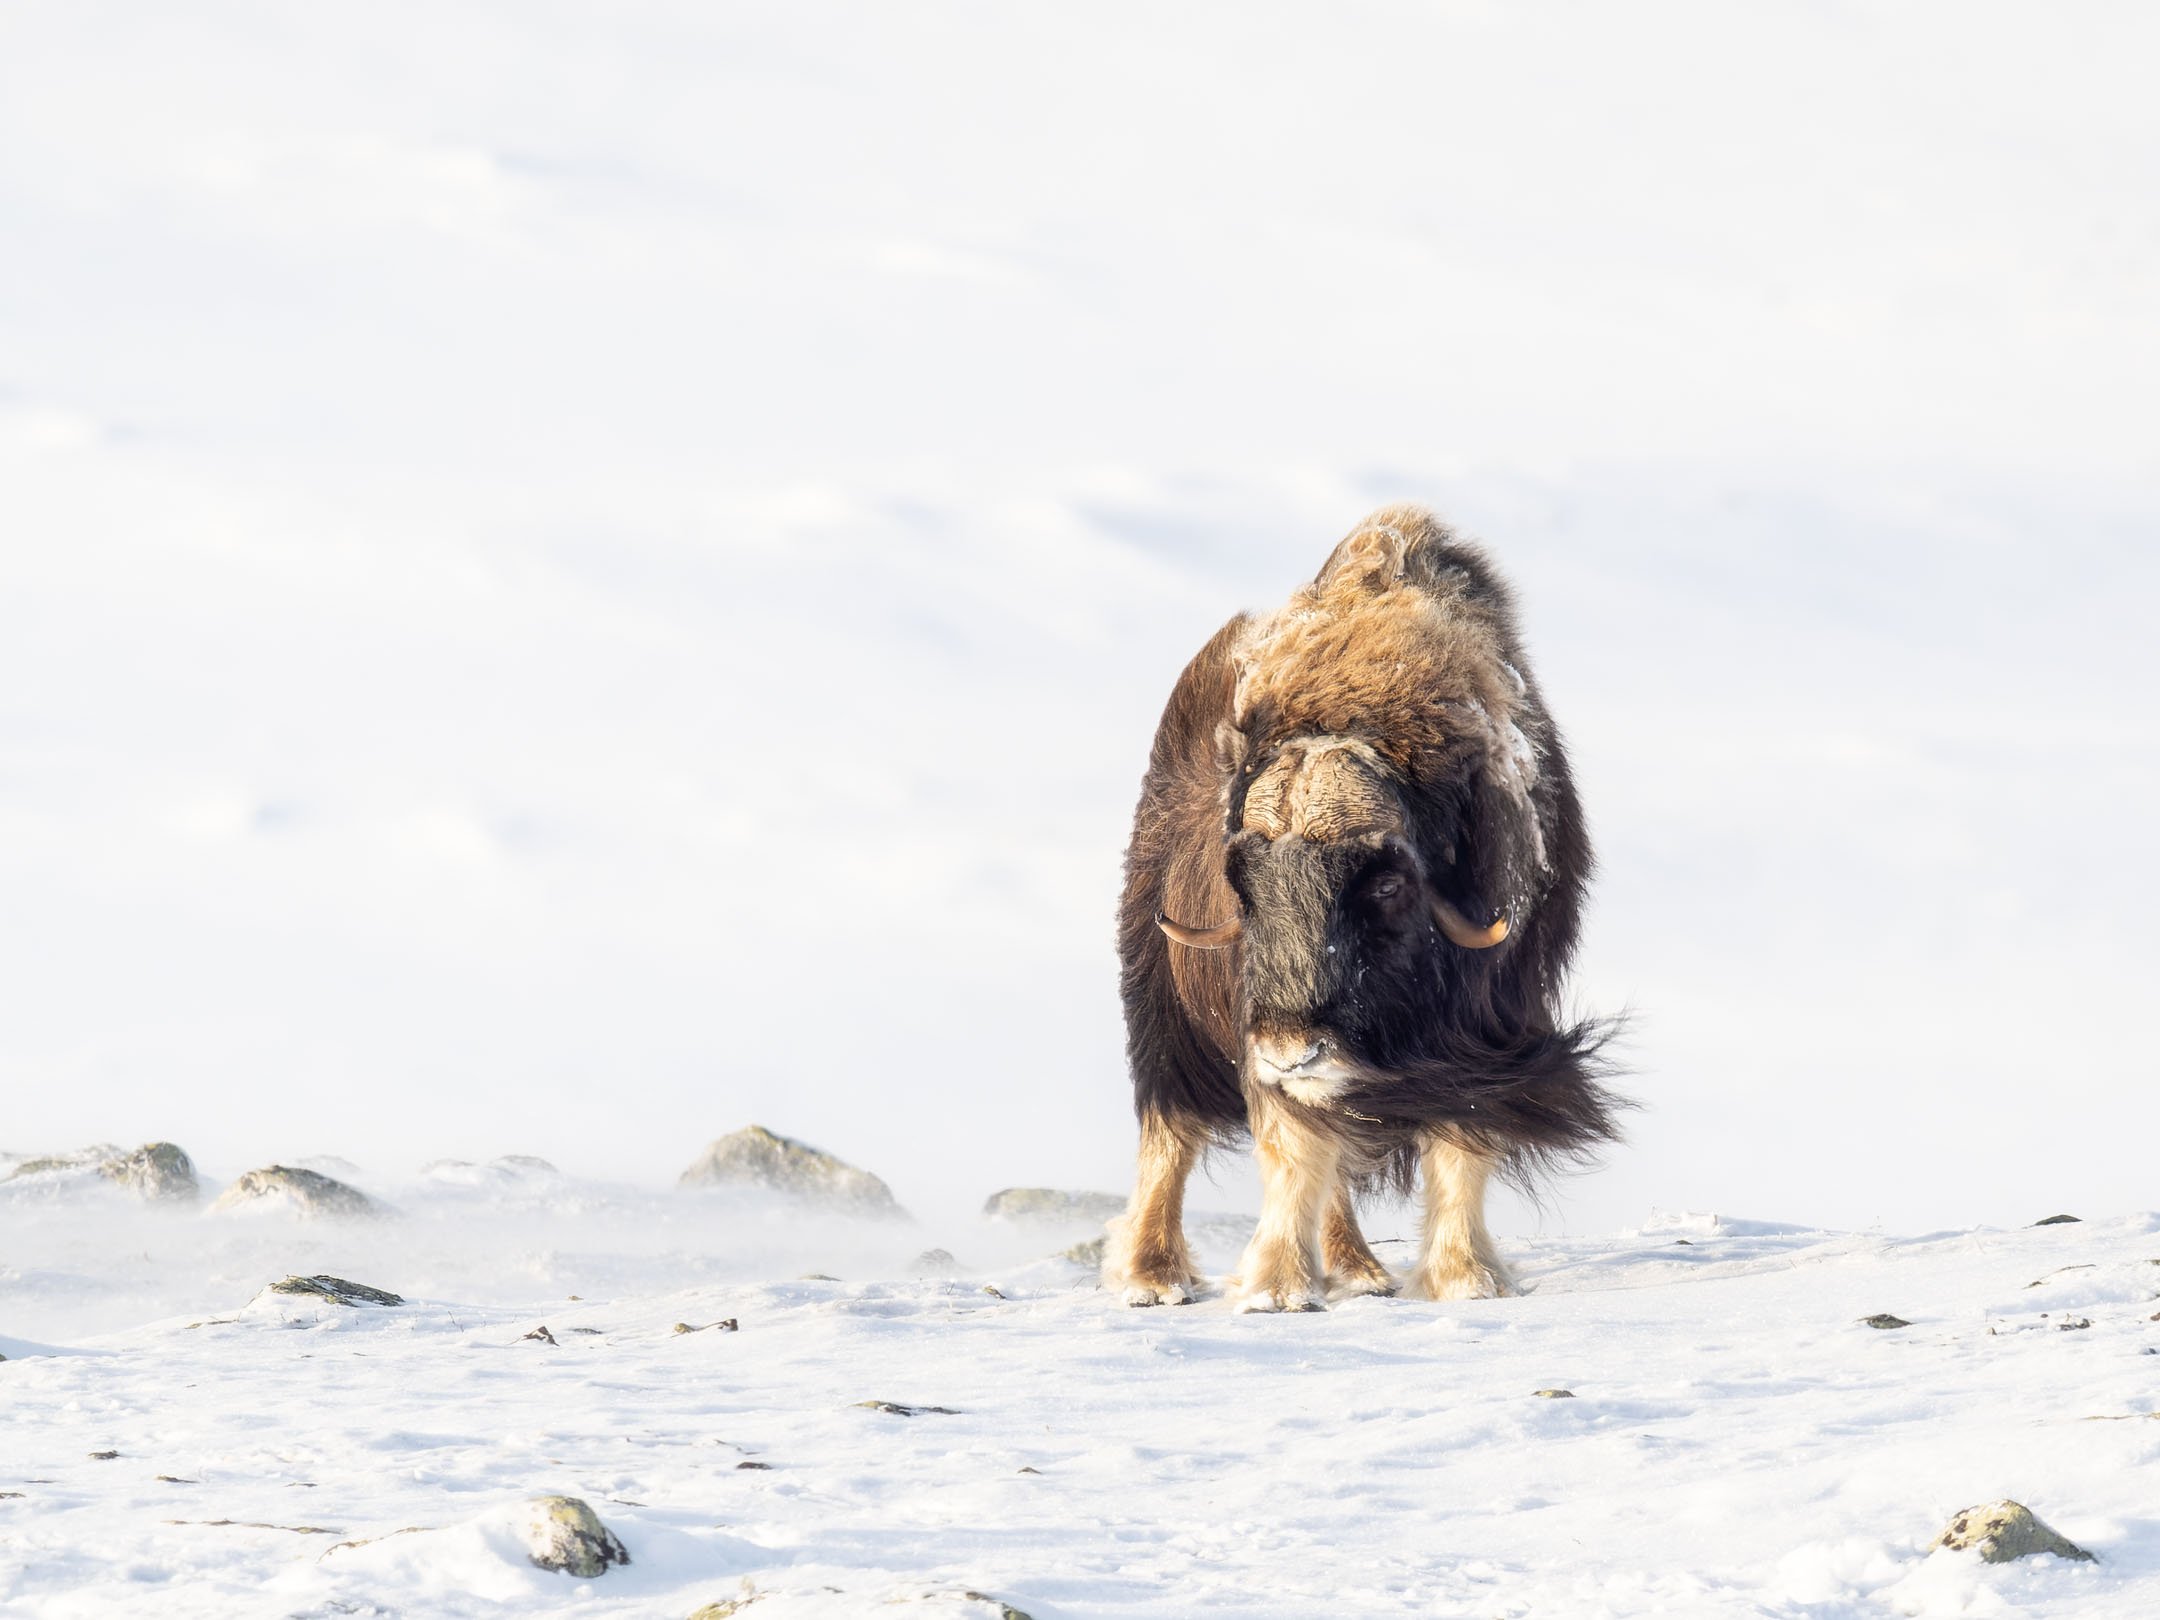
Although we were short on time with dusk approaching quickly we still had to move slowly so as not to disturb the animals. We moved in a large arch around the muskox to attempt the get the pink and orange skies behind the them.
As we got a bit closer I tried to use a higher f-stop to create more depth of field. I really wanted to get more of the animal sharp and show their spectacular wholly fur.

OM-1, 150-400mm, 500mm, f/5.6, 1/200, ISO 3200
Losing light quickly though, I soon found myself photographing with a wide open f-stop again. With the 150-400mm that means f/4.5 at 400mm or less and f/5.6 when using the 1.25x built in teleconverter with a maximum reach of 500mm.

OM-1, 150-400mm, 500mm, f/5.6, 1/160, ISO 5000
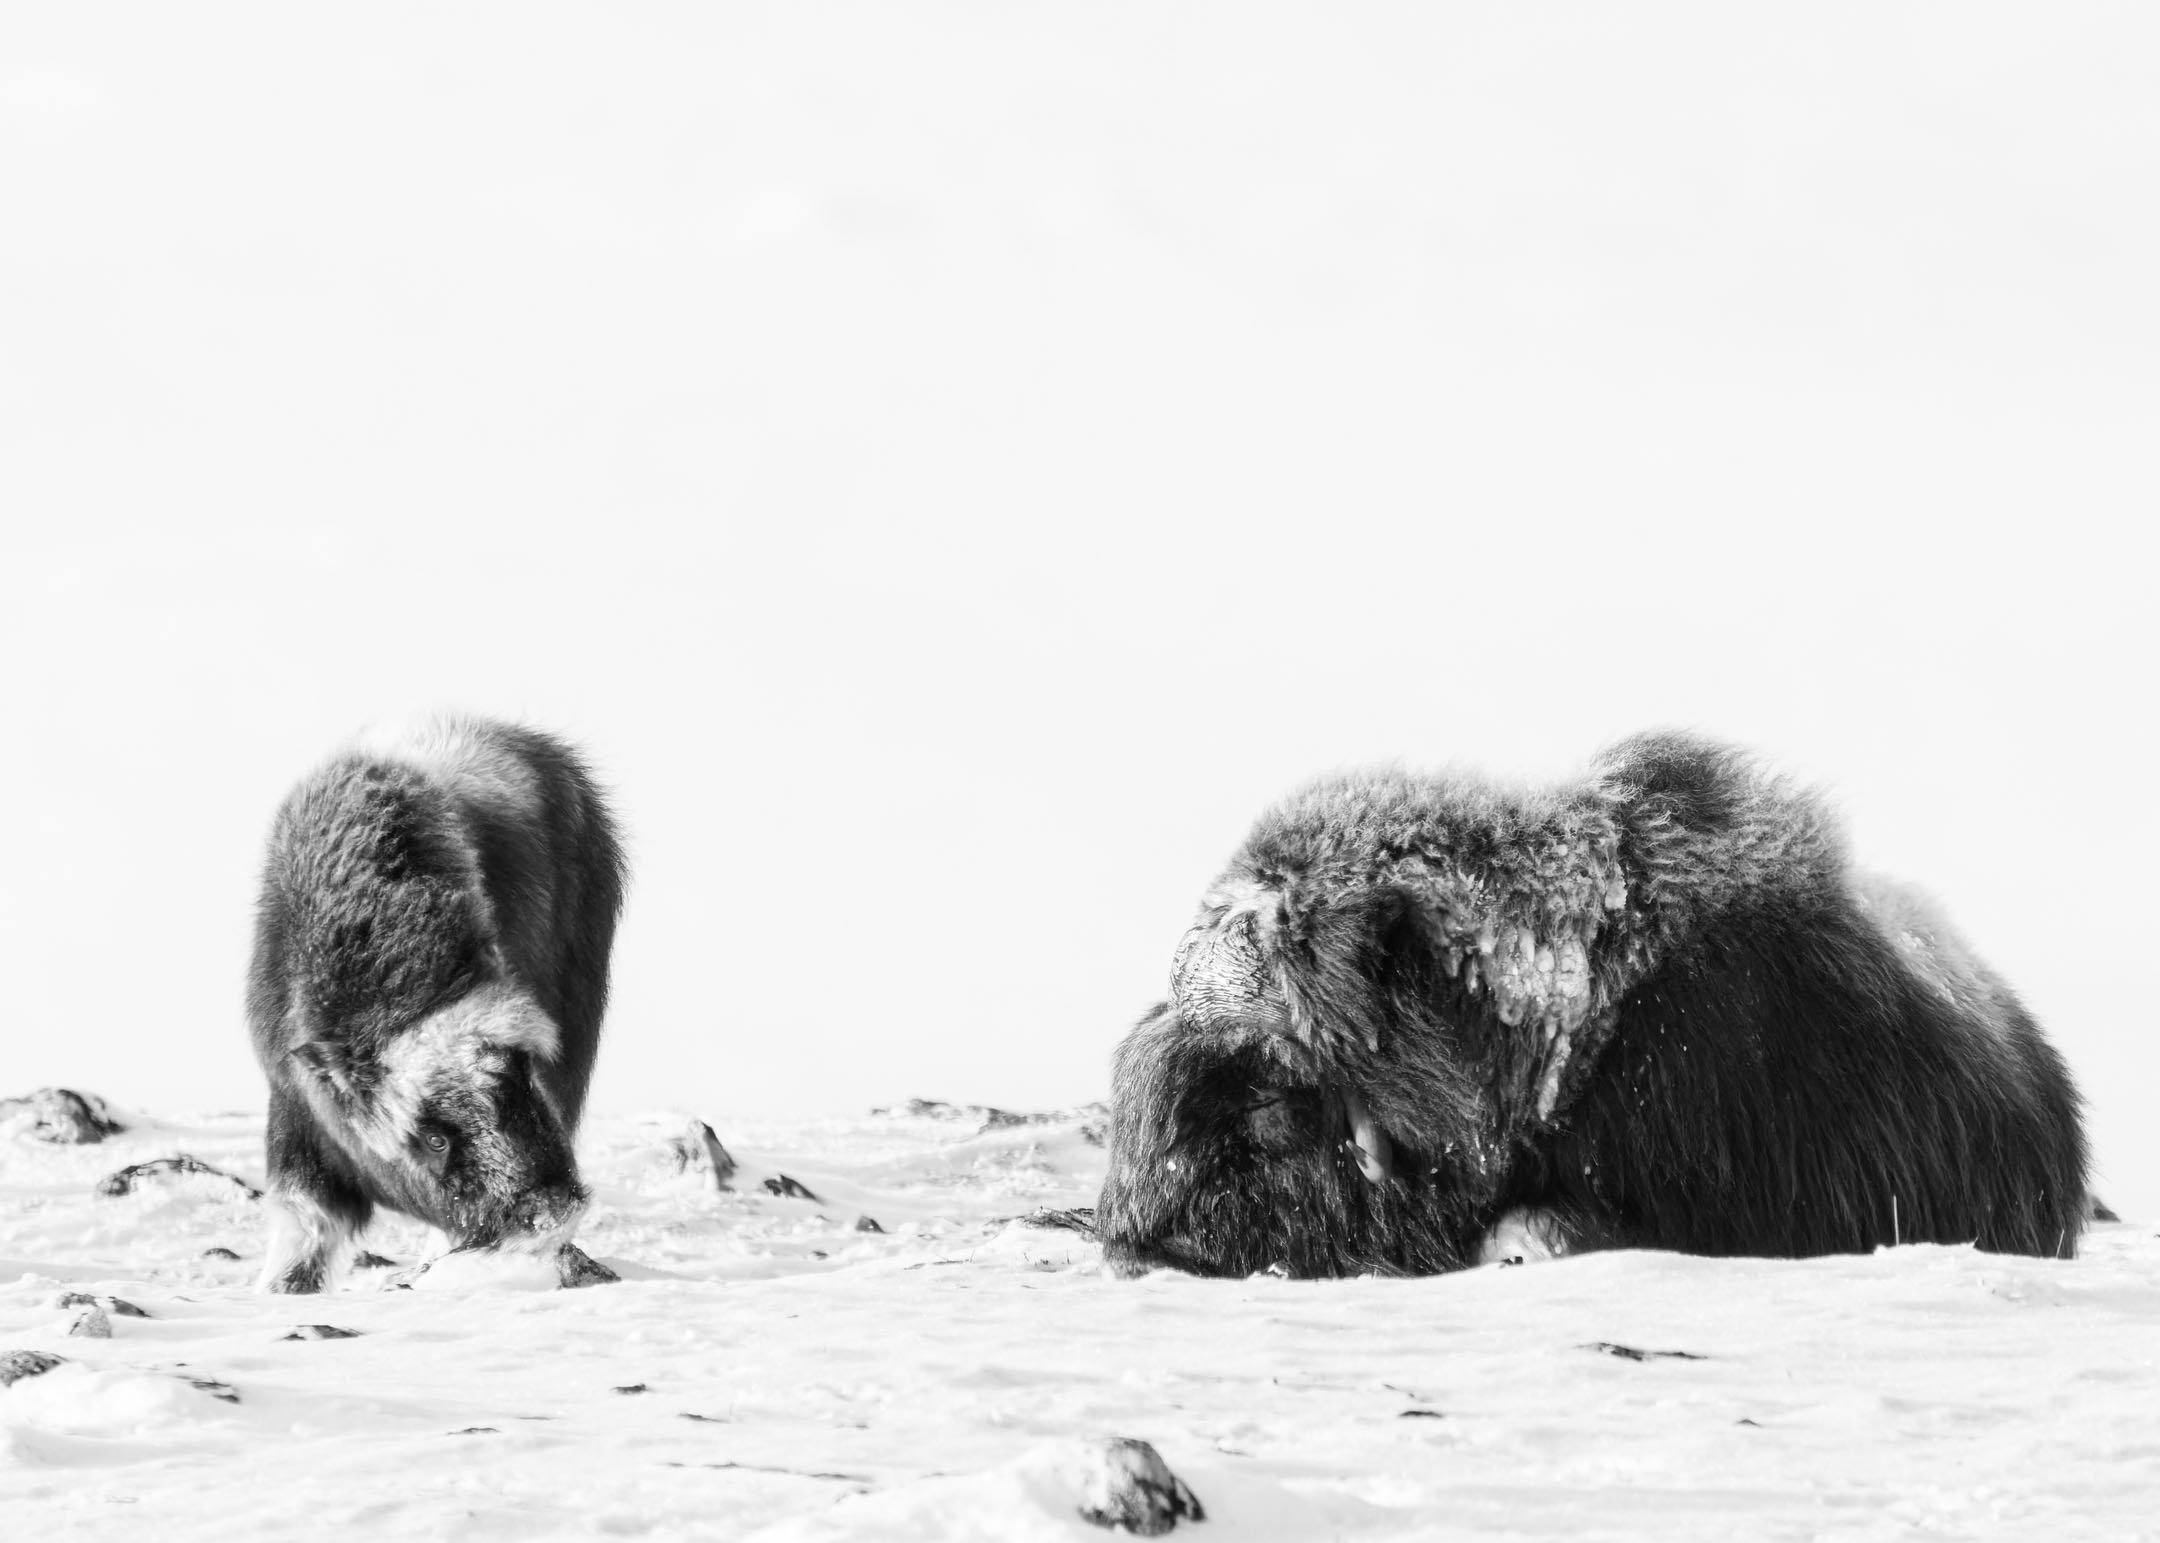
When we first came across the muskox they were sitting still which meant I could use a slow shutter speed to keep my ISO as low as possible. However, as they started to feed and move about I had to increase my shutter speed to freeze the movement of the muskox and was forced to push the ISO higher as well.

OM-1, 150-400mm, 150mm, f/4.5, 1/200, ISO 3200

OM-1, 150-400mm, 150mm, f/4.5, 1/100, ISO 4000

OM-1, 150-400mm, 256mm, f/4.5, 1/100, ISO 4000
On Post-processing
I have used Topaz for a long time as part of my post processing, especially for images taken at higher ISO to reduce noise. However, I’ve noticed that with some of the recent updates I haven’t been too happy with the results I’ve seen so I decided to try a free trial of DxO Pure Raw 2.
Comparing them side by side, to my eyes it looked like both programs reduce noise excellently, but I think DxO looks a bit more natural.
DxO kindly provided me with their products and I even got an early copy of Pure Raw 3 so now Pure Raw is my default first stop for images I edit and I’ve also really enjoy trying out Nik Collection 5, especially Color Efex Pro 5 after some Lightroom edits and Silver Efex Pro 3 for some of my black and white conversions.
Try out DxO free for 30 days to see what you think. DxO constantly gives some excellent promotional deals, so if you like it keep an eye out for a good deal!

RAW file

After DxO Pure Raw 3
I usually always expose to the right, meaning I capture the brightest image I can without clipping the highlights. For the muskox I thought this was even more important as their dark fur absorbs so much light.
First step in post-processing was then to run it through DxO Pure Raw 3. Then I darkened parts of the image to make it look more like what I saw, and most importantly bring back the stunning colours of the sky.
I needed to be careful not to make the muskox look fake, but as you can see the brightness of the animal is almost the same throughout the post-processing steps.

Final image after post processing
OM System for Wildlife Photography Course
Check out my course if you want to learn more about how I expose my images as well as my settings setup and approach to wildlife photography using the OM System.


OM-1, 150-400mm, 244mm, f/8, 1/60, ISO 1600
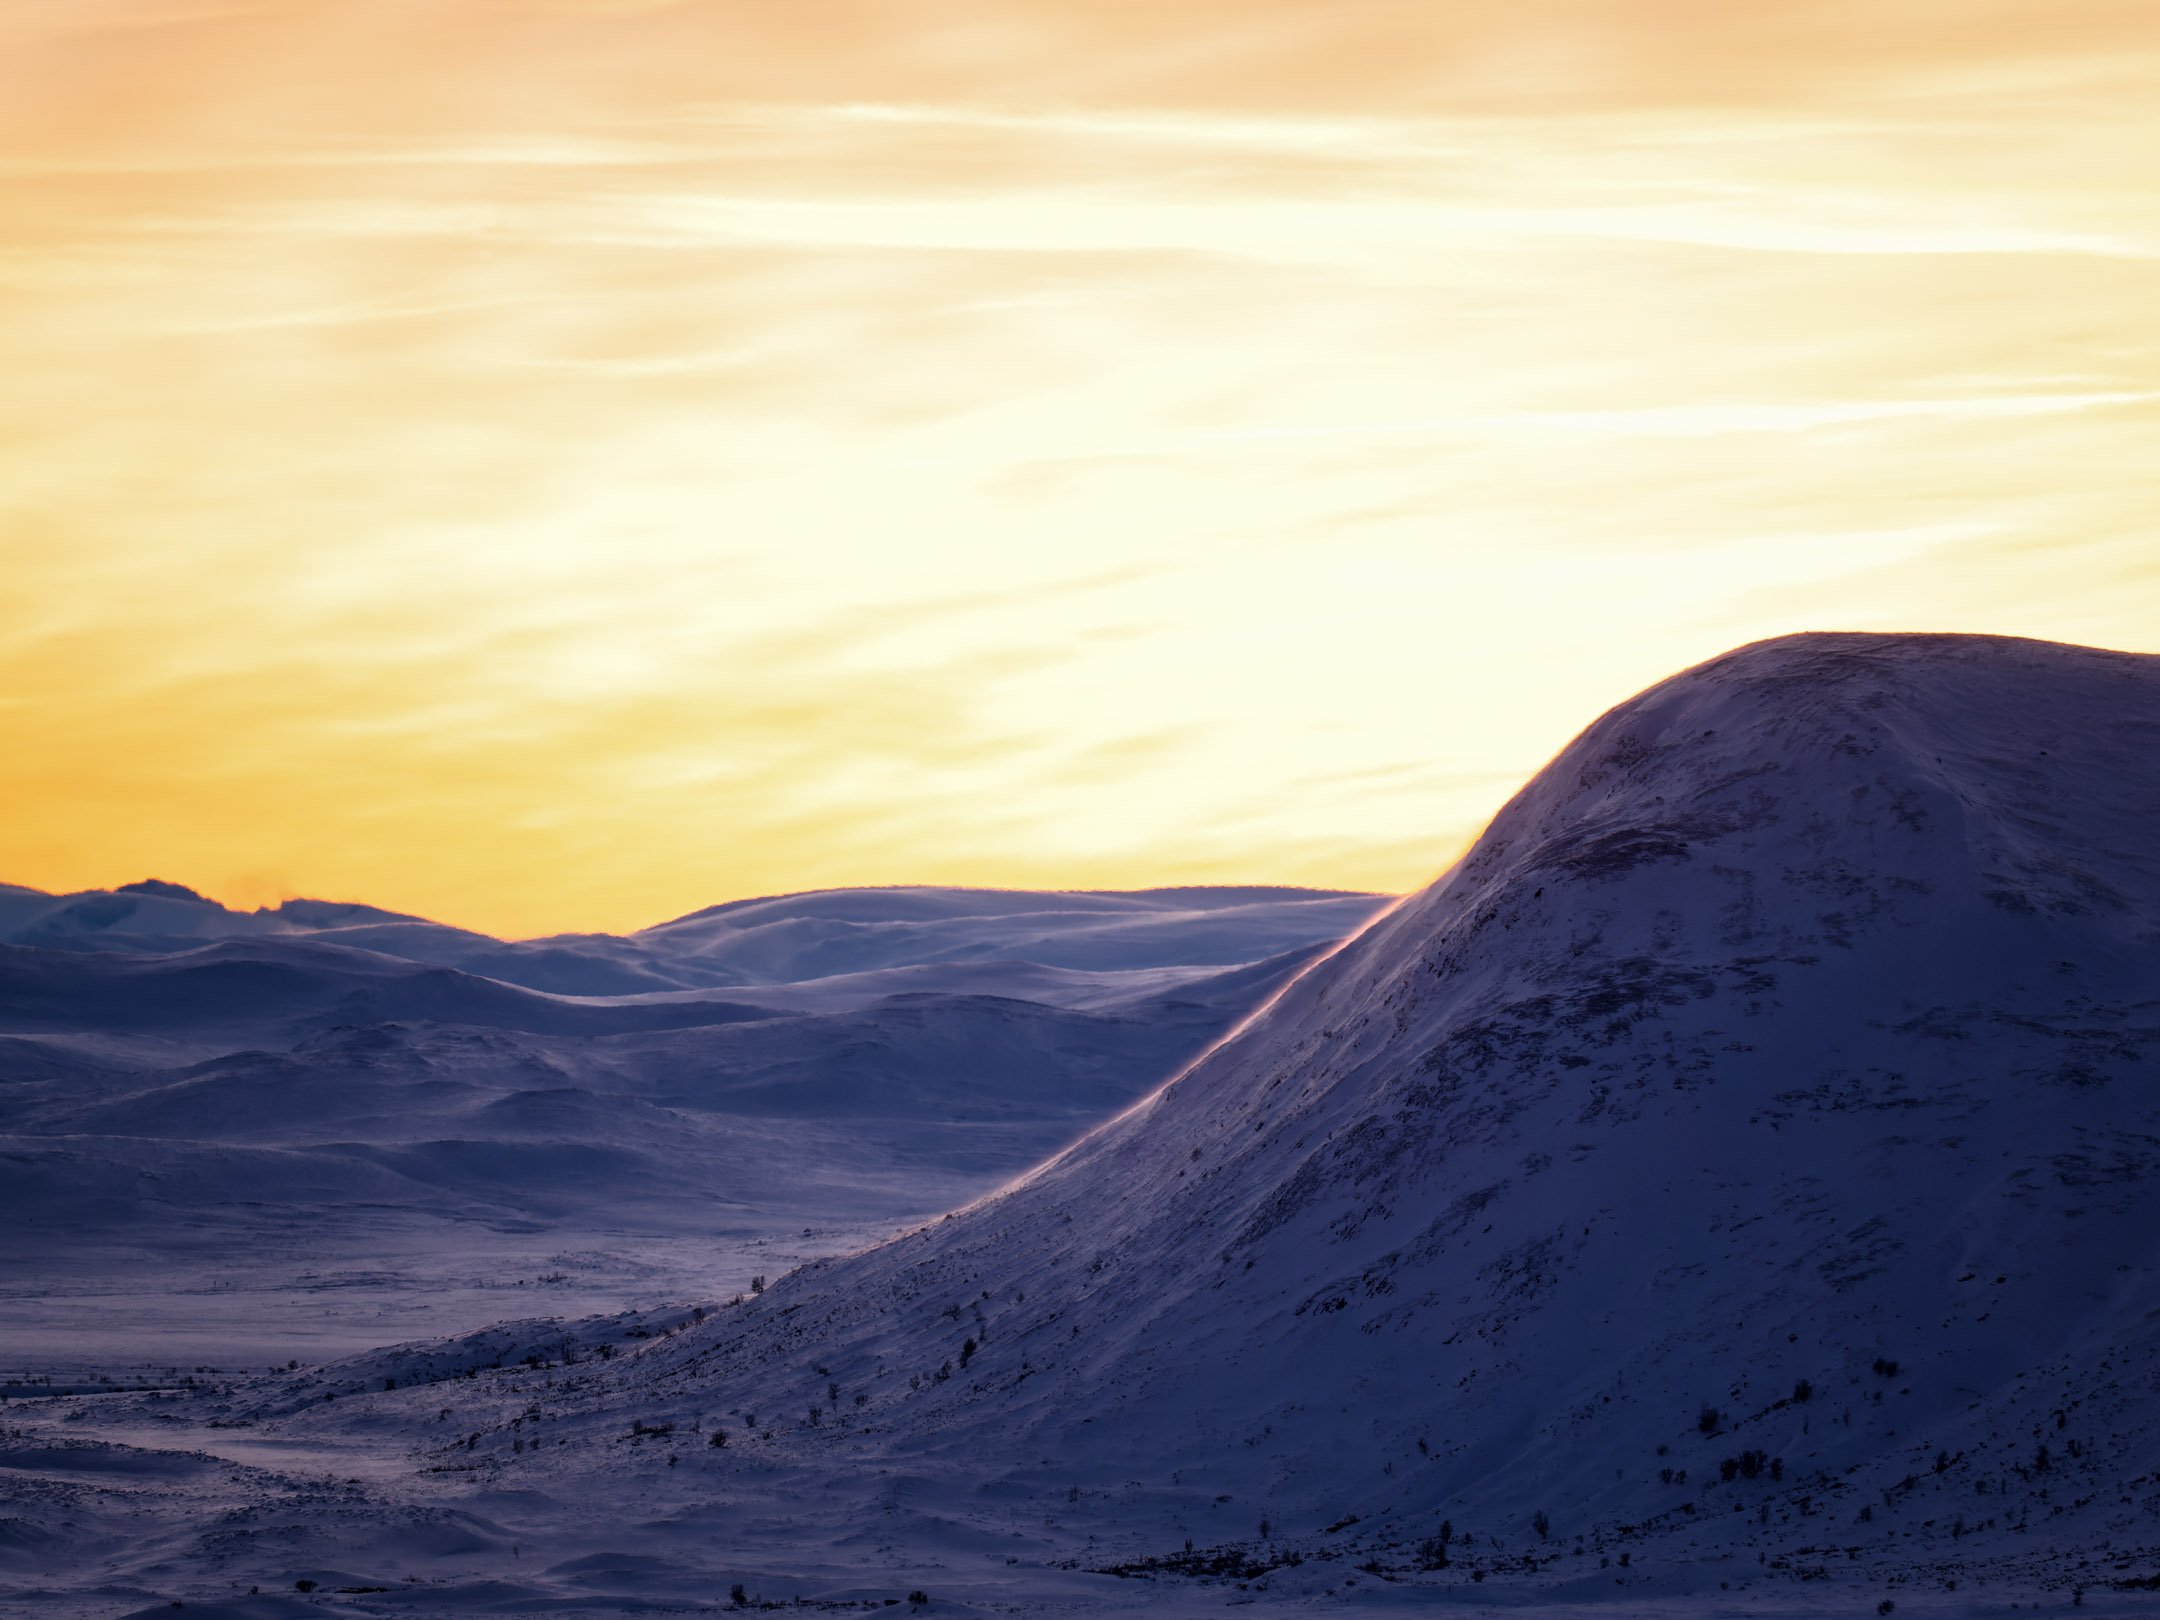
When the scenery looks like this I can’t help but try a little landscape photography as well!

OM-1, 150-400mm, 188mm, f/5.6, 1/125, ISO 3200
I often don’t know where to start when editing a landscape image as I rarely take them, so I decided to try out Color Efex Pro 5 to see if I could add something extra to the images.
A few simple clicks and small adjustment on a few sliders and I think both images stands out a bit more after using Colour Efex Pro 5. What do you think?

After my Lightroom edits

After my Lightroom edits

After final touches in Color Efex Pro 5

After final touches in Color Efex Pro 5
Day 3 Photographing the muskox at Dovre

OM-1, 150-400mm, 150mm, f/9, 1/800, ISO 800
Incase you’re wondering day two wasn’t very good for photography as the muskox was quite sedentary. On day three however, I became completely transfixed by the 8 muskox walking along a ridge high above us and spent a lot of time capturing them in various compositions to include the landscape and the rocky cliffs below them.

OM-1, 150-400mm, 500mm, f/9, 1/400, ISO 800
When I saw they started to run and kick up snow as they went I zoomed in it at 500mm and went for some high key images.
OM-1, 150-400mm, 500mm, f/9, 1/400, ISO 800

OM-1, 150-400mm, 500mm, f/9, 1/640, ISO 800
This year I’ve decided to put some time into learning and it was while watching David Yarrow’s Masters of Photography class that I was inspired to turn some of my images into black and white. It was also while watching David’s series on photographing the bison that I decided to photograph the muskox with a higher f-stop to get more detail in the fur.
I can highly recommend both David Yarrow's and Paul Nicklen’s courses on Masters of Photography, lots of knowledge and inspiring stories.

OM-1, 150-400mm, 500mm, f/9, 1/640, ISO 800 | Converted to Black and White with Silver Efex Pro 3
It got very cold when the wind picked up at the end of the day, but I don’t think any of us minded as the photography just got better and better. Getting the motion in the fur of the muskox was something I really wanted to capture so I was ecstatic when one of the males got up and started to walk in our direction with the wind coming in from the side.
OM-1, 150-400mm, 500mm, f/9, 1/640, ISO 800
For a little while I also experimented with the 1.4x teleconverter which gave me a total of 700mm reach!
OM-1, 150-400mm + 1.4x, 700mm, f/9, 1/500, ISO 1000

OM-1, 150-400mm, 373mm, f/9, 1/500, ISO 800

OM-1, 150-400mm + 1.4x, 560mm, f/9, 1/640, ISO 800

OM-1, 150-400mm, 373mm, f/9, 1/500, ISO 800
Most of the time the muskox were not doing much and we would sit and wait for something to happen. Later in the day when the light got good I used these times to take some landscape images of the stunning scenery. It was handy to be vlogging with my OM-5 with the M.Zuiko 12-40mm f/2.8 attached and I could get a few frames without needing to swap lenses.

OM-5, 12-40mm f/2.8, 12mm, f/6.3, 1/60s, ISO 200

OM-1, 150-400mm, 150mm, f/4.5, 1/320s, ISO 800 | Lightroom + Color Efex Pro 5
OM-1, 150-400mm, 150mm, f/4.5, 1/320s, ISO 250 | Lightroom + Color Efex Pro 5
As the sun set the colours were incredible, at this point the muskox were lying down with their backs to the wind and I took my last image of the trip.
OM-1, 150-400mm, 234mm, f/4.5, 1/100, ISO 800
I absolutely loved my time at Dovre photographing the muskox. Going with three other talented photographers and vloggers really helps push myself further, it’s always interesting to see how other people work and the results they get. It also helps that they’re great fun to hang out with and we had lots of laughs.
If you haven’t seen the whole adventure of Dovre 2023 check out my video below and go have a look at Trond’s, Oddbjørn’s and Gunnar’s videos as well!
Can’t wait for Dovre 2024!
Gear
Mindshift ThinkTank Backlight Elite 45L
This bag gives me plenty of space for extra gear and warm clothing and I can take it as checked in luggage on my flight. Ideal for trips like this.
The HEIPI tripod is light and compact, I use it for vlogging, but also when we’re waiting for hours for the muskox to move it helps to have the camera aimed and ready.
The Tinden gloves are ideal for this environment, keeps me warm and I can control the basics of the camera with the finger caps on, but I can take off the thumb when I need to fiddle about with the menu system.
Hot Hands (hand and foot warmers)
As good as the Tinden gloves are, when I sit still in the cold for hours on end I rely on heat packs to keep me from freezing. The Vallerret smartly designs pockets in their gloves hot packs. I also get some foot warmers for my boots incase I start to get cold feet.
My Polyver Sweden boots kept me warm throughout my adventures at Dovre, even as the temperature was down to -22 C! Only on the last day when we were standing still for hours on end and the wind picked up did I have to put some heat packs in my boots.
A pair of snowshoes are essential in this kind of environment. There are lots to choose between and to be honest I don’t know much about which are better than others. I got a pair of Tubbs that were on sale and they did the job.
A good water bottle is important as I learnt the hard way. The first year at Dovre my water bottle froze shut and most of my water turned to ice. The Hydro Flask is REALLY good and though a bit expensive it’s well worth it. I went for a 946 ml (32 oz) as I’d rather not run out of water on a long day in the hills.
Some other tips for storing your water bottle in the cold is to keep it inside your bag and upside down so that if the water freezes, it does so from the bottom.