


The Pro Capture feature on the Olympus is kind of like the Flux Capacitor in Doc’s flying DeLorean. ‘It’s what makes time travel possible’ (note, you must be yay old to get this). Though not quite a time machine, it does allow you to capture frames from before you fully press the shutter button on your camera. That is why pro capture is so excellent for capturing birds in flight.
Pro Capture works by continuously taking images when you half-press the shutter, but only saving them in temporary memory. If you let go of the shutter button, these images get deleted. If you fully press the shutter button it saves these images, and more if you keep holding the shutter down.
In this post, we’ll dive into how to set up the Pro Capture High and Low and why you might want to change the settings depending on the situation. I’ll also show you the other settings I use for Pro Capture and how I save them all as a preset on my Olympus O-MD E-M1 ii so that I’m ready to use the feature with a quick turn of the Mode Dial in the field.
I’m using the Olympus OM-D E-M1 Mark ii, but I believe it’s similar if not exactly the same for the E-M1 iii and E-M1X. To find out more about the tools I use, check out My Gear for Wildlife Photography.
Pro Capture Low allows for a total of 18fps (frames per second), with a max of 35 frames taken before pressing the shutter button (pre shutter), and an unlimited number of frames if you keep holding the shutter button. So if you use 18 fps with 35 frames taken pre shutter, you almost go back 2 seconds (36fps would be 2 seconds pre shutter).
Pro Capture High allows for a total of 60fps, with a max of 35 frames taken pre shutter and 64 after for a total of 99 frames. That means if you use 60fps with 35 frames taken pre shutter you would capture action just over 1/2 second before you pressed the shutter. For fast-flying birds, 60fps will give you the highest chance of capturing unique and cool wing formations with plenty of frames to choose from in post.
But do you really need all these frames? Most likely not.
Ideally, I would always use Pro Capture High as it gives me the most amount of frames per second and therefore a better chance of capturing an image where the bird is sharp and the wing action looks the best. However, as you can’t use continuous focus with the High feature there are many times I prefer to use Pro Capture Low.
Most of the time, I use Pro Capture High when I’m waiting for stationary birds to take to flight and I use Pro Capture Low when capturing birds already in flight.
When using the High feature and the bird is unlikely to move before flying, I will pre-focus on the bird, re-compose, and start half-pressing the shutter. I’ll often use a tripod for this as I did for photographing great spotted woodpeckers flying out from their nesting hole.
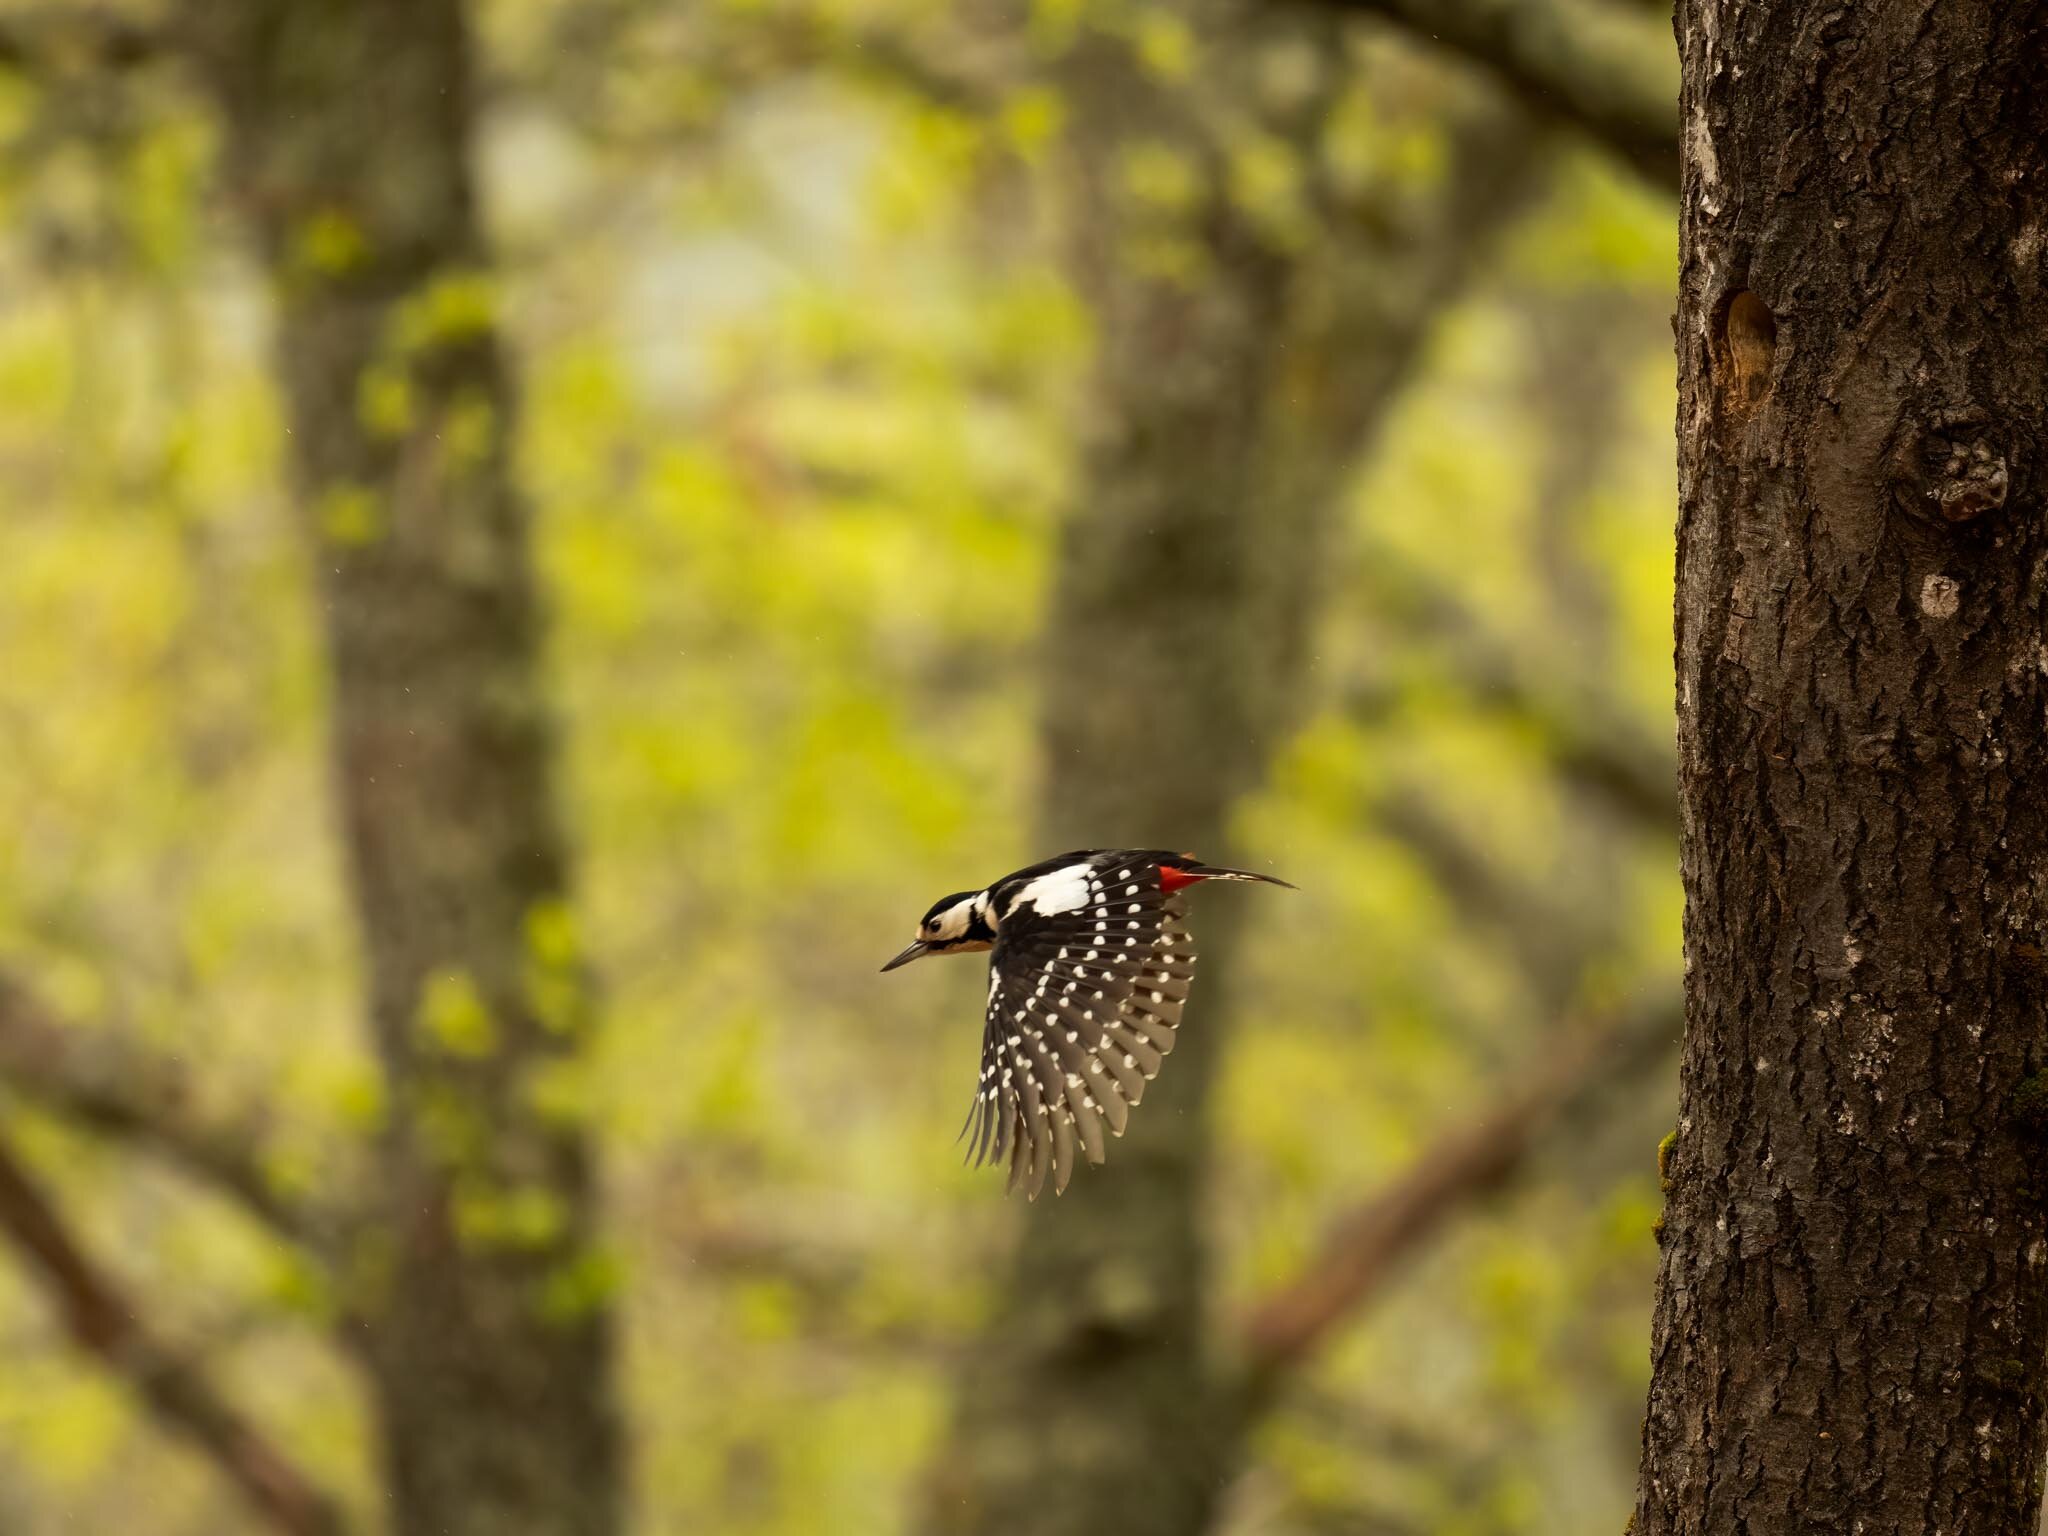
Male great spotted woodpecker in flight E-M1 ii, 300mm, f/4, 1/1600s, ISO 640, Pro Capture High
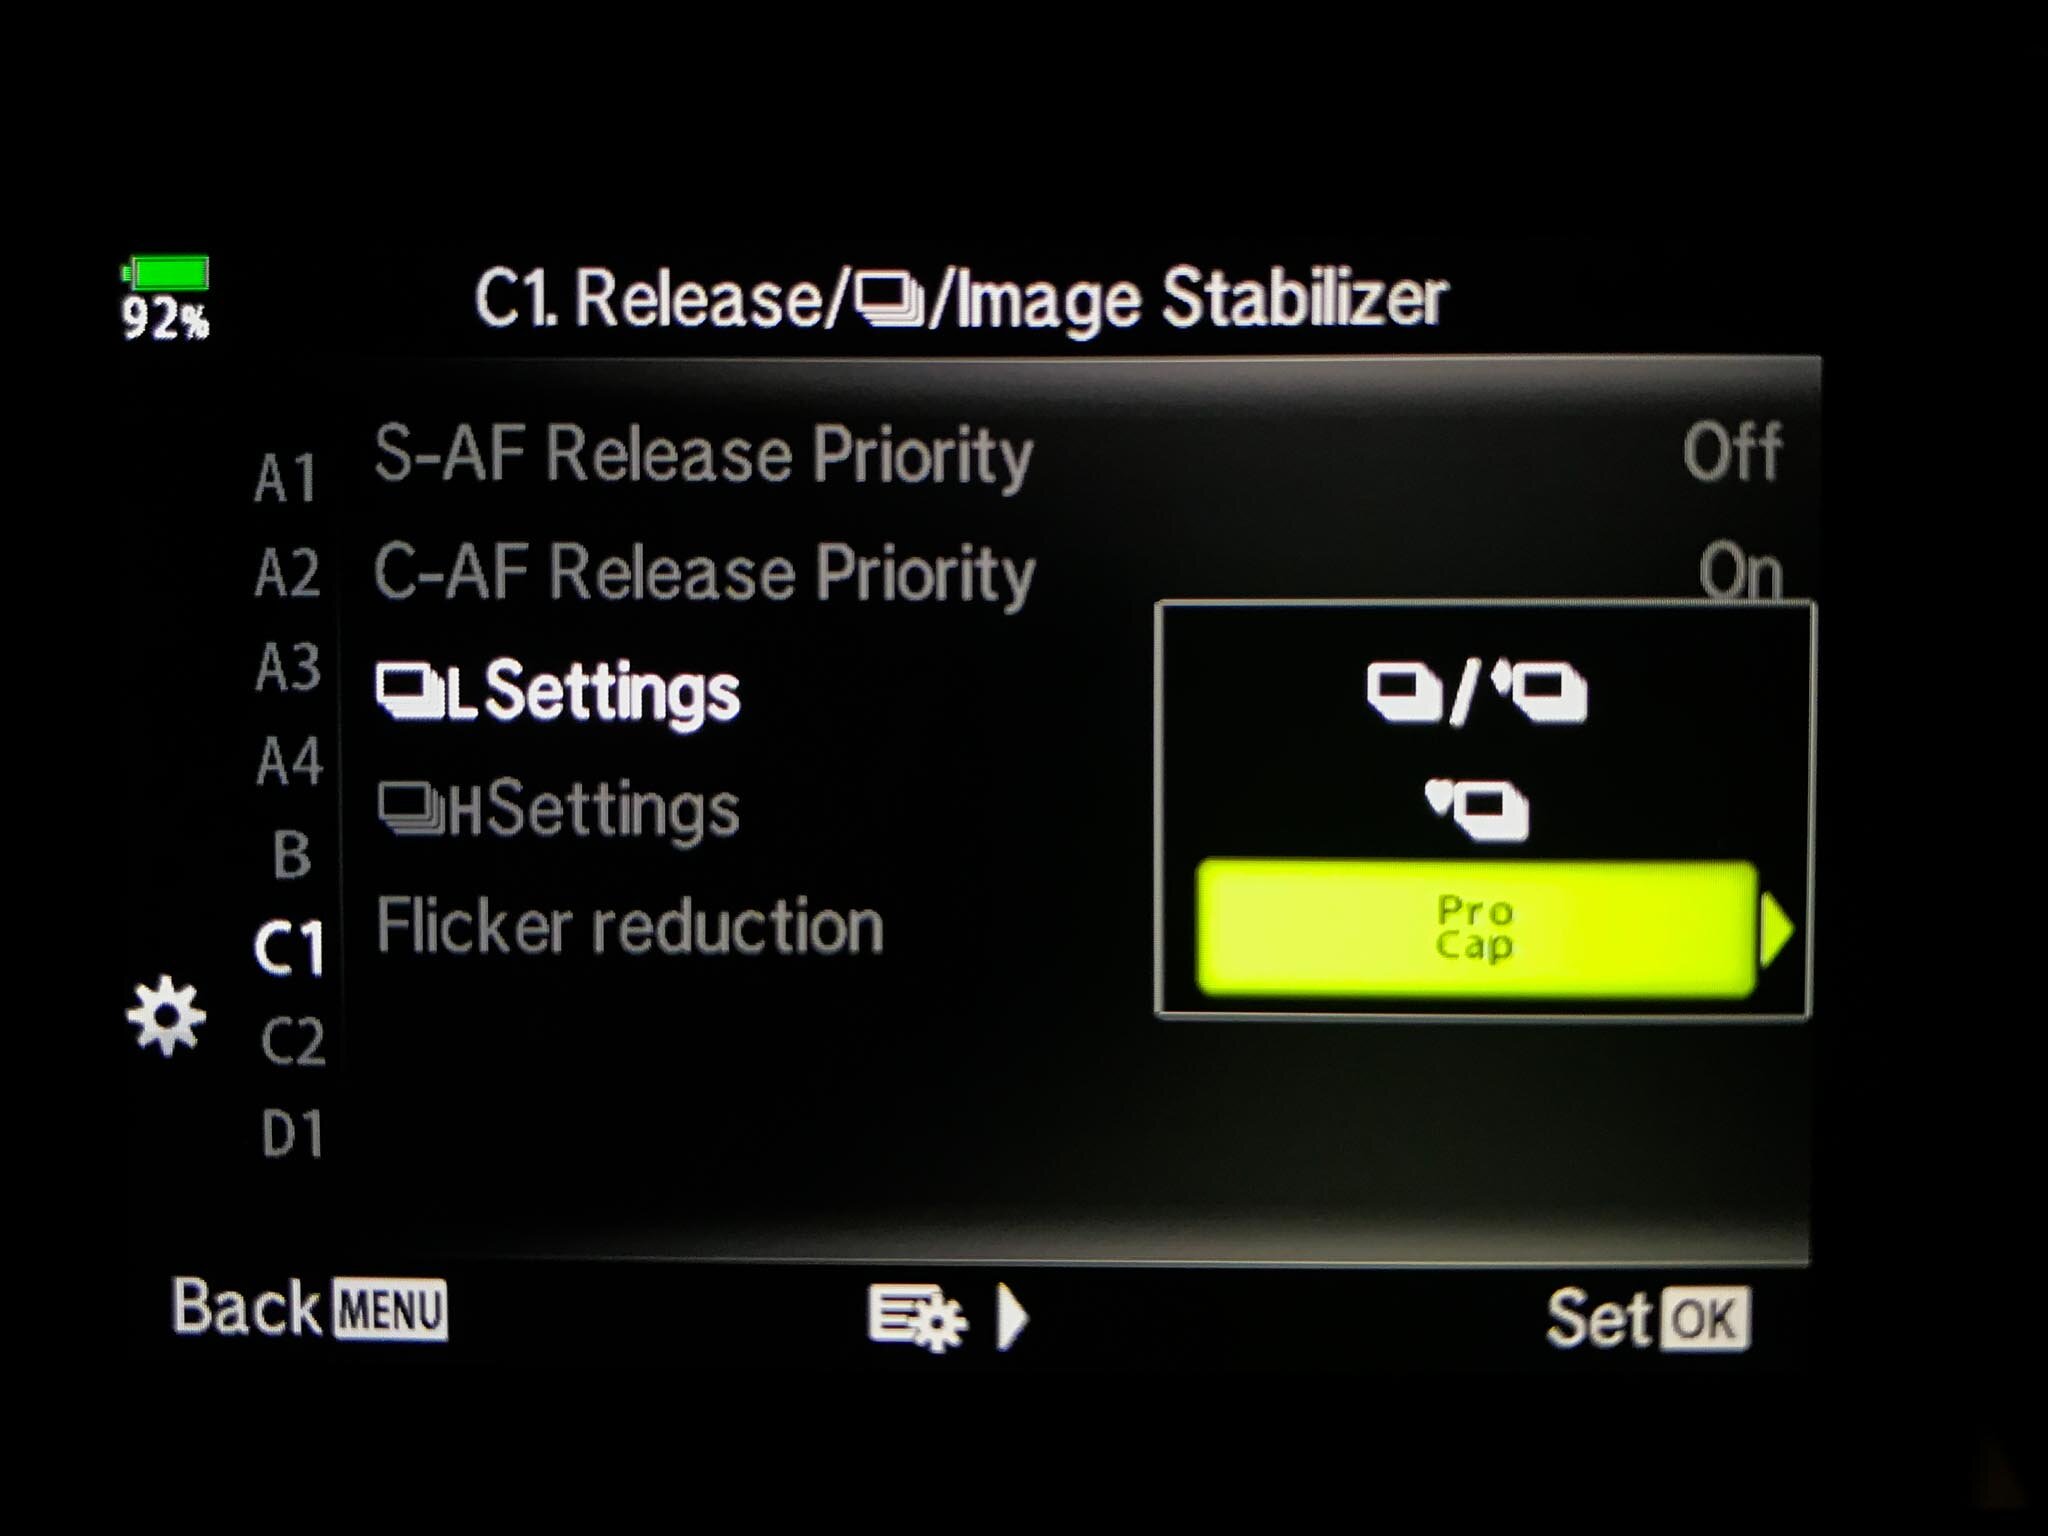
⚙️ To setup Pro Capture High go into menu C1, H-Settings, ProCap.
First, you choose frames per second. I set mine to 60fps to get the most subtle differences in wing movements frame by frame. Second, set Pre Shutter Frames, and thirdly Frame Count Limiter. If you set 15psf (Pre Shutter Frames) and Frame Count Limiter to 25, it means that 15 of your photos will be saved from before you press the shutter and 10 photos will be saved from after you press the shutter. After that, the camera will stop saving photos.
The exact numbers you should use depends on a number of factors such as your reaction time, how fast the bird is, if there is a lot of room for the bird to fly out of the frame (how tight your crop is) and which direction the bird flies (how many frames is the bird likely to be in focus).
In his blog post, ‘Pro Capture in Reverse‘ Thomas Stirr recommends 15 psf with a limit of 15 for small birds, thus not taking any images after you press the shutter.
I think this is an excellent starting point, but depending on the situation you might want to change it. So with 60fps, 15psf and 15 frame limit, take a test sequence of the bird taking off.
Now, if your photo sequence starts with the bird mid-air then your reaction time is slower than 1/4 second, and you will need to add more Pre Shutter Frames. If after using 35psf you still struggle, try 30 frames per second instead of 60fps.
If your photo sequence ends with the bird not having left your frame and you think those potential images could be keepers, then increase the frame limit so that you keep taking a few images after you press the shutter.
Olympus E-M1 ii, 300mm f/4, 1/1600s, ISO 500, Pro Capture High
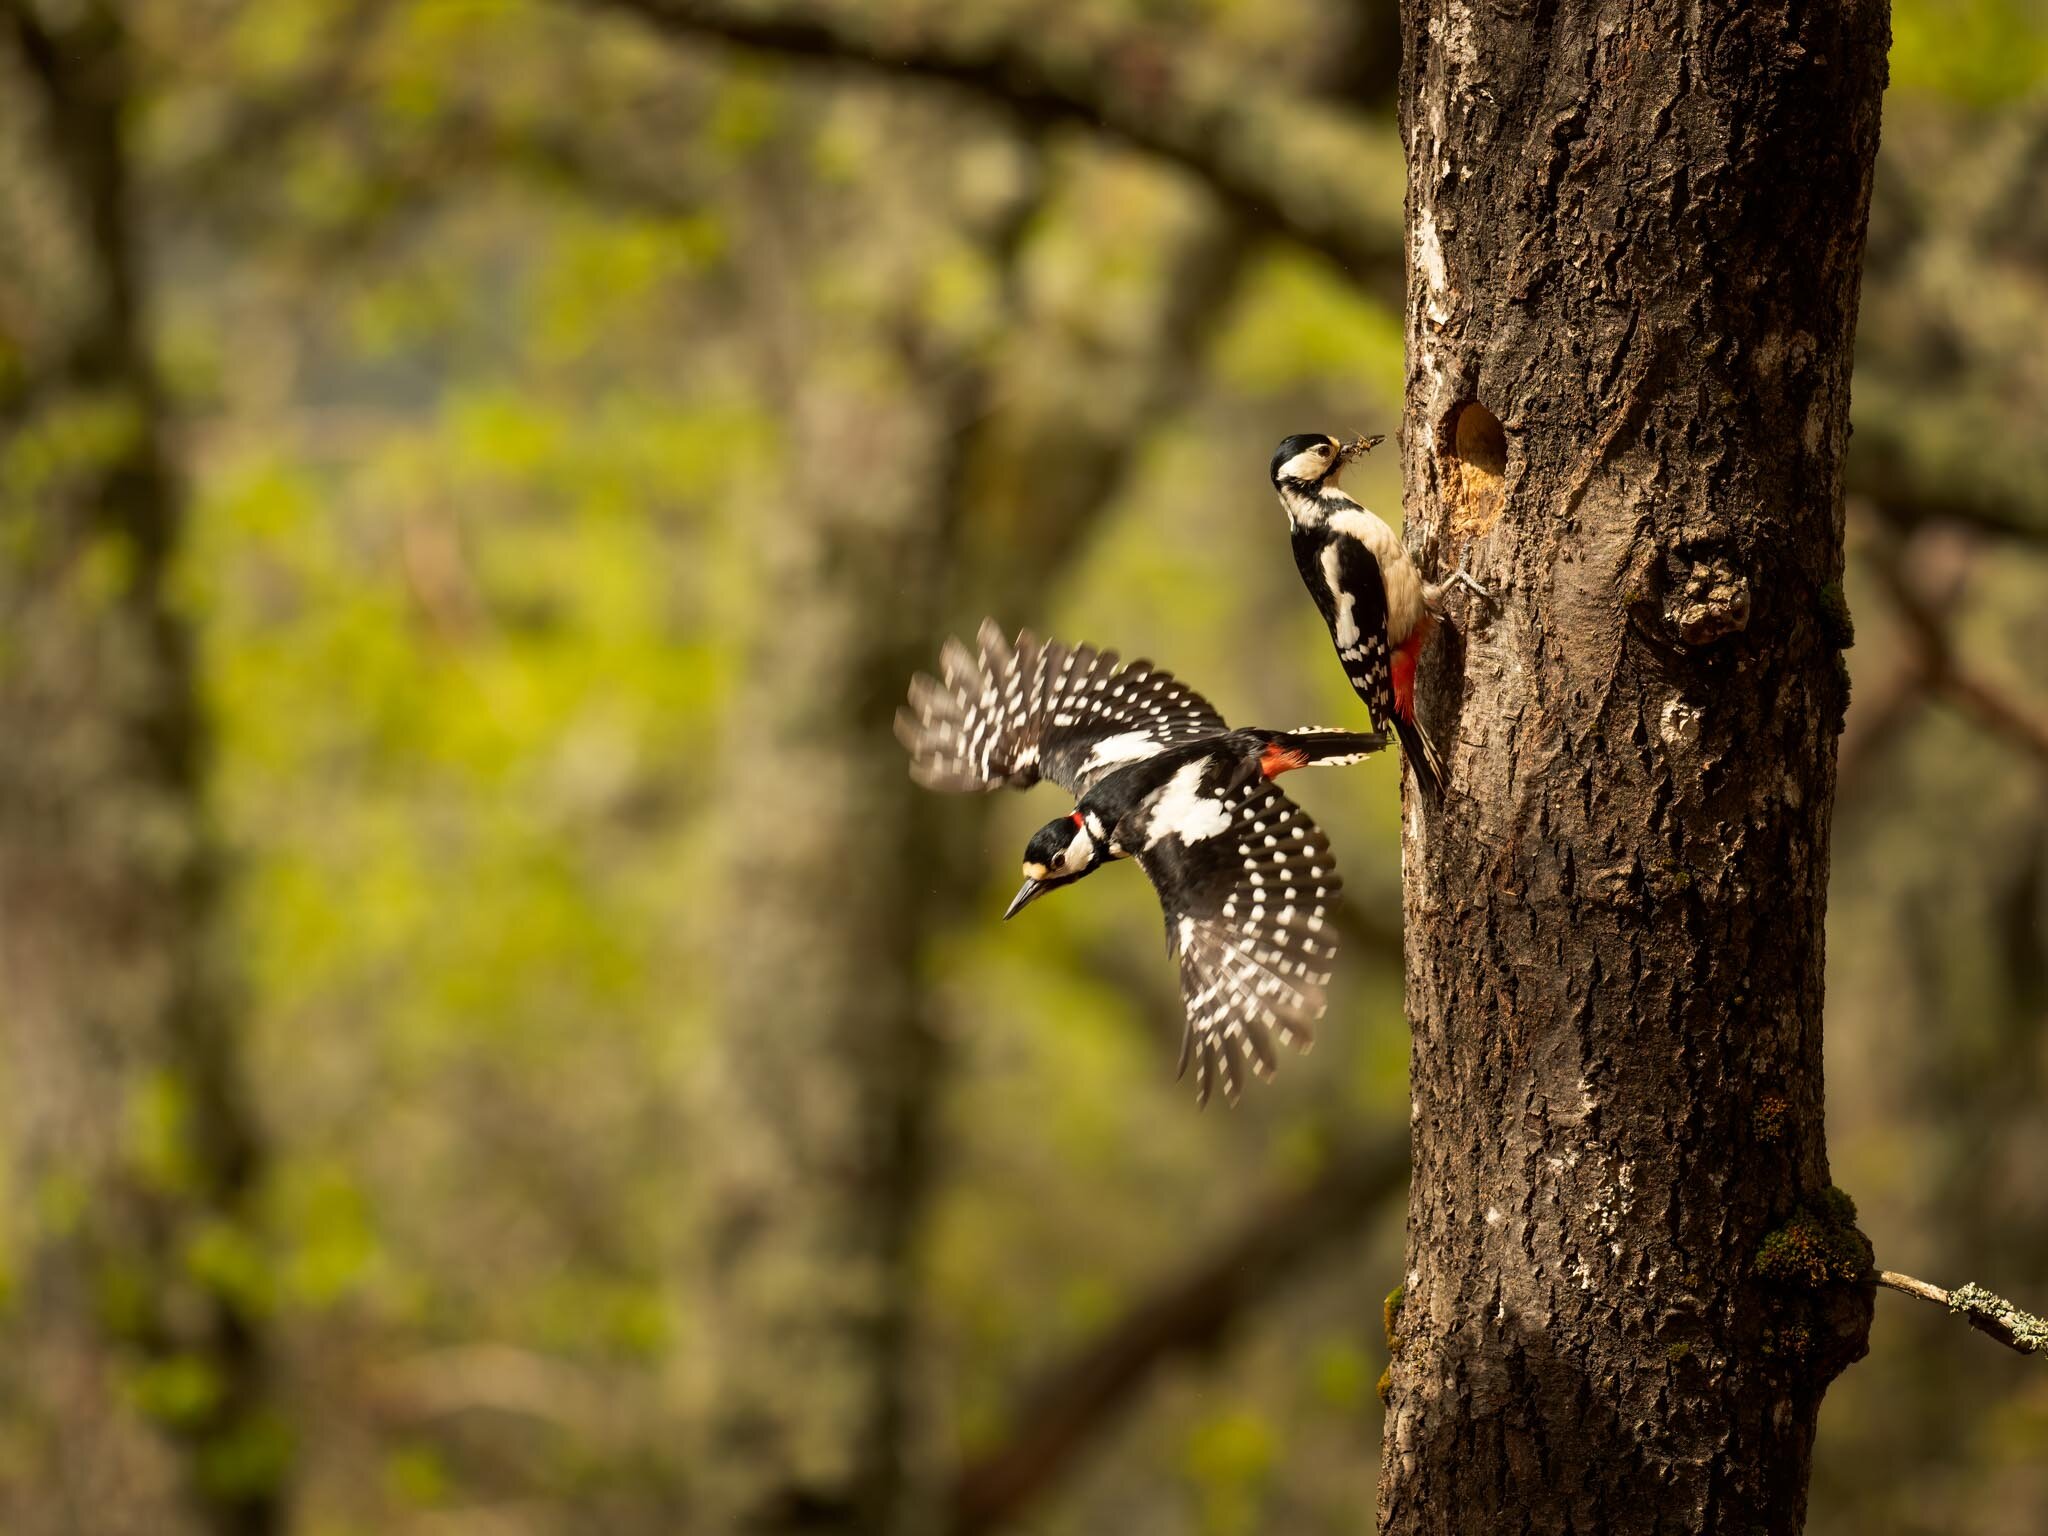
As an example, if your first image in the sequence looks like this photo of the woodpeckers here, with the bird already in flight, you should add more Pre Shutter Frames.
Don’t forget to increase the Frame Count Limiter with it.
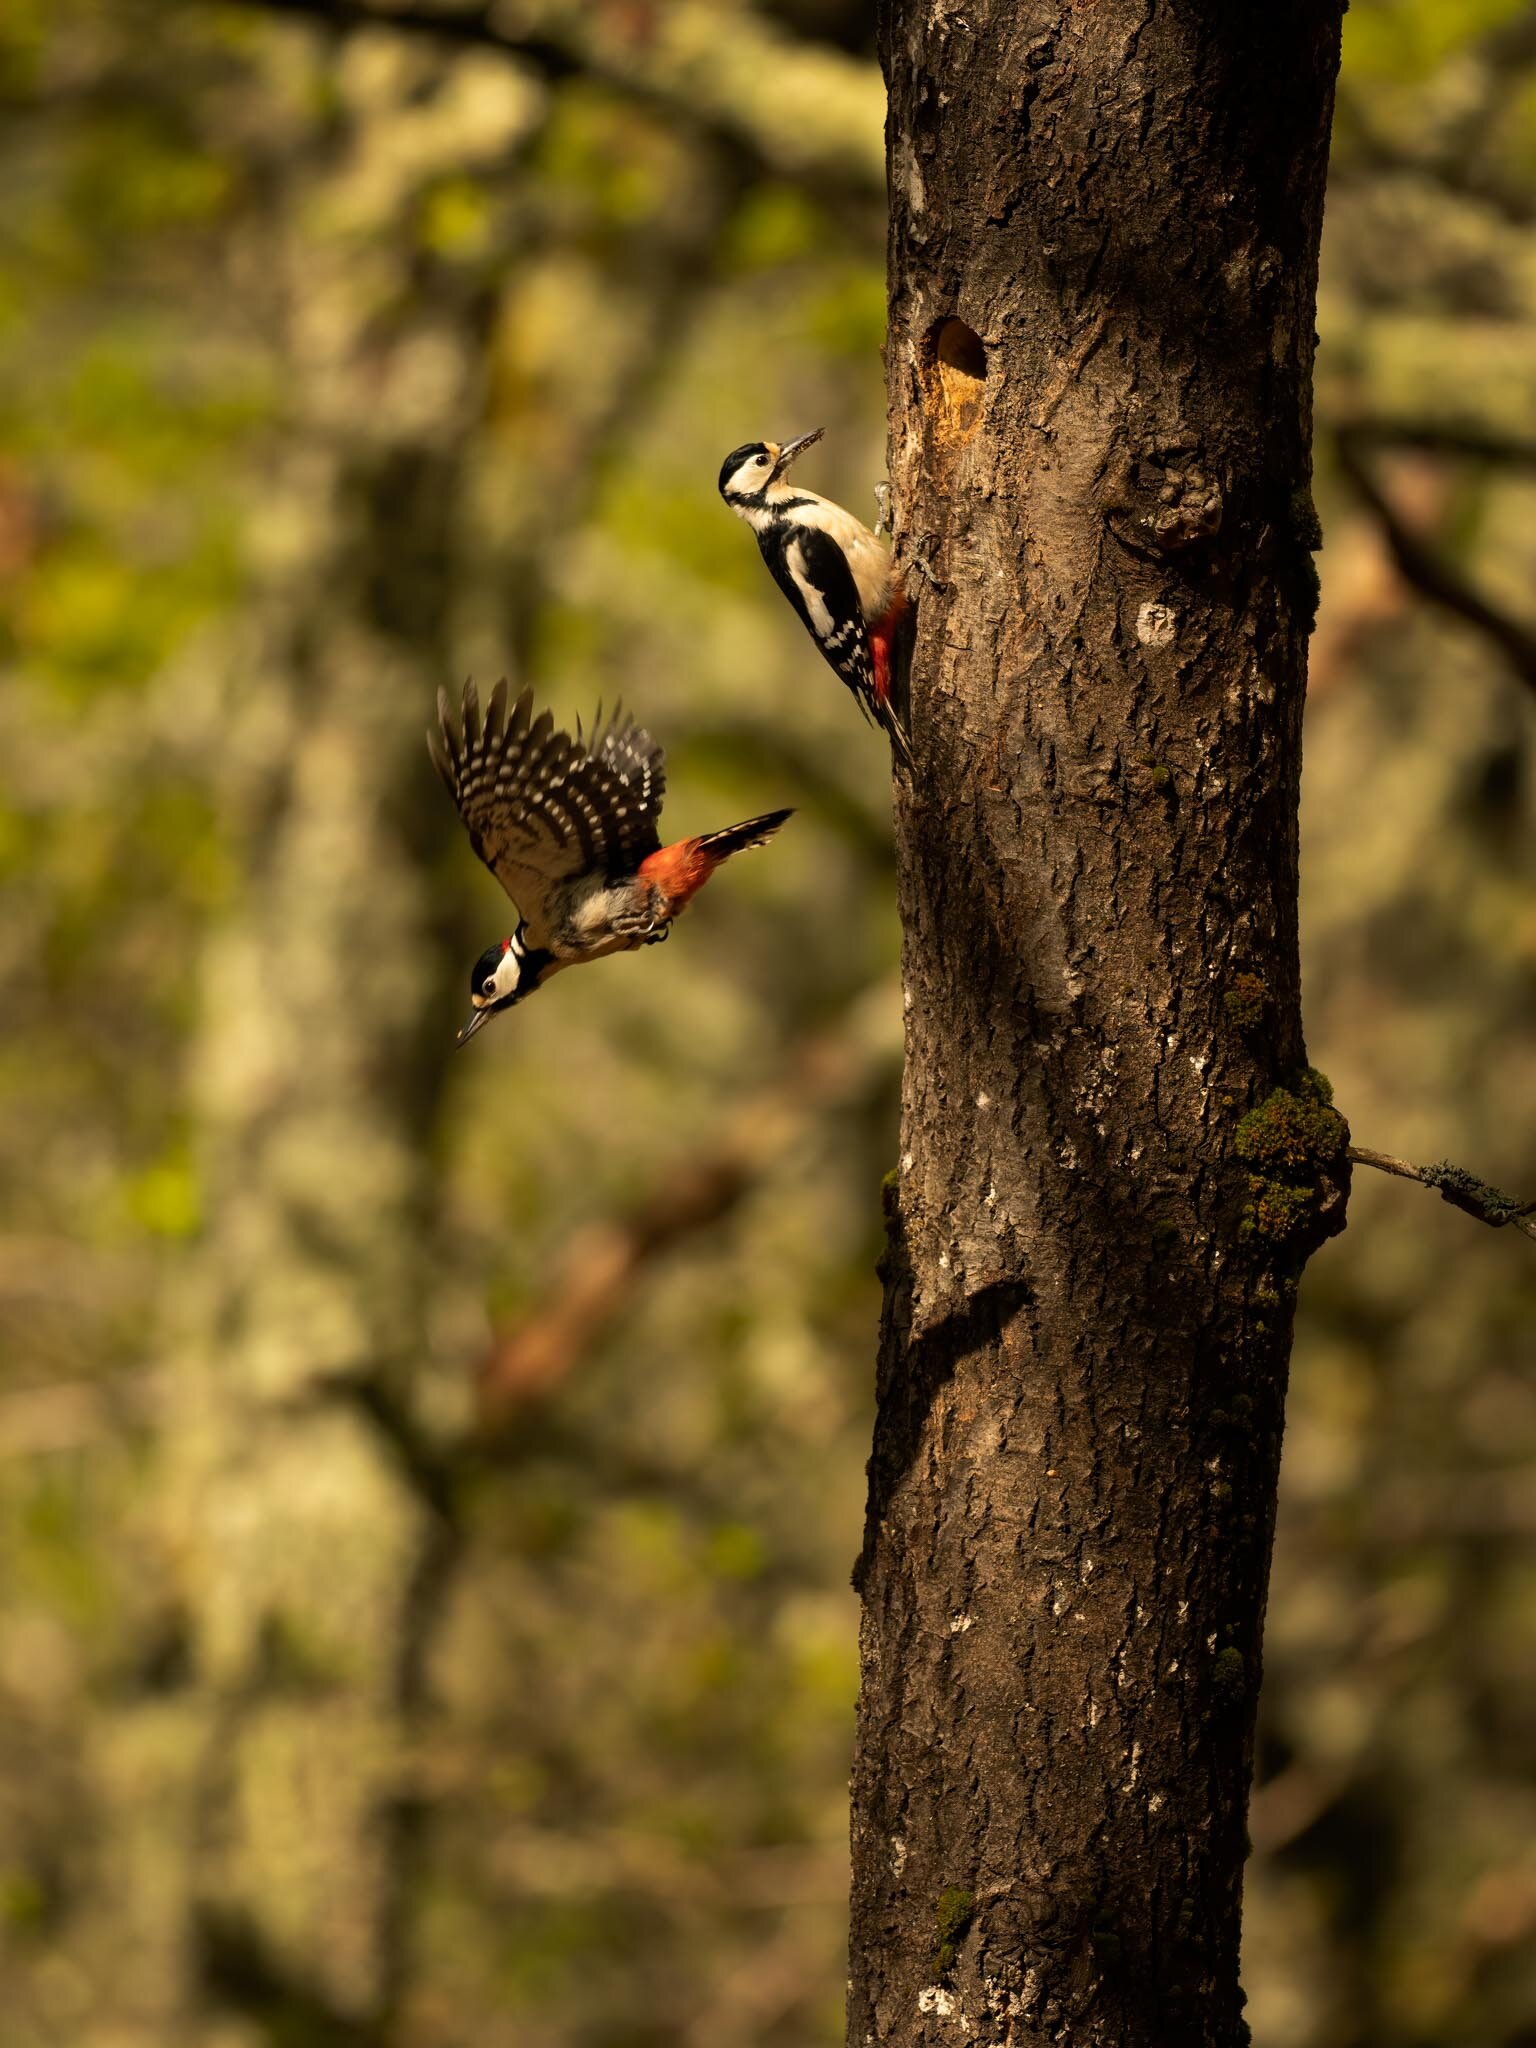
Olympus E-M1 ii, 300mm f/4, 1/1600s, ISO 2000, Pro Capture High
If the last image in your sequence looks like this, the single woodpecker in flight, where there is more room for the bird to fly in the frame, you should increase the Frame Count Limiter so that you can keep taking photos after you press the shutter.
When photographing birds in flight you often have to increase the ISO which can introduce noise to your images. To clean up my images I use, and I highly recommend, Topaz DeNoise. Check out my blog post and accompanying video to see how it performs cleaning up noise from high ISO images.
Using the 15psf and 15 frame limit I took a test sequence of a great spotted woodpecker flying from the nest hole after feeding its young. Looking over my sequence on my camera I seemed to be a bit slow on the trigger as the first image had the woodpecker already in the air. So I quickly changed my settings to 18psf and 18 frame limit.
For my next sequence of 18 frames I had a few images of the woodpecker still on the tree before it took off. I didn’t increase the frame limit as the last of my photos had the bird exiting the frame.
Notice if I had been further away and the bird had more space in the frame, I probably would have needed to add post shutter frames. Maybe something like 18psf and 23 frame limit.
It’s a bit of trial and error, but I prefer to err on the side of caution and have a little more than I need.
Obviously not all these images are sharp. For that the bird would have to fly perfectly along my depth of field focus window. Though whenever the bird flies within my depth of field I have a good chance of capturing some keepers.
After some experimenting I like to keep my Pro Capture High default at 60fps, 17psf and 21 frame limit, though I’ll change it depending on the situation.
My settings for Pro Capture Low is quite different, but again I start with a default setting and adjust from there.
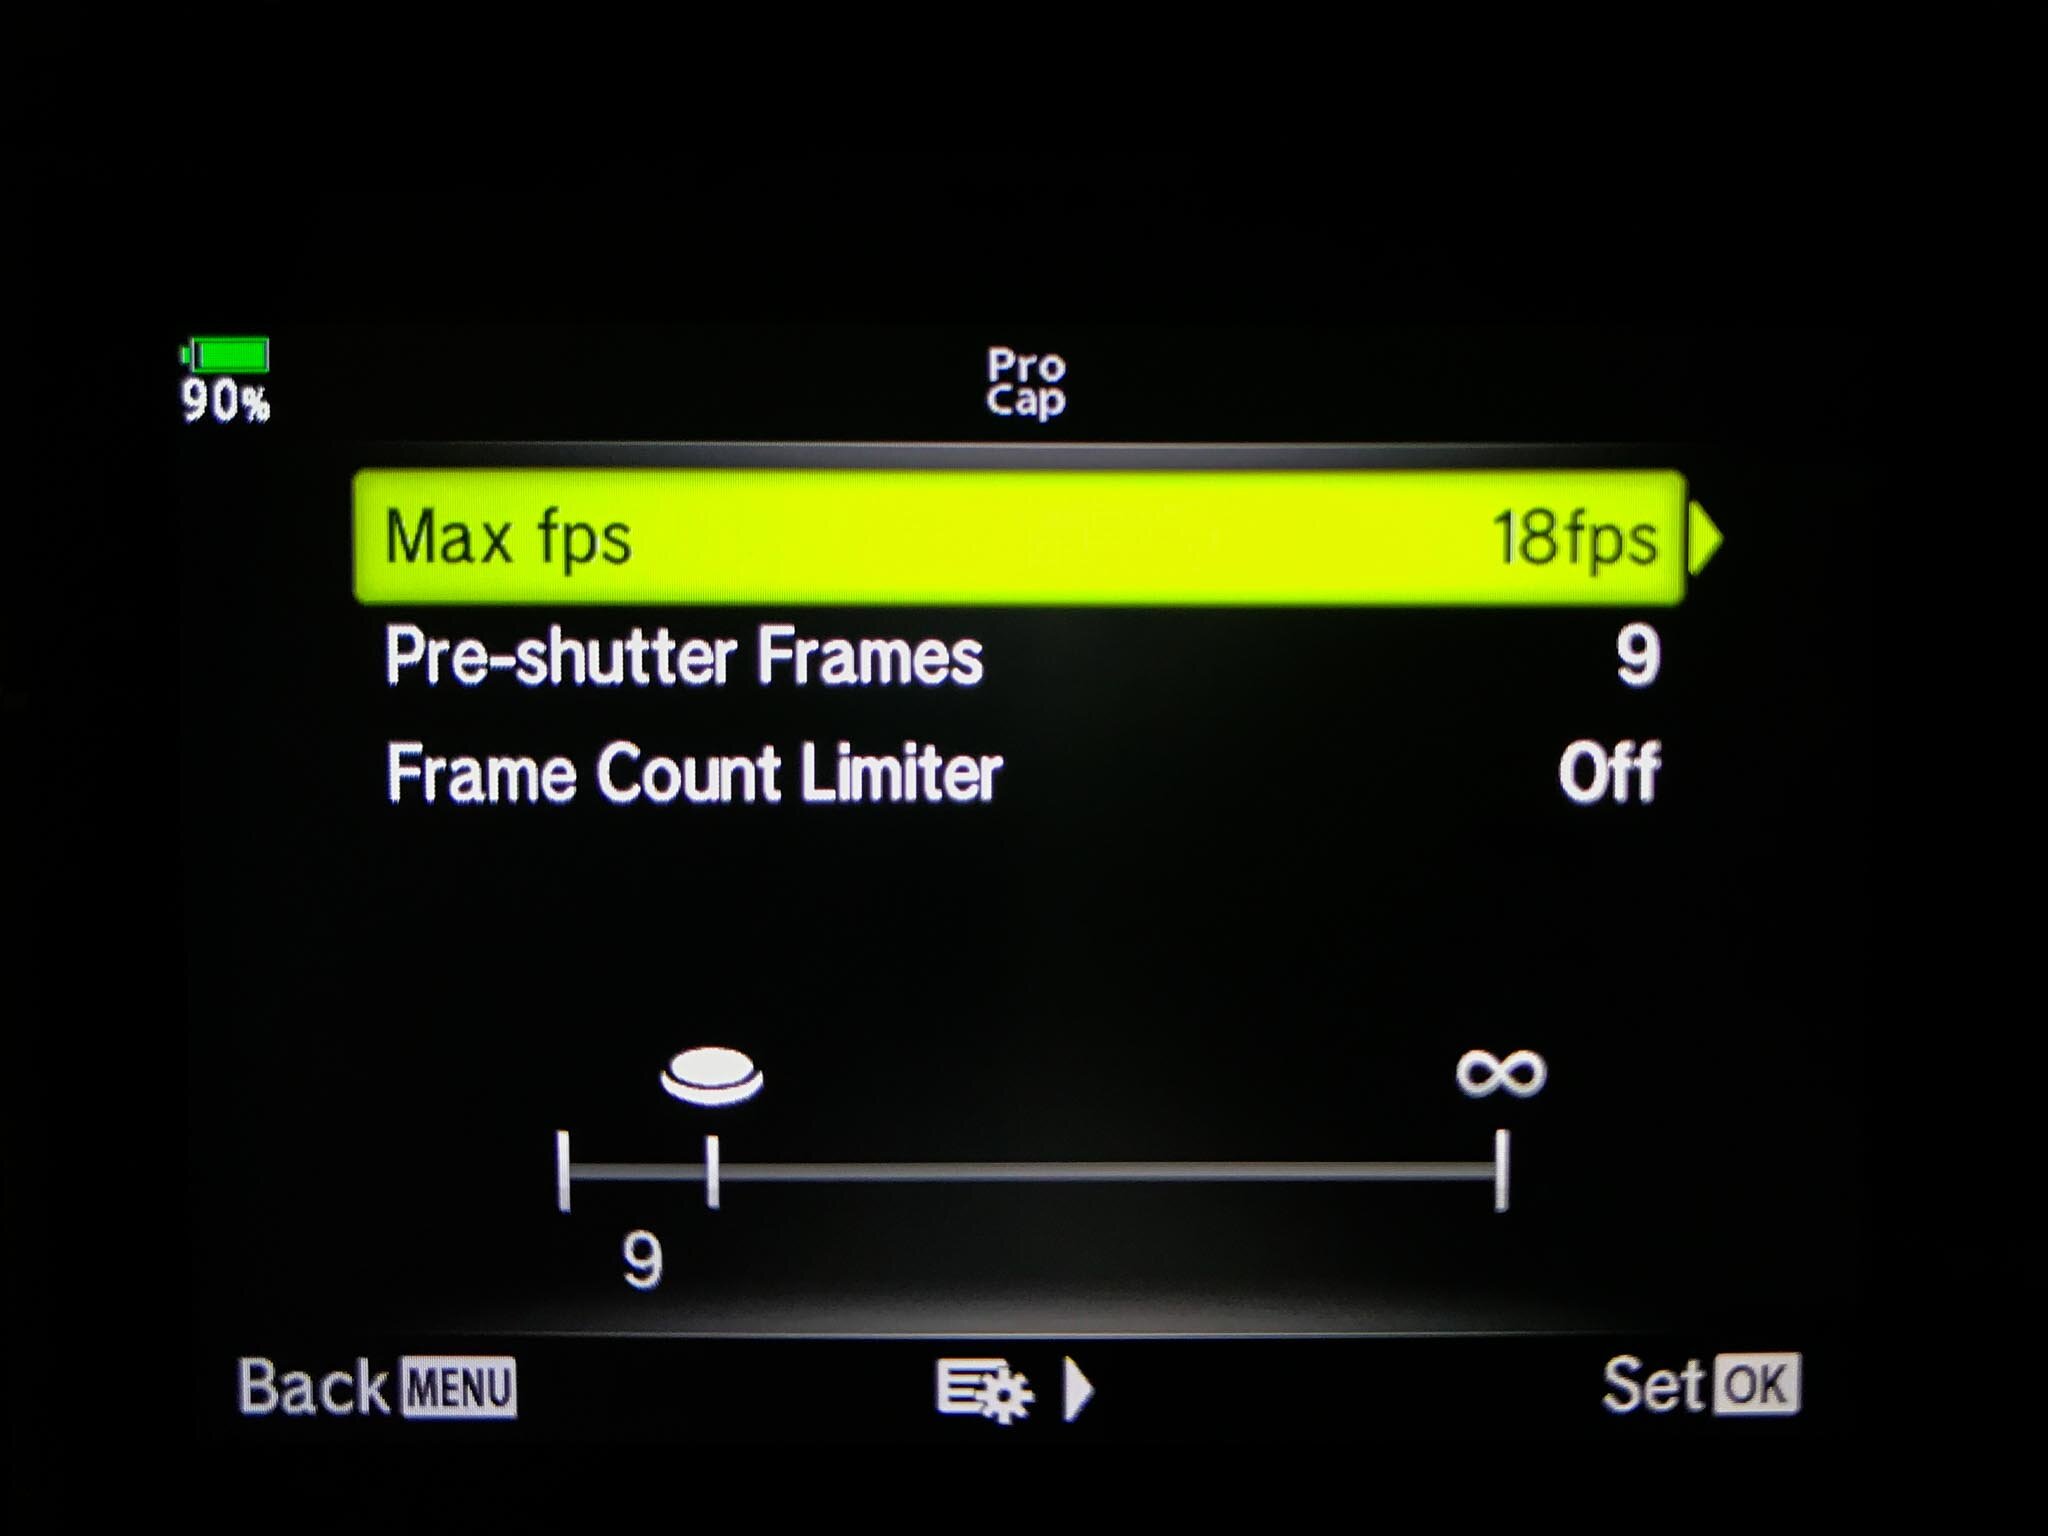
⚙️ To setup Pro Capture Low go into menu C1, L-Settings, ProCap.
Again, we set our frames per second and the highest is 18fps, so I go with that. For the pre shutter frames I go with 9 which gives me 1/2 second of images before pressing the shutter. Most of the time that’s probably too many. As for the frame limit, I turn it off.
I turn off the limiter because I may still be tracking the bird with continuous focus and want to keep shooting. It’s also a lot easier to control 18fps than 60fps and I can let go of the shutter when I want.
As a default I like to keep my Pro Capture Low at 18fps, 9fps and turn limit off.
Next, let’s look at creating a preset for Pro Capture so that you can quickly switch to this in the field when you need it.
The settings you’ve adjusted for the Pro Capture High and Low will be saved in the camera. However, I have created a preset specifically for Pro Capture that includes my other settings such as shutter speed, aperture, ISO and SD saving slot (essential, by the way!!) etc.
⚙️ Start by turning your Mode Dial either to Manual or Shutter Speed Priority, depending on which you are comfortable using for capturing action photos – I like to shoot in Manual.
Photographing birds already in flight is what I’d like to quickly be able to capture with the turn of a dial. Therefore, I like to have my preset set for Pro Capture Low.
⚙️ Set shutter speed to 1/1600s which is a middle of the range starting point and is good for small to medium-sized birds (i.e. not too fast).
⚙️ Set Aperture wide open – I use f/4 on my M.Zuiko 300mm lens.
⚙️ Set ISO to automatic.
With these settings, I can be ready in an instant to capture birds in flight using Pro Capture Low. I can adjust shutter speed quickly to capture faster-moving subjects and take over ISO if the camera is likely to get my exposure wrong.
⚙️ Other settings: Auto White Balance, Continuous Auto-Focus, Face Priority Off, Auto Image Stabiliser and M-IS 1 (sensor-shift + digital)
I like to use one middle point for focus as I can be more specific with where the focus is. If you find it tricky to find birds in flight, you might want to set it to a cluster of 5 middle points.
I’ve only experimented a bit with focus tracking and haven’t found it reliable enough on the E-M1ii so I don’t use it as part of my preset for Pro Capture.
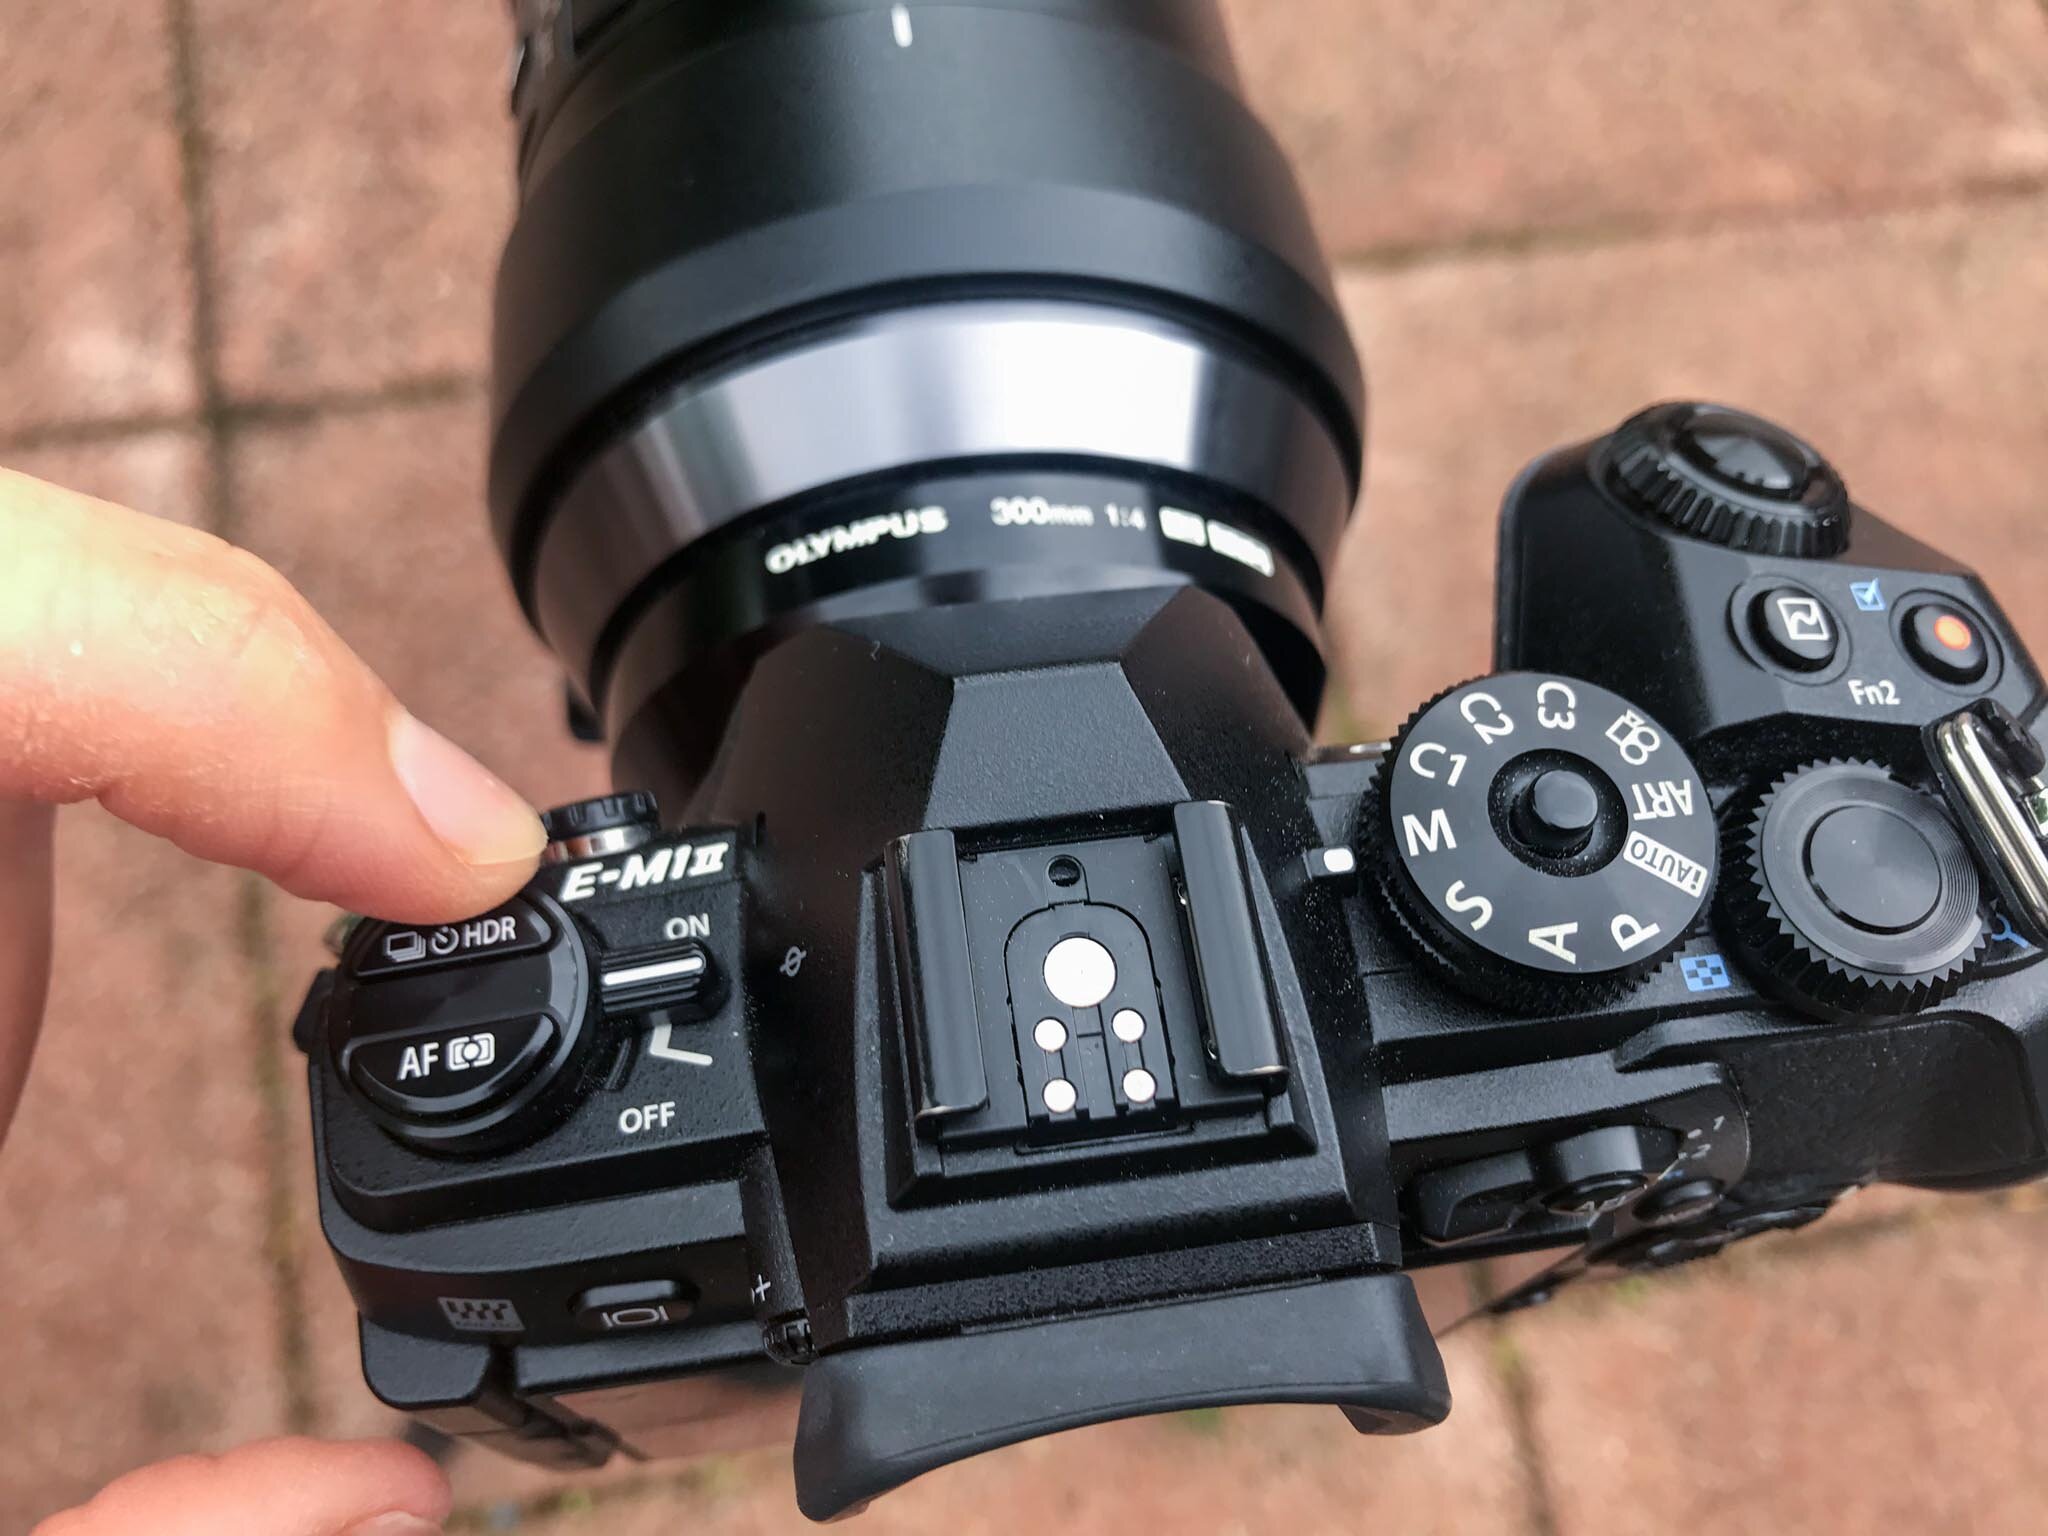
When I need to use Pro Capture High it’s a quick change through the top button on the left of the camera or through the Super Control Panel.
Olympus O-MD E-M1 ii Quick Button to Change Shooting Mode
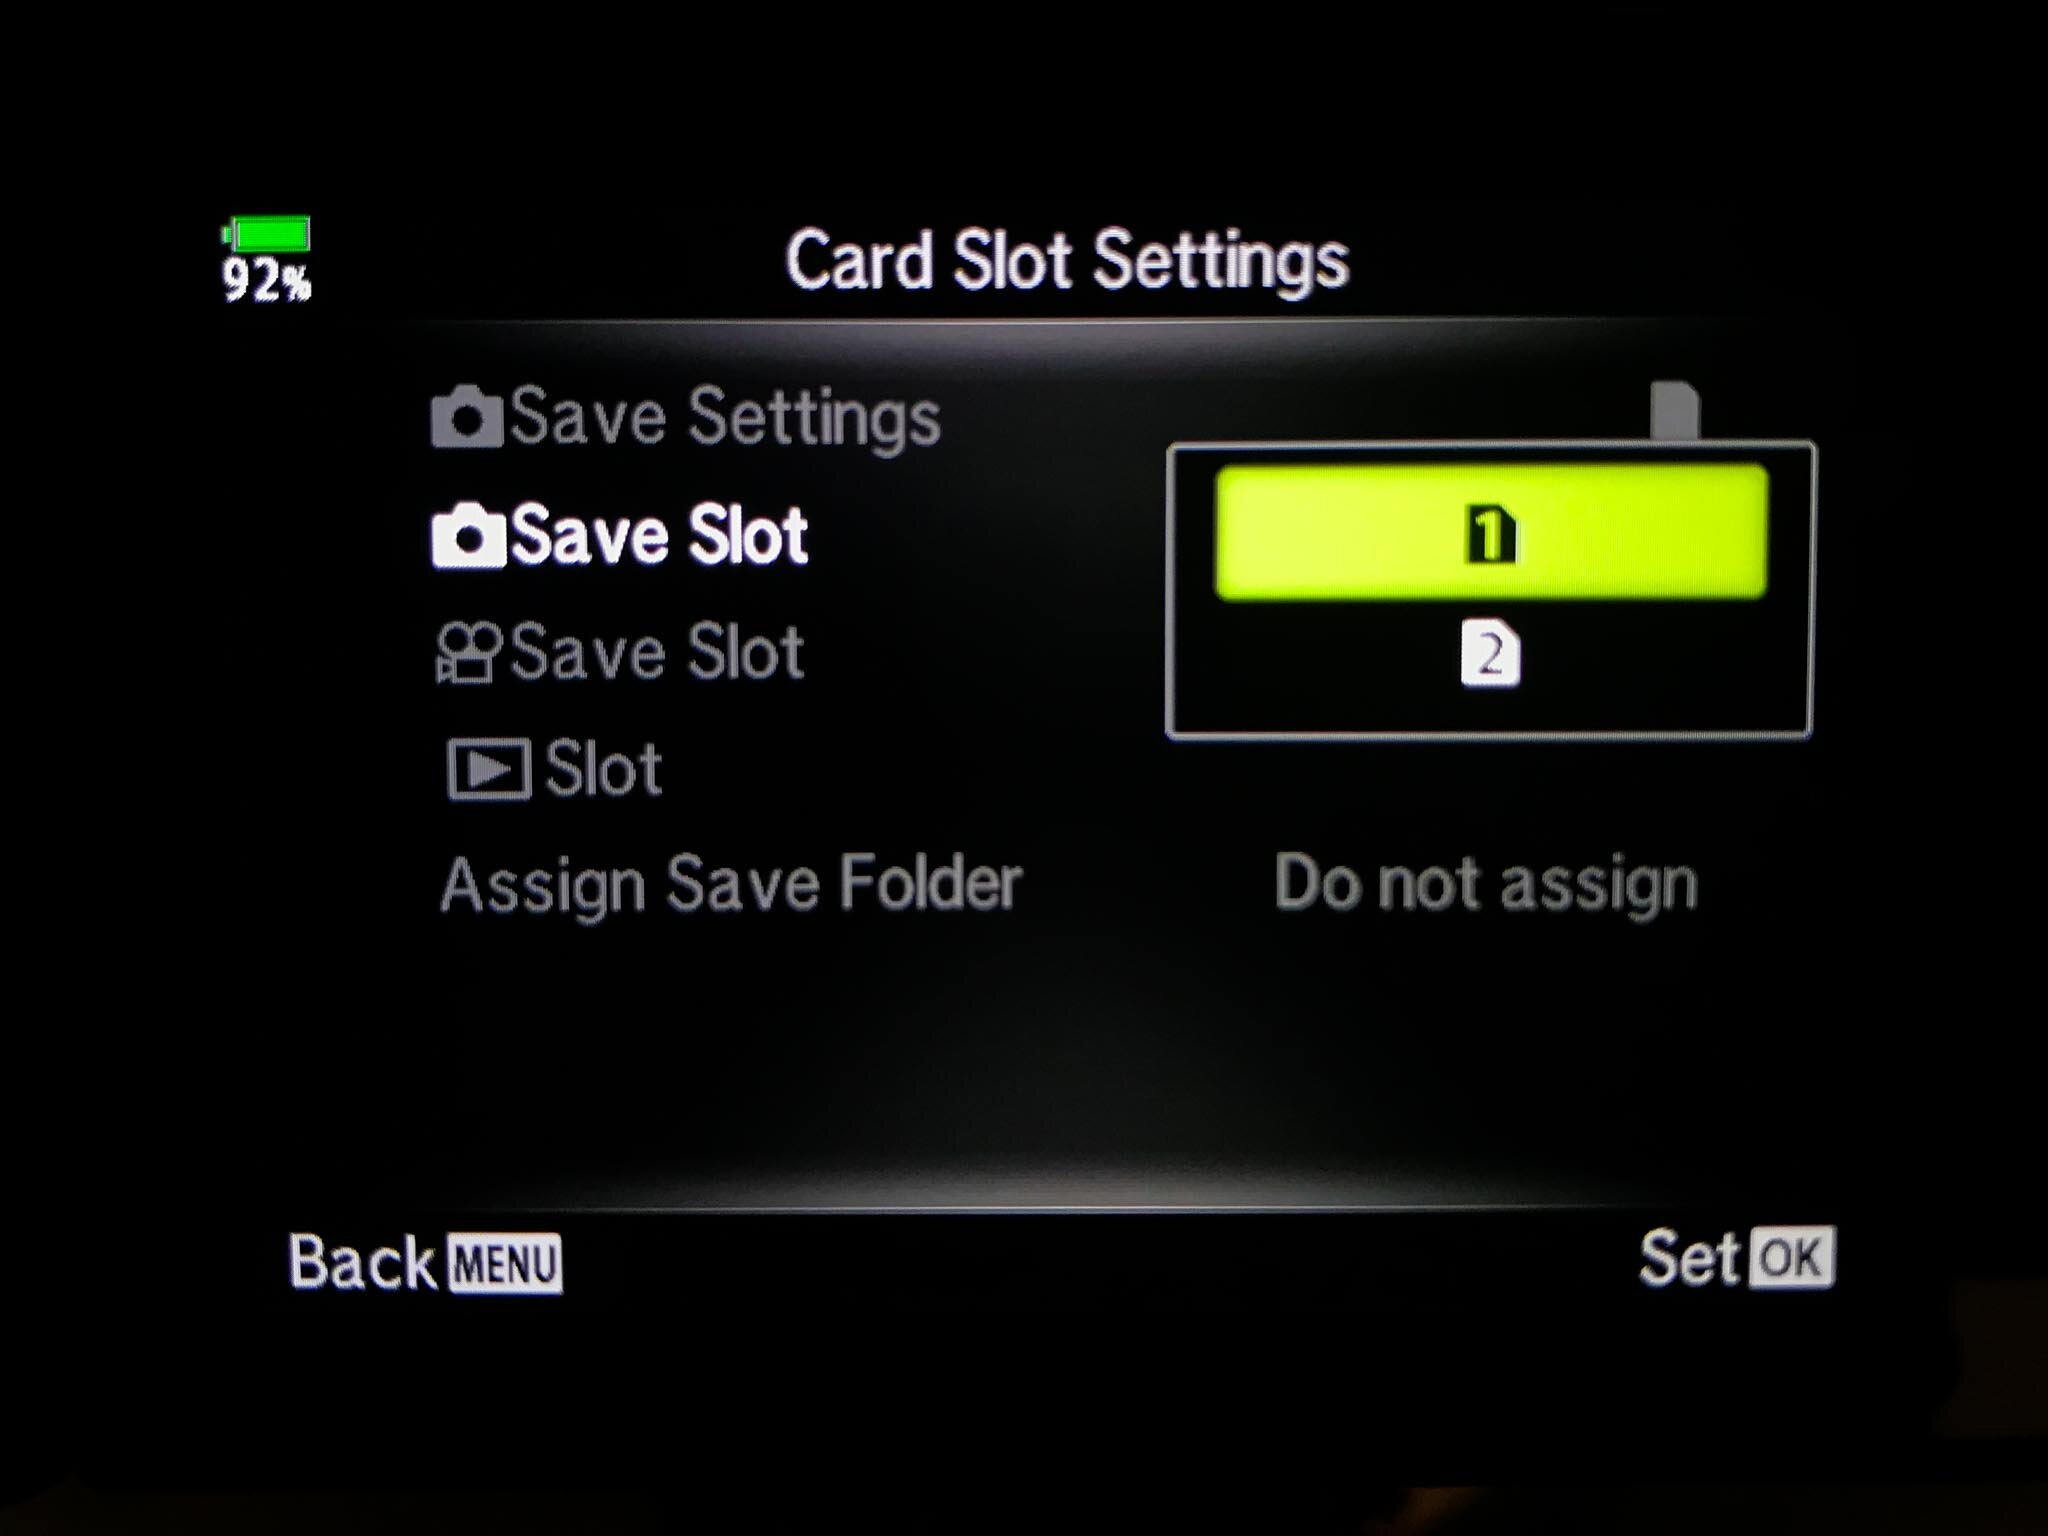
⚠️ To make full use of Pro Capture you need a fast memory card – not just reading speed, but writing speed. I use and can recommend Sony Tough with a writing speed of 299mbs.
On the Olympus OM-D E-M1 ii memory card slot 1 is for fast UHS-II cards, so make sure you put your fast SD card in slot 1.
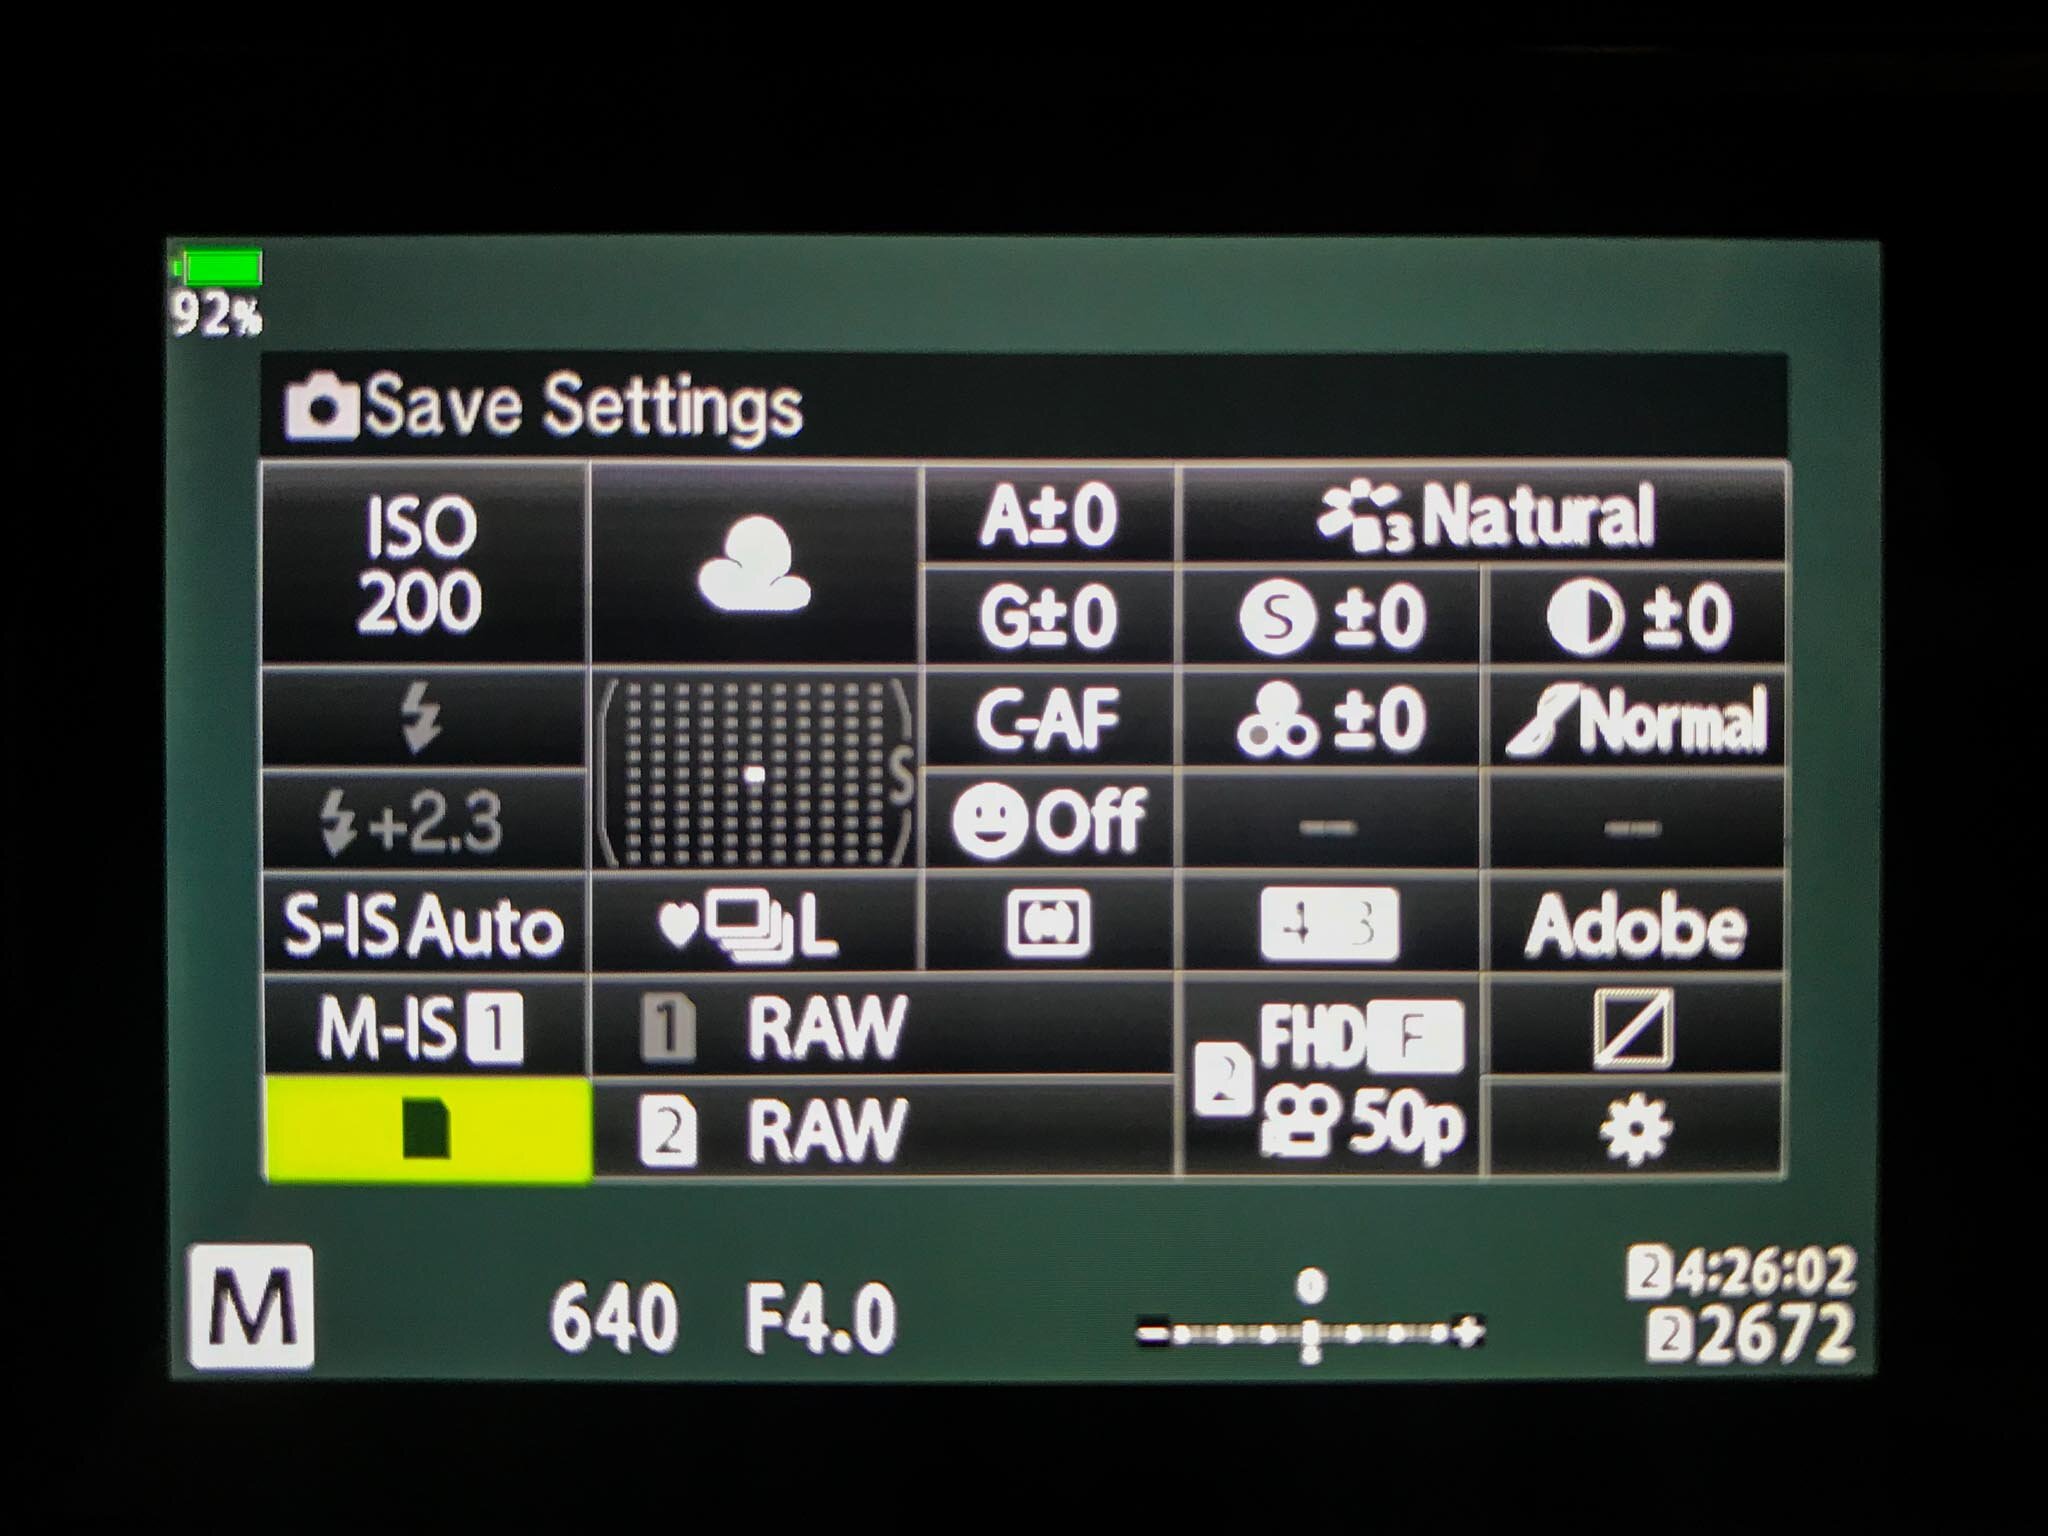
⚙️ In the Super Control Panel bottom left (save settings) press ok.
⚙️ Save Settings to Standard.
⚙️ Save Slot to 1.
Remember to save to card slot 2 when you shoot regularly and shoot movies. That way you don’t waste valuable space on the fast memory card for when you need it.
Now, if you’ve saved the Pro Capture Low and High settings as well then you can save it all as a preset. I use Preset 1 as it lies right next to Manual on the dial, making it a very quick switch in the field.
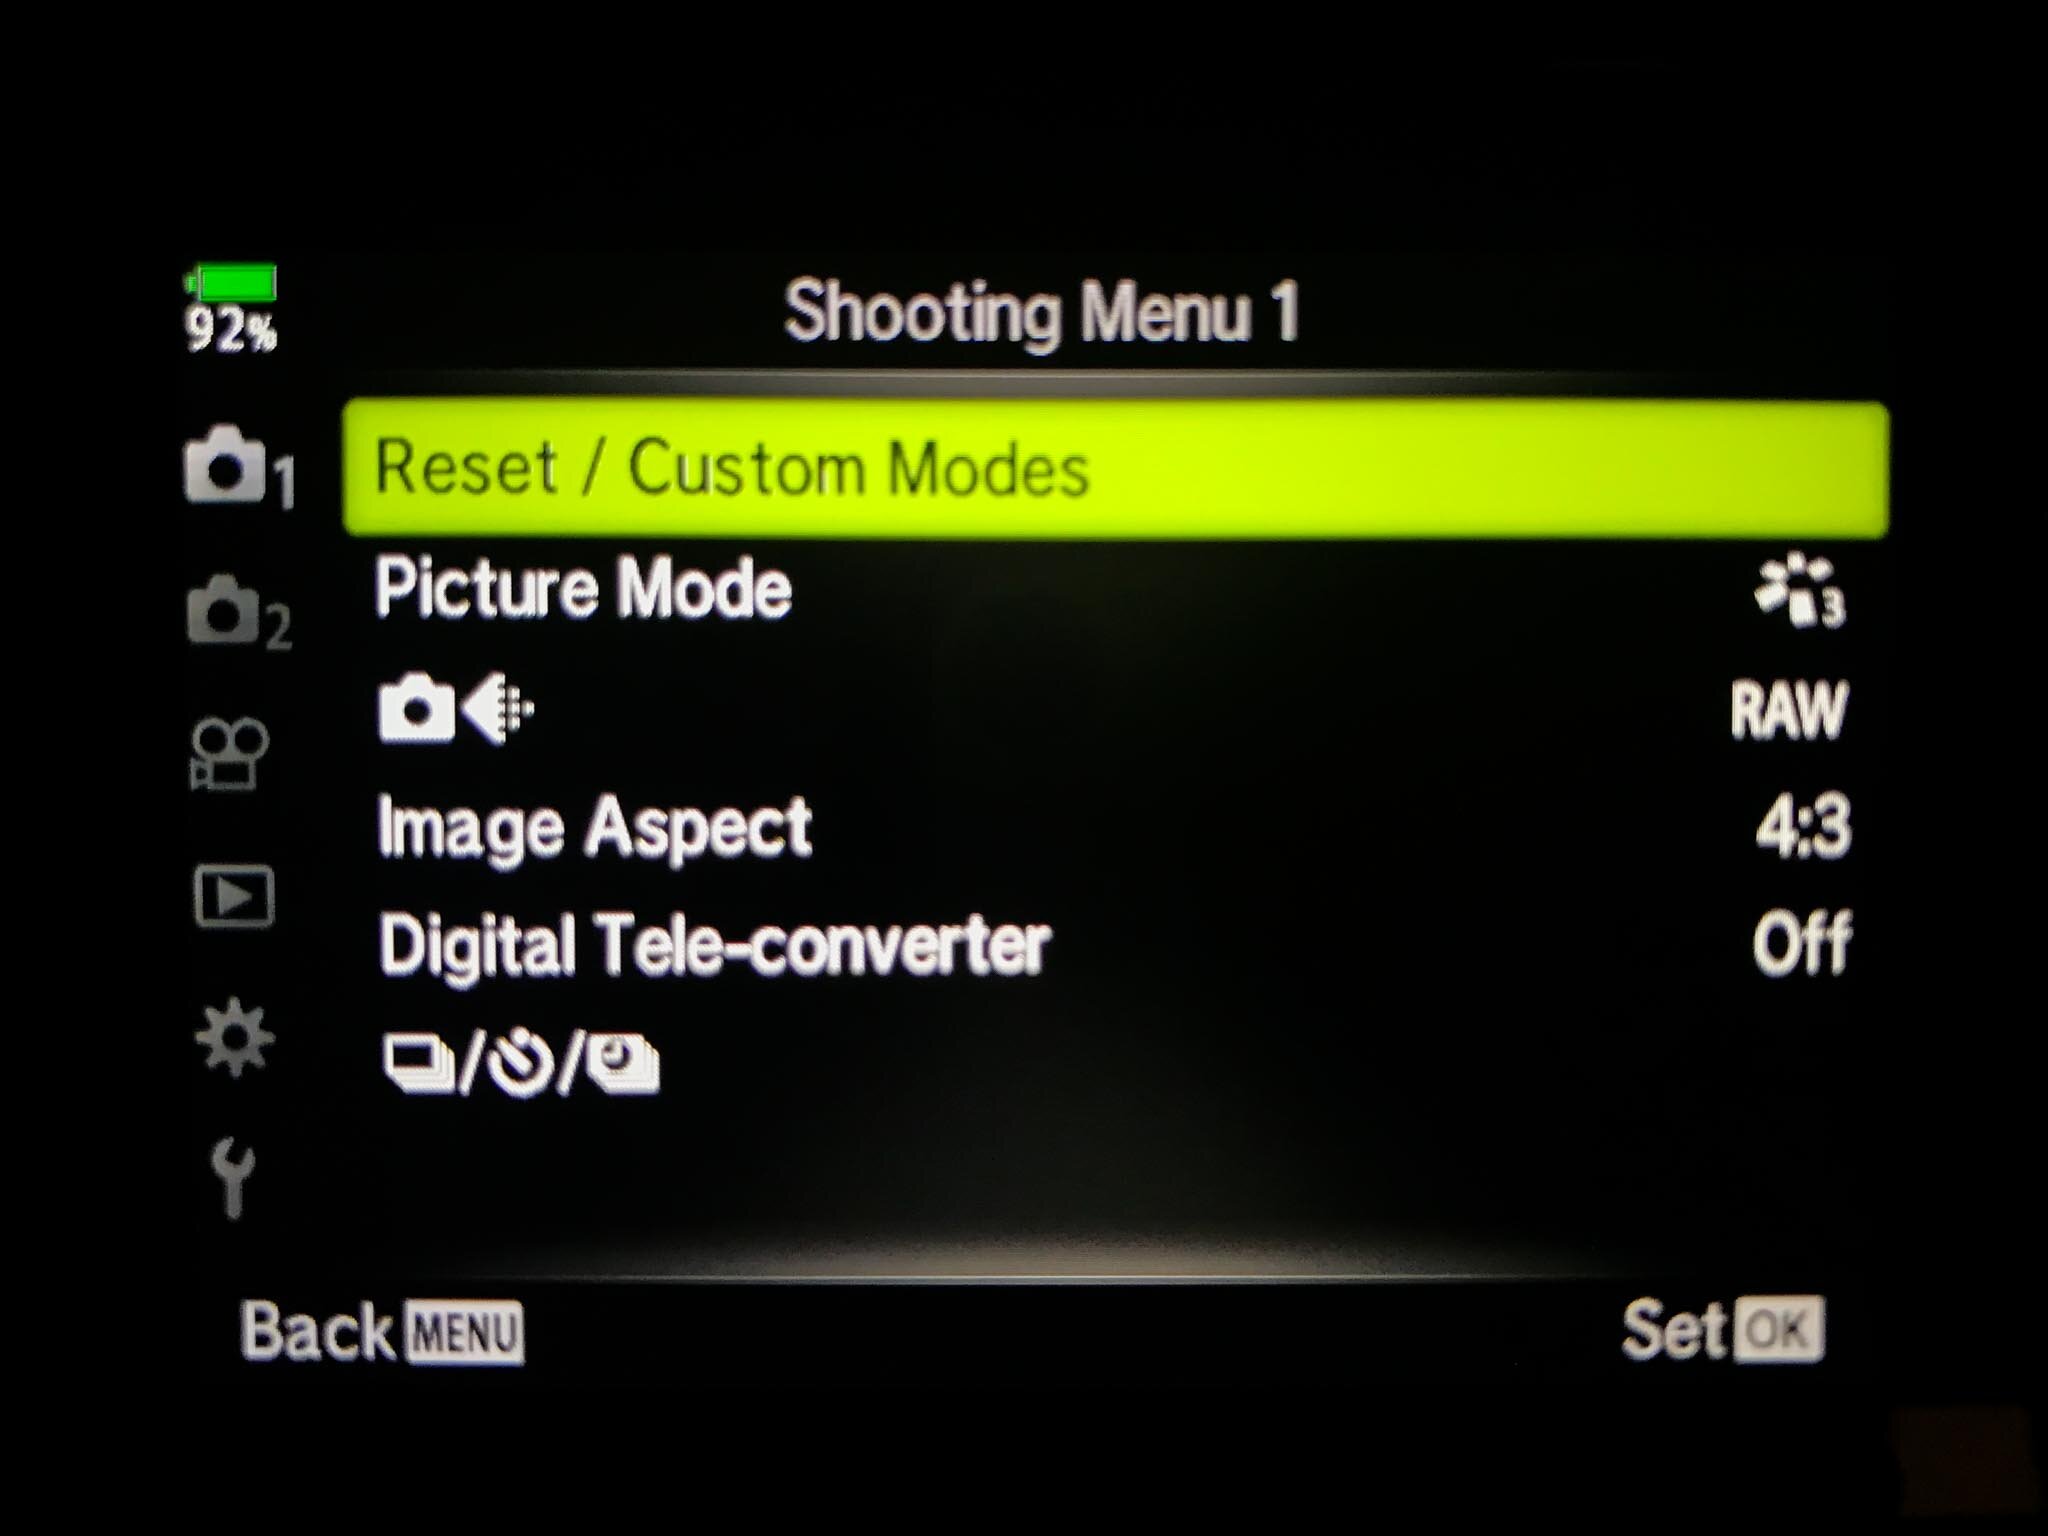
⚙️ Go to Menu, Shooting Menu 1, Reset/Custom Modes, Assign to Custom Mode, C1 Set.
Now, with your Pro Capture setup for Low and High as well as a preset for quick access to all the benefits of shooting in Pro Capture, you should be ready to give it a shot. So get out, have fun, and take some photos of birds in flight that we used to only dream about being able to capture.
And that’s my guide to Pro Capture settings for capturing birds in flight. If you found it useful or if you’ve got any more questions, let me know in the comments!


be the first to comment