


The introduction of Live ND in OM System cameras has enabled landscape photographers to get creative results while taking away the hassle of bringing filters into the field.
But, have you ever thought to use Live ND for your wildlife photography to create something more artistic?
You can find Live ND on the OM-1 Mark II, OM-1, OM-5, OM-D E-M1X and the OM-D E-M1 Mark III. The OM-1 Mark II has got the most versatility with simulated filters ranging from ND2 to ND128.
Live ND simulates the effect of neutral density filters, reducing the amount of light entering the camera sensor. This enables slower shutter speeds, even in bright conditions, making it ideal for creating motion blur or emphasising dynamic movement. Unlike traditional ND filters, Live ND is built directly into the camera, offering unmatched convenience and flexibility.
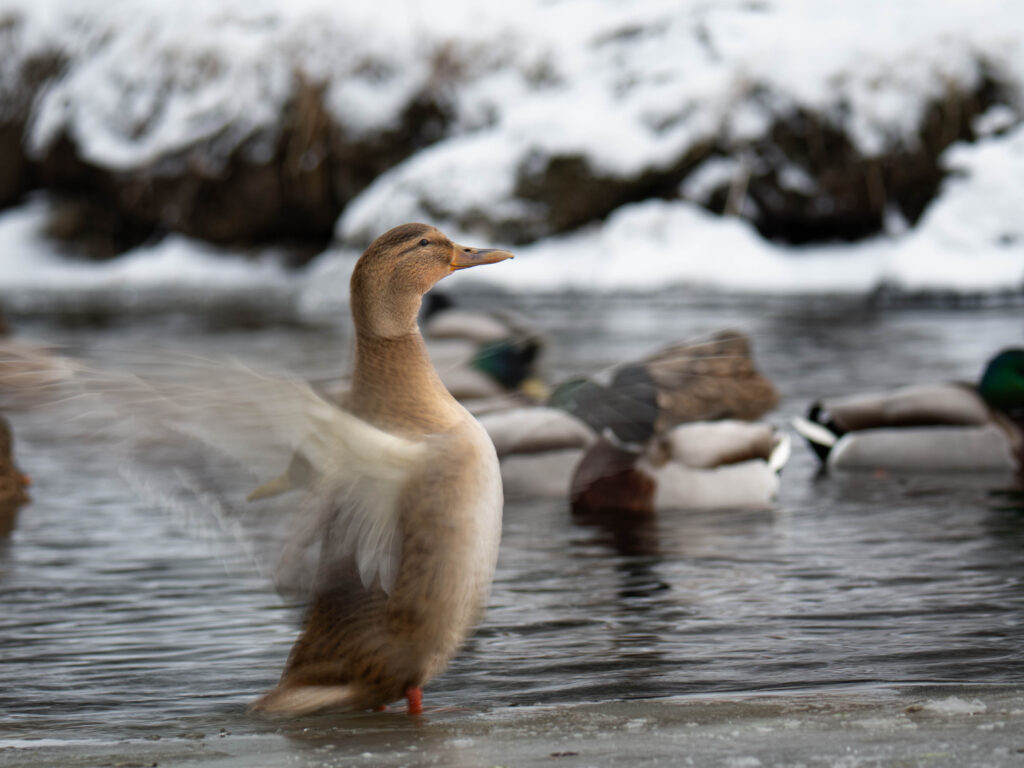
In the image below I was photographing ducks on a half frozen pond in Norway when I decided to try the Live ND filter to convey motion. Unfortunately Lightroom doesn’t give any info on the settings used for the Live ND so I can’t say which strength on the Live ND I used. However, the important thing is that I used the appropriate Live ND to get the desired shutter speed, which in this case was 1/25s.
Conveying Motion
The main reason you would use Live ND is to convey motion in an image by making all or parts of the image blurry. Wildlife and nature scenes are full of motion—birds flying, waterfalls cascading, or grass swaying in the wind are common elements in motion. Live ND lets you emphasise this movement by introducing controlled blur to parts of your image that’s in movement.
For wildlife photography you can play around with either blurring the wildlife, trying to get the animal sharp while blurring surrounding elements, or go for motion all over.
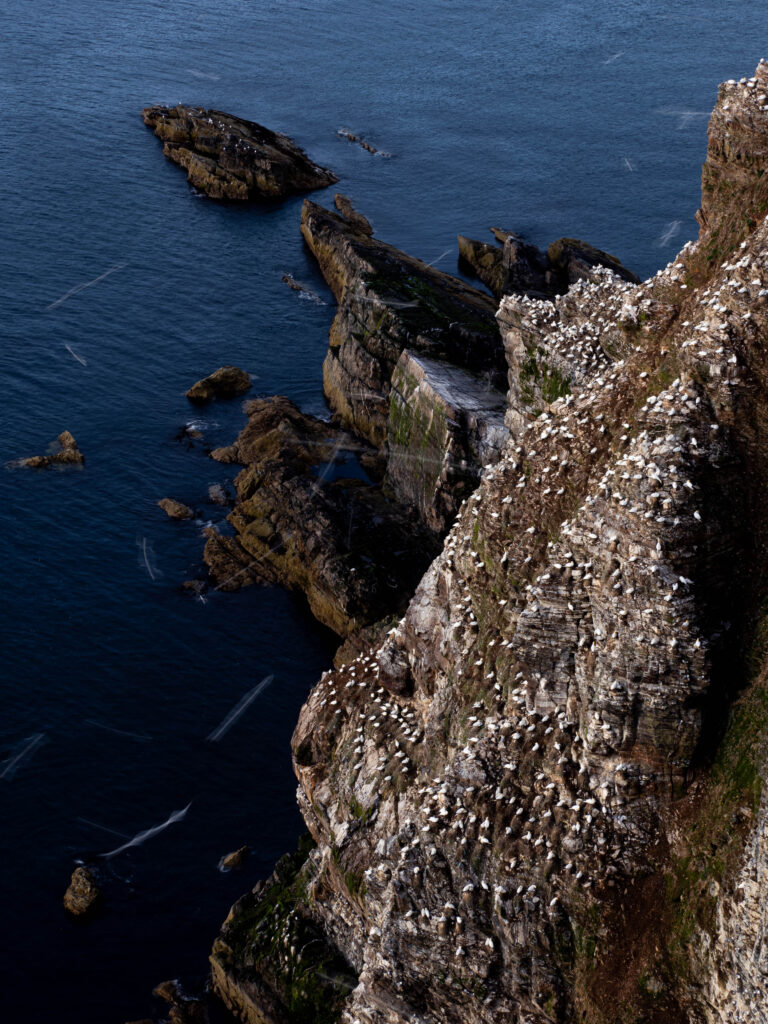
In July 2024 I was photographing gannets with a pal at Troup Head in Scotland. After a lot of close ups of the gannets I decided to use my 40-150mm f/2.8 lens to show more of the landscape and the amount of gannets that were nesting there. After finding a composition I was happy with I wanted to try to get the flying gannets as streaks across the darker background. I was using an aperture of f/10 to get sharpness throughout the image, but even at and ISO of 80 I needed to use the Live ND as well to get my shutter speed low enough for the kind of image I had in mind.
Can’t I just use a higher f-stop to slow my shutter speed?
It’s true that sometimes you could just increase your f-stop to allow you to use a slower shutter speed. However, depending on the light it might be so bright that even if you put your f-stop at max (e.g. f/22), the image would still be over exposed if you tried to use a slow shutter.
If you have to use the maximum f-stop you may also experience diffraction and introduce a softness to your image. Finally, with a high f-stop you also increase depth of field (what’s sharp) in an image which may ruin the desired result you were after.
Simplifying Your Gear
As wildlife photographers we don’t really tend to drag filters with us in the field just incase it may be useful. Live ND eliminates this hassle, allowing you to stay agile and focus on the unpredictable nature of wildlife.
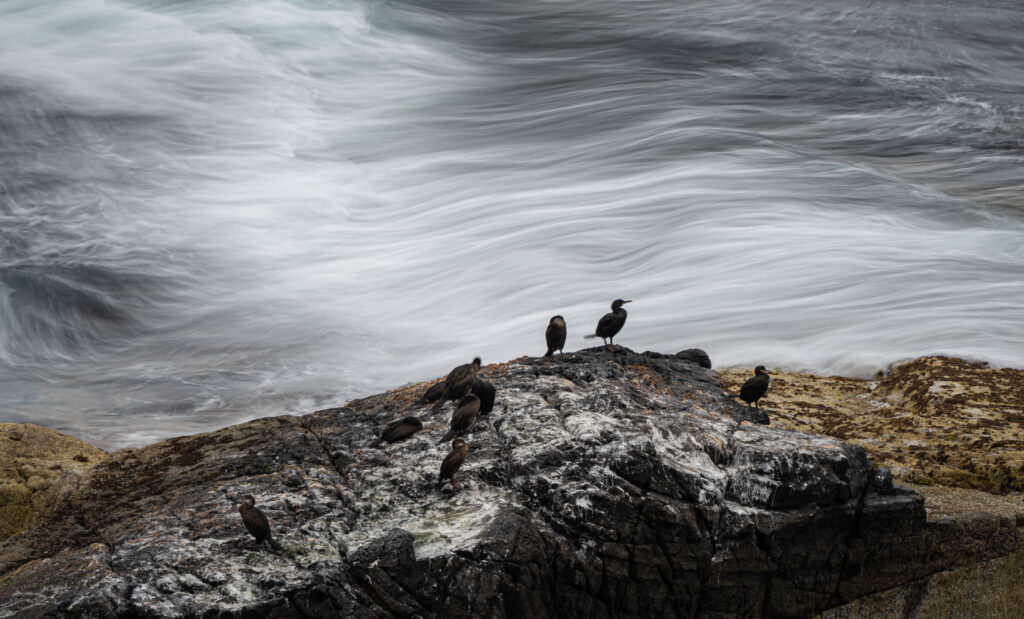
Whenever I have a bird near flowing water I try to use the Live ND to blur out the water while keeping the bird sharp. With a bird like the dipper that’s not easy, the reason is in the name, they dip all d… the time! Here’s an attempt at a river near me in Perthshire, Scotland. The bird isn’t quite sharp, but this is a work in progress, I’m still chasing the perfect dipper image with water flowing all around.

Check out my course on the OM System for Wildlife Photography to learn how I setup my OM System/Olympus cameras and use them for wildlife photography.
The Creative Edge
Live ND doesn’t just simplify technical challenges—it unlocks creative opportunities. Picture a heron standing still in a fast flowing stream, the water flowing like silk around it, or a sky filled with flying birds, their wings slightly blurred to emphasise speed. With Live ND, the possibilities are only limited by our imagination.
By leveraging this innovative feature, wildlife photographers can push the boundaries of their artistry while staying light and nimble in the field. So, grab your OM System camera, explore the magic of Live ND, and capture wildlife moments like never before.
Have you used the Live ND on OM System for wildlife?


be the first to comment